

A virtual machine is the best way to test a complete operating system within our OS, without the risk or inconvenience of a dual-boot installation. If, however, we want to try Raspbian, VirtualBox or VMware can't emulate the ARM processor. Let's create a Raspberry Pi emulation on Windows with QEMU.
Unblock any international website, browse anonymously, and download movies and Mp3 with complete safety with CyberGhost, just for $2.75 per month:

A Raspberry Pi emulation is a great way to try out the Raspbian environment without buying a Raspberry Pi first.
But, even if we already own the device, with the Raspberry Pi emulation we can test new software in Raspbian without any risk.
Install QEMU on Windows
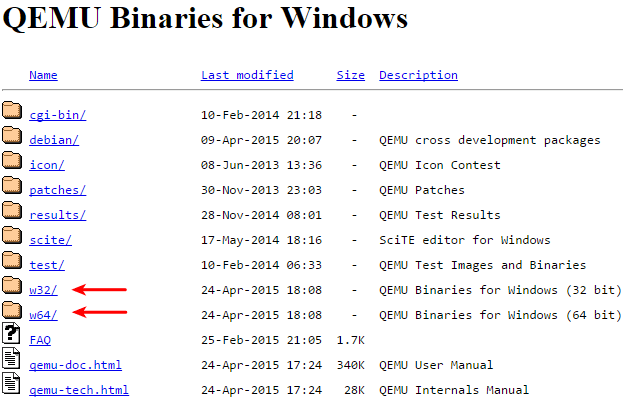
First, we need the Windows version of QEMU (Quick EMUlator). We must select the proper binaries for 32-bit or 64-bit Windows.
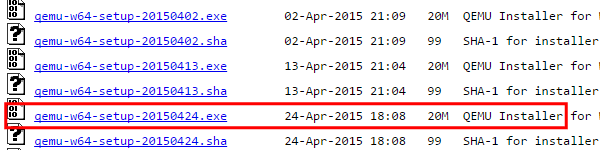
We download the 20150424 version. The current latest version 20150503 won't work.
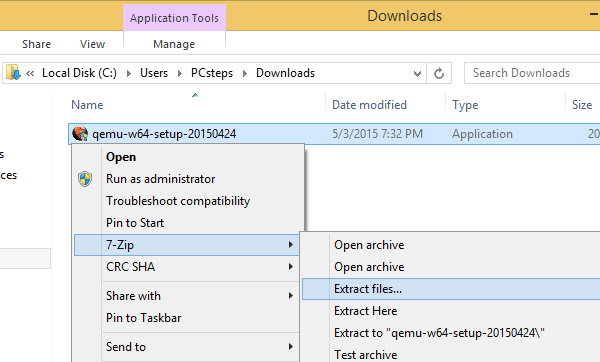
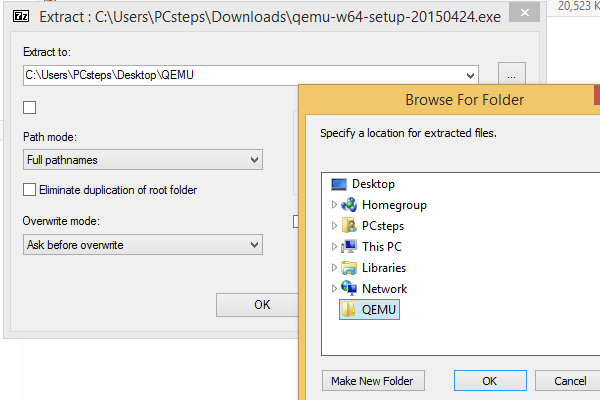
After the installer downloads, we don't run the application. We use an archiving program, such as 7-zip or WinRAR, to extract all the files it contains.
Let's say we extract the files on a folder QEMU on the desktop.
Get a Linux Kernel and the latest Raspbian
The next thing we need for the Raspberry Pi emulation is to download a Linux Kernel compiled for ARM and the latest version of the Raspbian operating system, currently 2015-02-16.
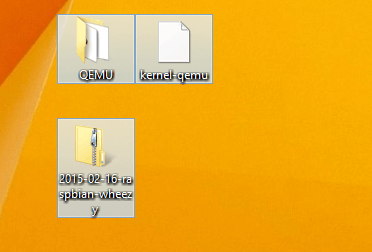
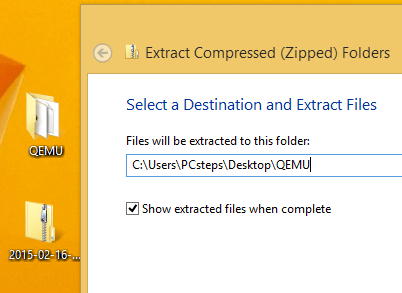
We move the Linux Kernel in the QEMU folder, and extract the contents of the Raspbian .zip inside too.
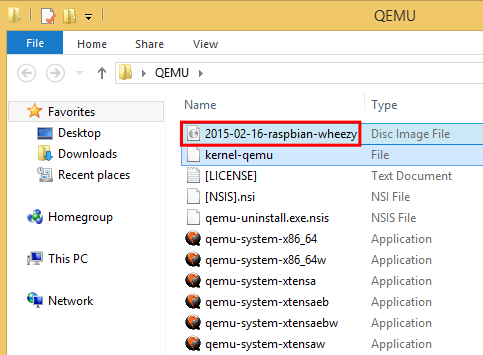
Inside the QEMU folder, it's important to note the exact filename of the disk Image file.
Resize the Raspbian image
The Raspbian image we downloaded will contain the complete Raspberry Pi emulation, and any programs we will install. So, it's a good idea to resize the image and give it a couple more Gigabytes.
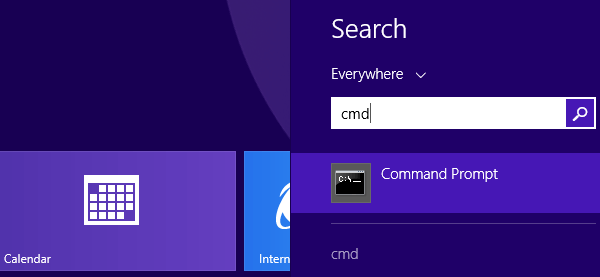
We do a Windows search for cmd and open the command prompt.
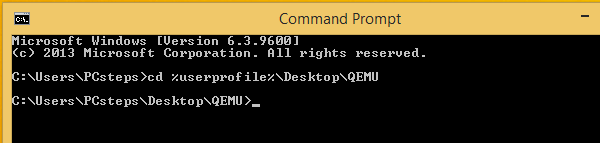
On the command prompt, we navigate to the QEMU folder. If we created it on the desktop, we navigate with:
cd %userprofile%\Desktop\QEMU
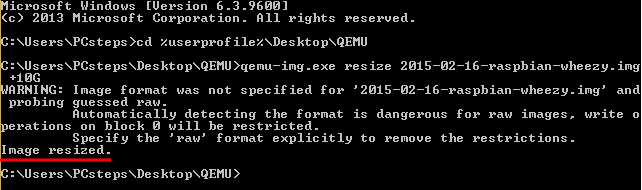
To resize the Raspbian image, we run the command:
qemu-img.exe resize 2015-02-16-raspbian-wheezy.img +10G
Note that we need to use the exact filename of the image file, with the ".img" extension. The +10G parameter will add 10 Gigabytes to the image, which should be more than enough.
Running the command will produce a Warning, but if we get the "Image resized" message, everything went well.
Create a startup batch file
QEMU doesn't have a sexy user interface like VirtualBox and VMware. We need to type long commands to start it up. And it's easier if we create a batch file instead.
We open notepad, or any other plain text editor...

...and paste inside the following command. Ignore the text-wrap, it's all in one line.
qemu-system-arm.exe -kernel kernel-qemu -cpu arm1176 -m 256 -M versatilepb -no-reboot -serial stdio -append "root=/dev/sda2 panic=1 rootfstype=ext4 rw init=/bin/bash" -hda 2015-02-16-raspbian-wheezy.img
You might have noticed that the -m 256 part of the command will allocate 256MB of RAM for the Raspberry Pi emulation. Unfortunately, we can't allocate more RAM, or the emulation won't boot at all. This is a bug of QEMU when doing ARM emulation.
We make perfectly sure that the final part of the command is identical to the filename of the Raspbian disk image.

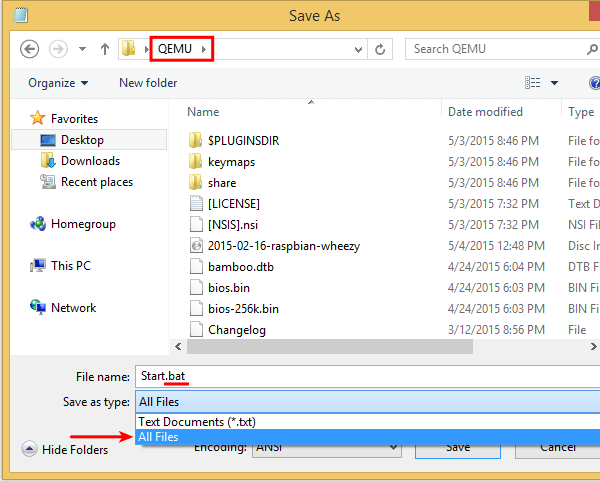
Then, we save the file as .bat. We make sure we save it inside the QEMU folder, with a .bat extension and that we have selected the "All files" option.
If we did it correctly, we will have a Windows Batch File within QEMU.
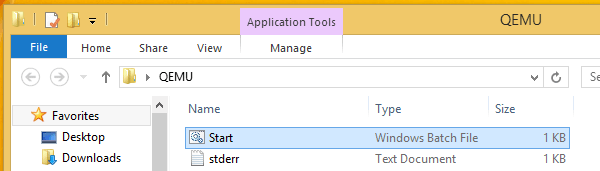
We double-click this file to start the Raspberry Pi emulation.
Configure the Raspberry Pi emulation for QEMU
The emulator will load to a command prompt.
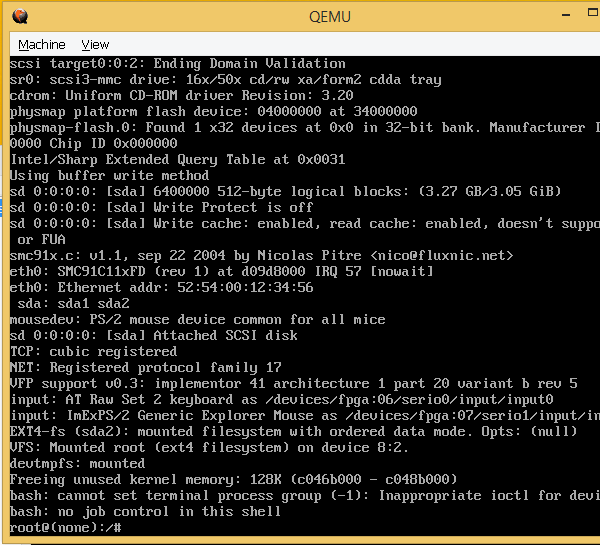
There, we type:
nano /etc/ld.so.preload
This is a Linux command prompt, and as such, it is case-sensitive. Nano or NANO or nAnO won't work.
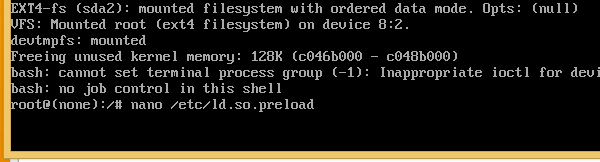
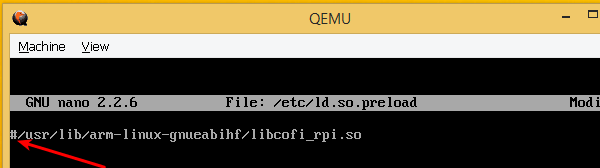
The above order will open the ld.so.preload file in the nano text editor. We just need to add a hashtag "#" at the beginning of the single line.
Then we exit nano. We press ctrl+X...

...and then press y for "Yes", to save the changes, and Enter, to overwrite the file.

If we did it correctly, we will get a "Wrote 1 line" message.
Next, we create a new file, with the command:
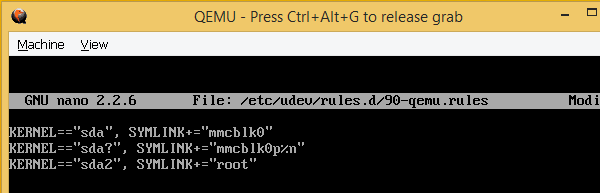
nano /etc/udev/rules.d/90-qemu.rules

Inside, we type exactly the following three lines:
KERNEL=="sda", SYMLINK+="mmcblk0"
KERNEL=="sda?", SYMLINK+="mmcblk0p%n"
KERNEL=="sda2", SYMLINK+="root"
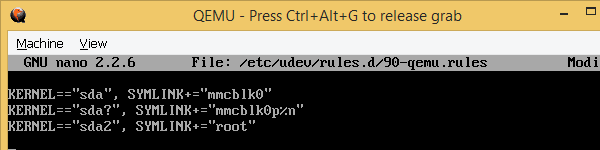
We exit with ctrl+X and make sure to save the file (get the "Wrote 3 lines" message).

Then we exit the Raspberry Pi emulation with "exit".
Raspberry Pi emulation: The first run
Now, we 're nearly ready to run the Raspberry Pi emulation for Windows.
Fist, we need to edit the batch file we created earlier...
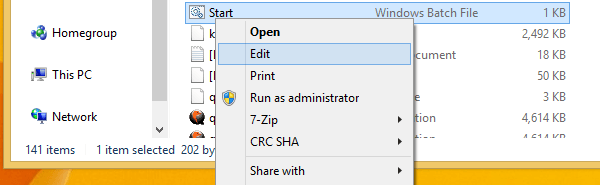
Inside, the only thing we change is to delete the init=/bin/bash option near the end of the command, including the preceding blank space. Be carefull not to delete the quotes.
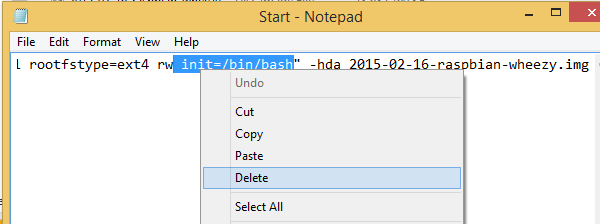
After that, we save the batch file, and double-click to open it.
It will take a while to load, and it will produce some errors. This is to be expected.
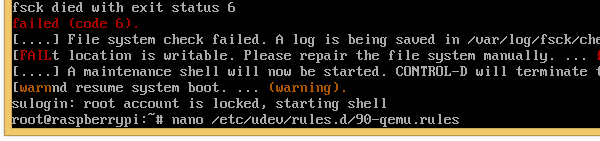
We have to create again the file we previously made, with
nano /etc/udev/rules.d/90-qemu.rules
Again, we type:
KERNEL=="sda", SYMLINK+="mmcblk0"
KERNEL=="sda?", SYMLINK+="mmcblk0p%n"
KERNEL=="sda2", SYMLINK+="root"
This time, however, we write the quotes " with shift+2, because the Raspberry Pi emulation currently has an English UK keyboard layout.
After that, again we exit.

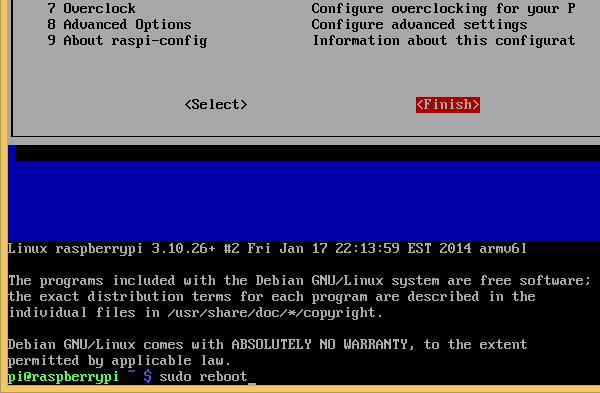
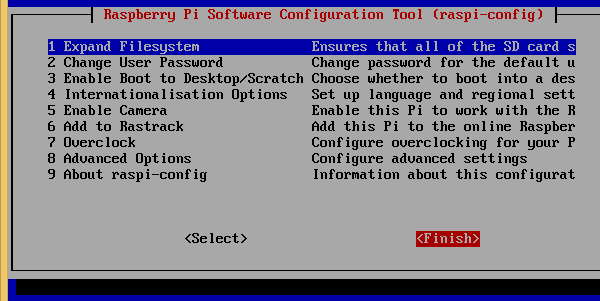
This time, the "exit" command will lead to a reboot, that will get us to the Raspberry Pi Software Configuration Tool. We press "Tab" on the keyboard to select "Finish".
As the pi@raspberrypi user, we type the command:
sudo reboot
This command will close the emulation. We start it again, double-clicking the "Start" batch file.
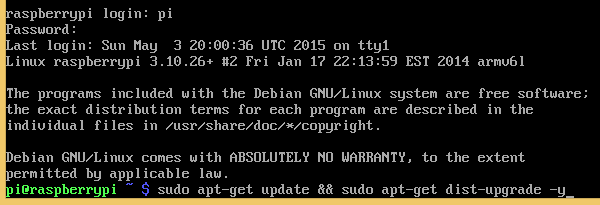
This time, after the boot sequence, the system will ask us to login.

The default credentials are:
username: pi
password: raspberry
Remember, when we type our password on Linux, nothing will show by default, not stars or dots or anything.
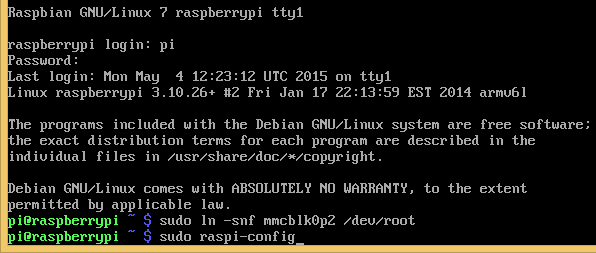
Once inside, we type two consecutive orders:
sudo ln -snf mmcblk0p2 /dev/root
sudo raspi-config
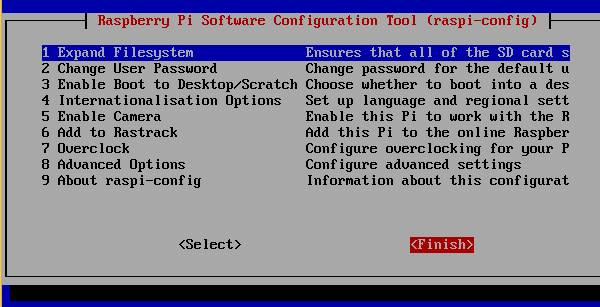
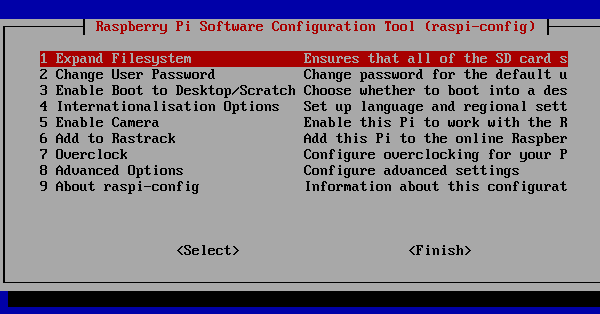
This will get us back to the configuration tool. We select the first option, "Expand Filesystem"...
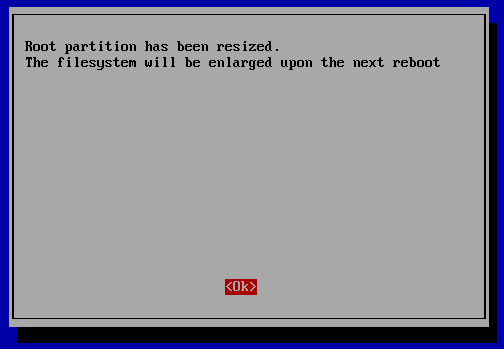
The configuration tool will momentarily close, and in a couple of seconds it will queue up the /root partition to expand and cover all the 10GB of the space on the next reboot.
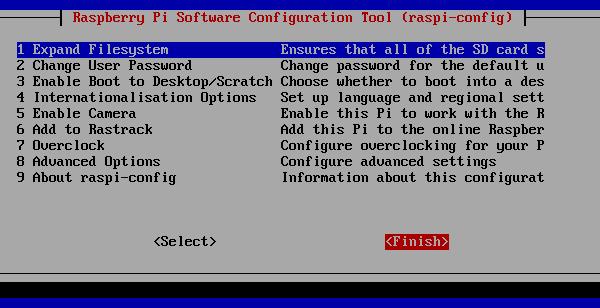
Again, we press tab to select "Finish"...
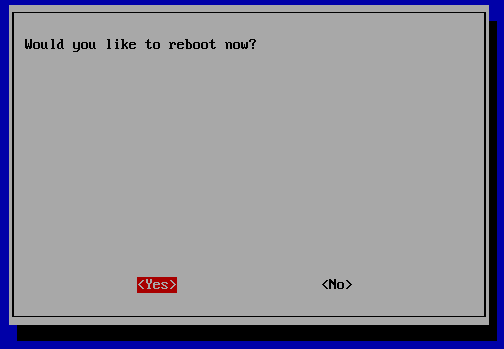
...and this time, we select to reboot.
The Raspberry Pi emulation will shutdown again. We start it with the "Start" batch.
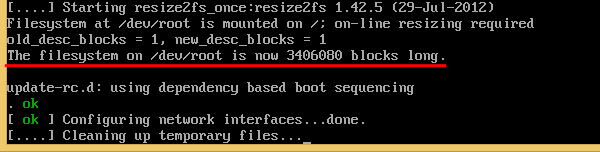
This time, the boot will take longer. It will seem stuck at the message below.
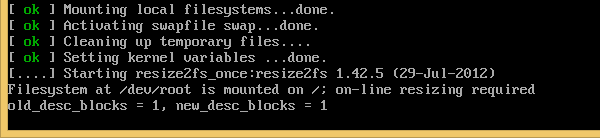
This is the resize command, and it will take some time. Leave it alone, and in a few minutes it will proceed with the boot.
After we log in as the "pi" user, we do a full update with:
sudo apt-get update && sudo apt-get dist-upgrade -y
This will also take a while, both to download and to install the updates. When the update is done, we type:
sudo raspi-config
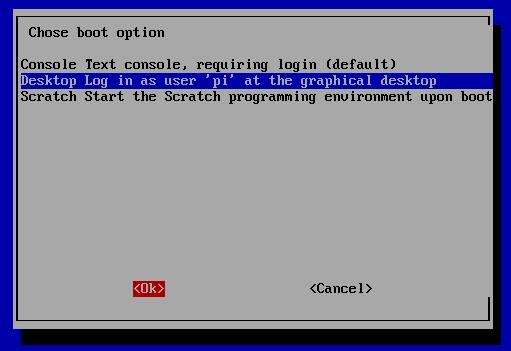
The most important configuration is the "Enable Boot to Desktop/Scratch" option.
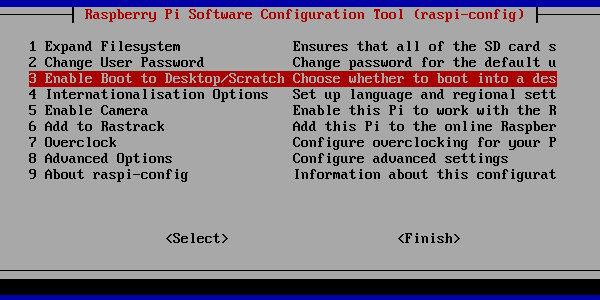
There, we select the "Desktop Log in as user 'pi' at the graphical desktop" option.
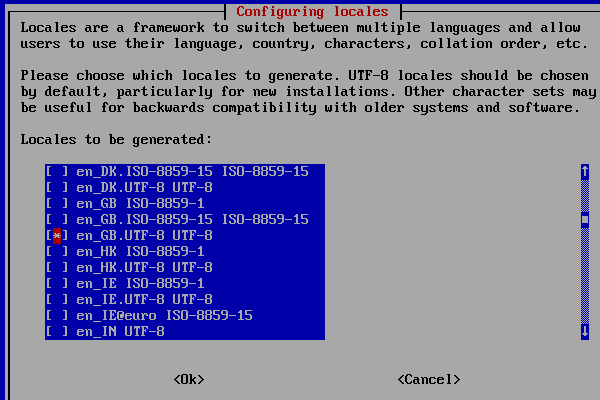
We can also configure other stuff, such as the locales.
Once we are done, we tab to "Finish".
Once again, we select to reboot.
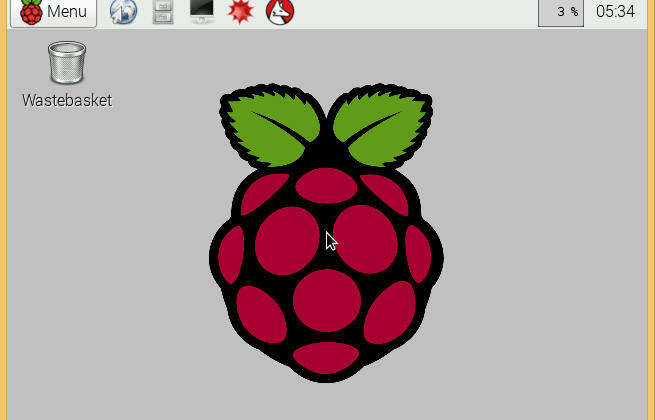
On the next boot, the system will automatically start the graphical user Interface.
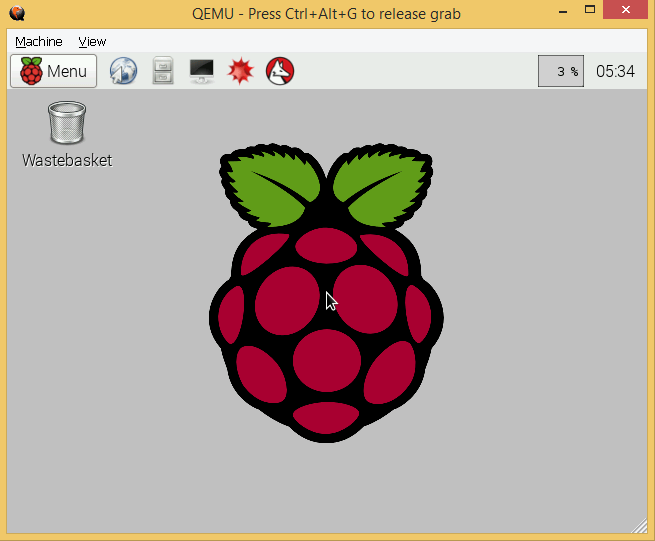
That's it. The Raspberry Pi emulation for Windows is complete.
Did you have any trouble with the Raspberry Pi emulation?
If any of the above didn't work as described, and you were unable to create a Raspberry Pi emulation, leave us a comment. If you used a different version of QEMU and/or Raspbian, you should also mention the exact versions.
Support PCsteps
Do you want to support PCsteps, so we can post high quality articles throughout the week?
You can like our Facebook page, share this post with your friends, and select our affiliate links for your purchases on Amazon.com or Newegg.
If you prefer your purchases from China, we are affiliated with the largest international e-shops:
