


Nowadays, kids use smart devices every day, either for playing games, surfing the Internet, or learning new things. However, it might be dangerous to allow our children to surf the Internet without any restrictions, and that's where Android parental control may come in handy. Let's see the best ways to control and supervise a child's usage of any Android smartphone or tablet.
Unblock any international website, browse anonymously, and download movies and Mp3 with complete safety with CyberGhost, just for $2.75 per month:

Google has some parental embedded features embedded in its software, but there are also some third-party options we can consider.
Android parental control settings
Before we proceed, we should mention that parental control can be a great tool, but it is also easy to overdo it.
Just as we wouldn't want to lose our freedom, the same thing applies to our children. Always remember that, with great power, comes great responsibility, and that's why it is important to use the Android parental control in moderation.

Add a second user account
Google gives us the ability to create accounts for many users on the Android tablets.
Also, since Android 5.0 (Lollipop), many smartphone devices have the potential to create multiple accounts, unless the manufacturer disabled this feature.
In this way, we can limit the content that every user has access to, as well as the changes they can make on the device.
However, manufacturers may have added different settings on their phones. We can't cover any feature you may be available on your device.

Below we will cover how to add new users, and a adjust a set of settings that are common to every smartphone or tablet.
We can add an account in two different ways.
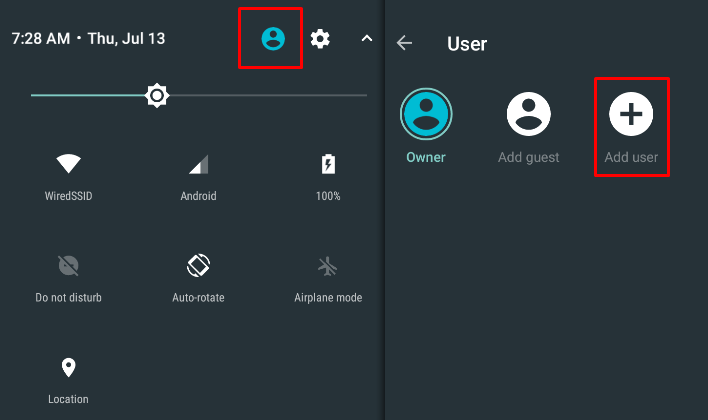
The first way is the easier one. We just need to pull down the notification bar and then tap the user button to open the panel. We'll see the option "Add User."
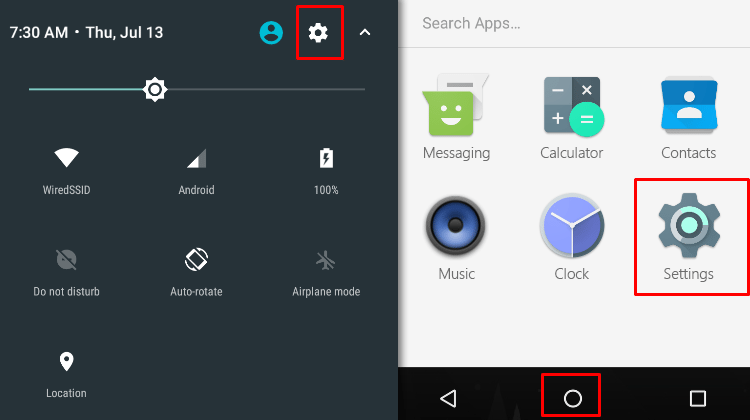
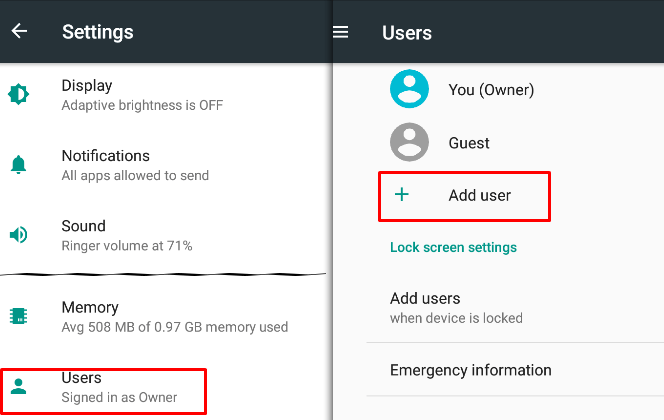
The second way we can add a new user is through the device's Settings. We can access it through the notification bar or from the app.
We tap on “Users > Add User.”
It is logical that every user can have different access permissions.
A window pops up and asks us if we want to set our account now or later. We press “SET UP NOW.” This option will disconnect our current user, and it will bring us to the lock screen.

We can press continue to finish the procedure.
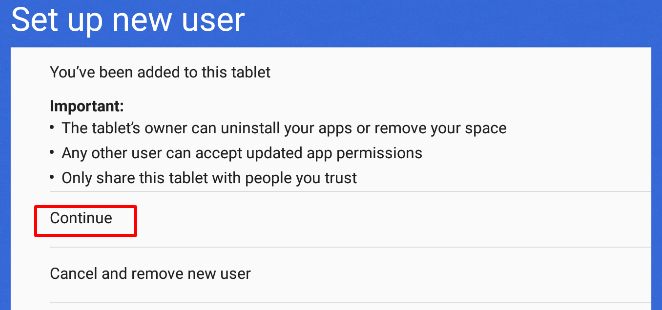
Our device will ask if we allow Internet access on the new user. This way, we can see the WiFi networks, and we connect to our own.
Now that we have Internet access, we can continue. We can either sign in to our child's Google account or if he/she doesn't already have one, we create a new one.

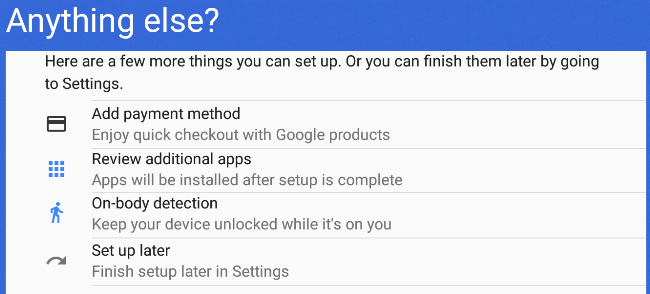
On the next screen, there are various settings. We can add a payment method, install apps the user might have on a different device, and keep our device unlocked while we hold it.
For now, we won't add a payment method. If our kids want to buy something, they will have to ask.

Moreover, in case our children are using other Android devices as well, we can either sync or not their apps and data.
Among these settings, there's also "On-body detection." It's better for our safety to keep this feature disabled since the device can fall into the wrong hands.
Now we are ready to finish by clicking on "Set up later."
Basic Settings
Before we see how Android parental control works, we need to set a few basic parameters so we can increase the safety of our device.
Account Protection
The first thing we must do is protect our own account from prying eyes.
We need to set a secure method to unlock our account. This way, we'll make sure that no one can change the settings, apart from us.
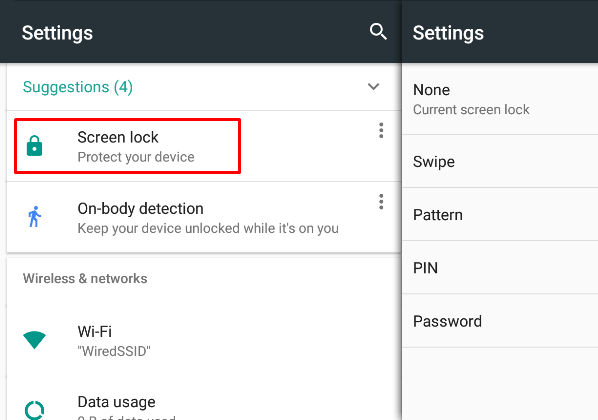
To lock our account, we enter the device's settings.
We tap "Screen Lock" and choose our preferred locking method between these three: Pattern, PIN number, and Password.
Now we have secured our account. If we want to go one step further, we can clean the device's screen before we hand it over to our kids. We don't want them to find our password from our fingerprints.

Disable installation from Unknown sources
On an Android device, we have the ability to install an app without using Play Store. Of course, we don't want our kids to install apps with side loading.
On our child's account, we go to "Settings > Security > Unknown sources, " and we make sure it's disabled.
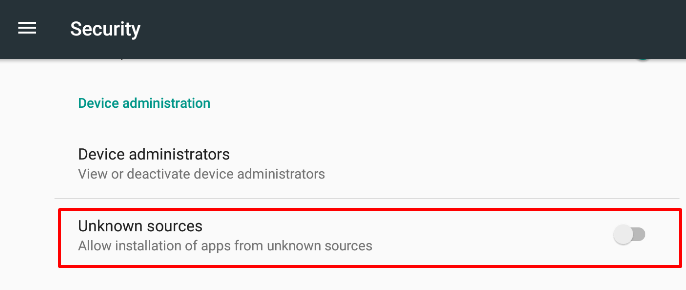
No one can guarantee that our kid won't enable this setting again, but at least we tried.
Content filtering
The Android Parental Control has several parameters we can set. One of them is filtering the Play Store content.
To do so, we have to open the Play Store app, tap the three lines on the top left, and then go to "Settings."
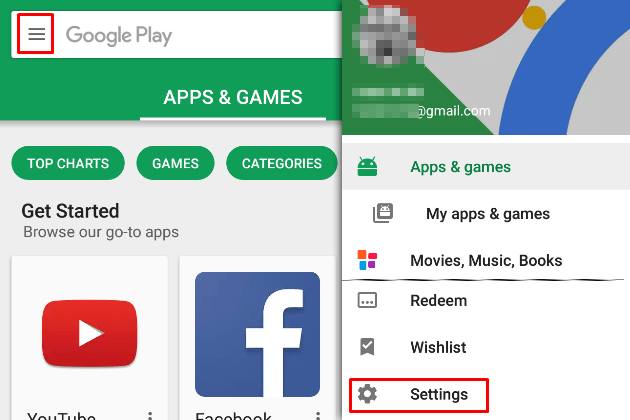
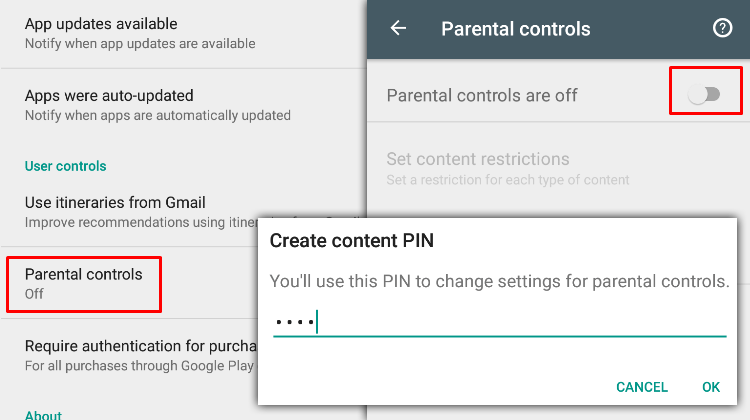
Among the other settings, we tap on "Parental Controls" and activate it. We set a PIN, so our children won't be able to modify this setting and disable the parental controls.
The choices we have available depend on the apps we have installed on our device. The first one is the most important one too.
We press "Apps & Games, choose" and on the next screen, we select our kid's age limit. If we select PEGI 3, for example, they can only see games and apps with a 3+ rating.
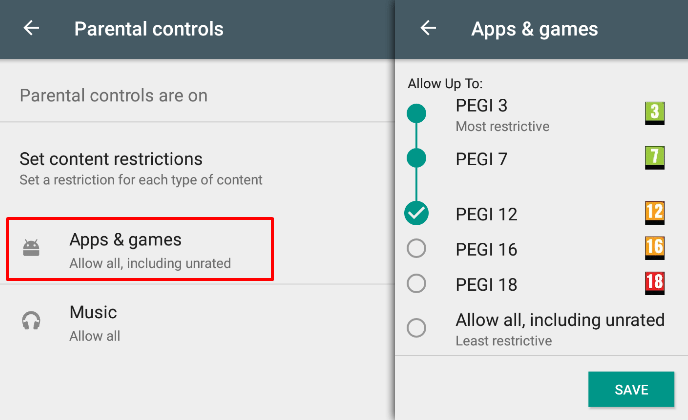
Each category has its own filter. We set the age limit for each one, and when we're done, we can continue with the purchase settings.
Purchases Limit
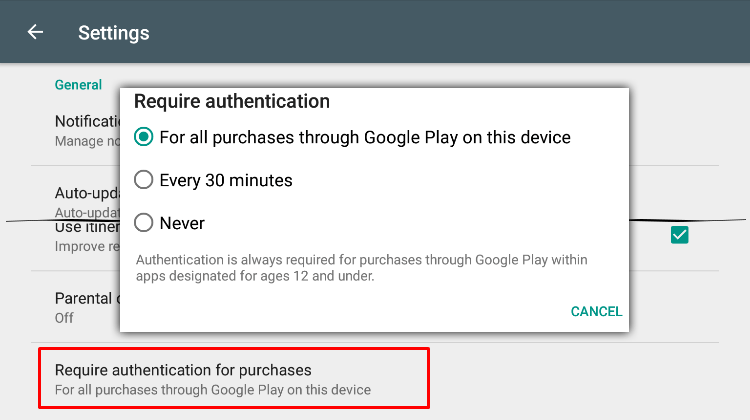
The last setting helps us limit the purchases our kid can make.
We go back to Play Store's Settings and look for the option "Require authentication for purchases."
We set it to check the identity "For all purchases through Google Play on this device." Now we will always have to identify ourselves before any content purchases.
Android Parental Control through apps
We saw what Android offers and found out Play Store's parental control settings. But are they enough?
Luckily, Google Play Store has millions of apps for everything we might need. As expected, it can also help us with the Android parental control.

Before we go on presenting the best apps in this category, we'll mention a few apps that are great.
These apps are either related to antivirus programs, or they're part of a service. Of course, since they're made for this purpose, they're compatible with computers and mobile devices.
Antivirus
Many antivirus companies offer the ability of Android parental control.
Usually, these companies develop apps for mobile devices that function independently. Still, most of the times, these apps need the antivirus program to work.
There's no reason for us to go into detail about these apps since we’ll need the antivirus of the same company.
Thus, we'll mention a few of the best apps if we want an antivirus and Android parental control at the same time.
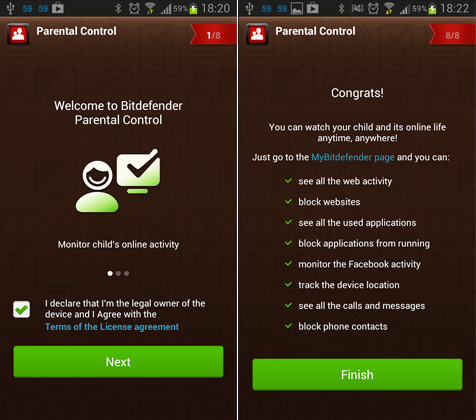
Bitdefender Parental Control
Bitdefender developed this app for Android parental control.
The app is free, and it gives us the ability to track websites, apps, calls, and texts. With 29.95$ a year, it offers even more options.
Bitdefender Mobile Security was the best antivirus for phones in 2016. It shares this spot with Sophos Mobile Security.
Thus we highly suggest this app, especially if you're using the antivirus the company offers.
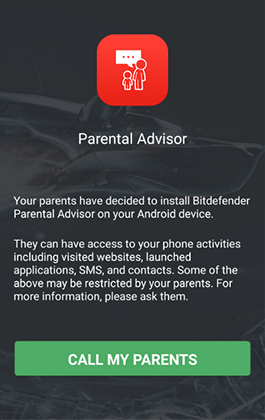
Last but not least, there is also Bitdefender Parental Advisor, an app Bitdefender offers for Android and Windows.
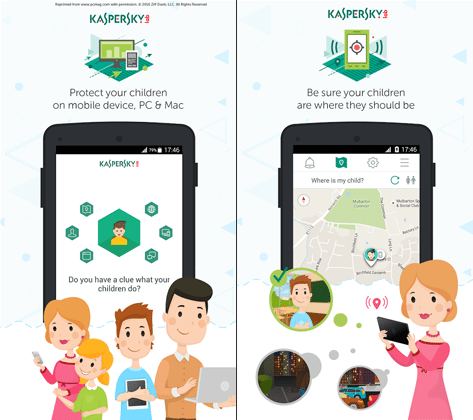
Kaspersky SafeKids – Kids mode
Kaspersky, on the other hand, has an app that offers everything we need to apply Android parental control.
The app helps us manage what content our kid has access to, the apps he uses, and can also track the child's location.
In contrast with Bitdefender Parental Control, the free version doesn't give us the ability to see his calls and apps.
For more features, we can get the premium version for 14.99$ per year. It's worth noting that the app functions without the Windows antivirus. We don't even need to download the free version.
Other antivirus apps
Let us also suggest three more apps from known companies. These can help us with Android parental control.
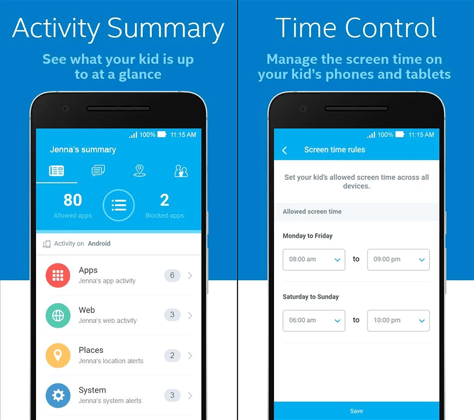
The first one is ESET Parental Control, and it offers multiple features. The app has a free and paid version, and it functions independently.
Symantec has developed Norton Family Parental Control, which is free. The app has numerous options, and by paying Norton Family Premier package, they expand even further.

We close this chapter with Safe Family – Parental Control from McAfee. It's a notable effort by the company to develop an app with many features and room for improvement.
Online services
Besides antivirus corporations, multiple others companies have developed apps and services regarding Android parental control. Below we'll see the most popular among them.
Net Nanny for Android
Net Nanny is a service for parental control, and we can use it both on computers and mobile devices.
Among the things it offers, there's a great app for Android parental control.
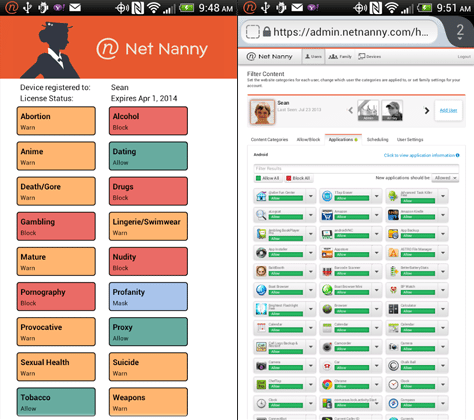
The UI is in tab form, and anyone can download it without paying. To use it though, we need to have the service of Net Nanny.
The app offers us a lot of abilities such as activity reports, filtering content, and setting usage time limit.
Qustodio Parental Control
Qustodio offers a free trial, but we'll have to pay for its service to unlock it permanently.

The app, however, is free and it needs a connection with our Qustodio account. It offers as much as the Windows version does and the UI is the same.
If we are okay with paying for this service, Qustodio Parental Control is the best solution for the independent apps and services.
Mobicip Safe Browser and Mobicip Monitor
Mobicip offers a lot of options, since it has two Android apps, and a program for Windows as well.
The Mobicip Safe Browser is a browser, and it applies parental control at the same time. It filters the content, tracks what pages the children visit, and so on.
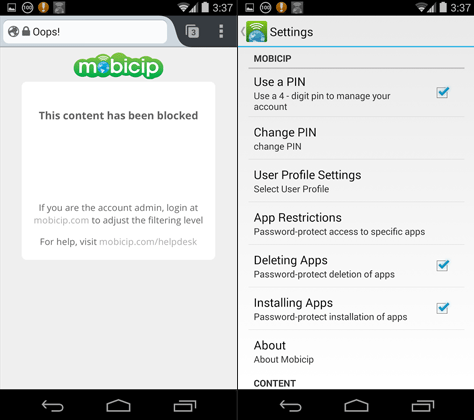
On the other hand, Mobicip Monitor does what its name suggests. It's a monitoring and management app.
Through the app, we can just get the monitoring data; we don't have the ability to make any extra settings.
In general, it's a service that is worth using. The app has a free version, but by paying for premium, we have more options available.
These solutions are available on Windows too.
Apps exclusively for parental control
Up to now, we have seen many ways to apply Android parental control.
Coming up, we'll see apps that have been developed exclusively to create a safe environment for our kids while they use a mobile device.
In the first category, we'll investigate the apps developed to apply Android parental control.
All these apps require a separate user's account to prevent changes that our kid might make.
They all have plenty of options and are easy to use, so we won't go into details.
Parental Control Board
First on our list is Parental Control Board, it's free to use and has a lot of features.
It also has premium features that we can try for 14 days for free. If we're interested in these extra features, the price is only 12$.
When we open the app, on the main screen we get asked if we're a new user or if we want to sign in with an existing account.
If it's your first time, choose “I'M NEW” to create an account. On the next screen, tap “MANAGE FAMILY DEVICES.”
We need to fill in our e-mail address, a secure password, and our name.
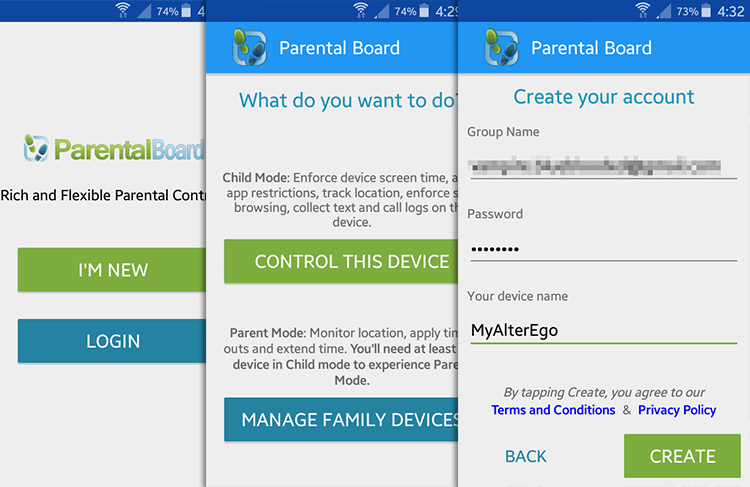
On our kid's device, we choose “LOGIN,” and we connect with our account. On the next screen, we select “CONTROL THIS DEVICE.”
We'll have to provide a couple of permissions to the app before using it, but for now, we press "NEXT."
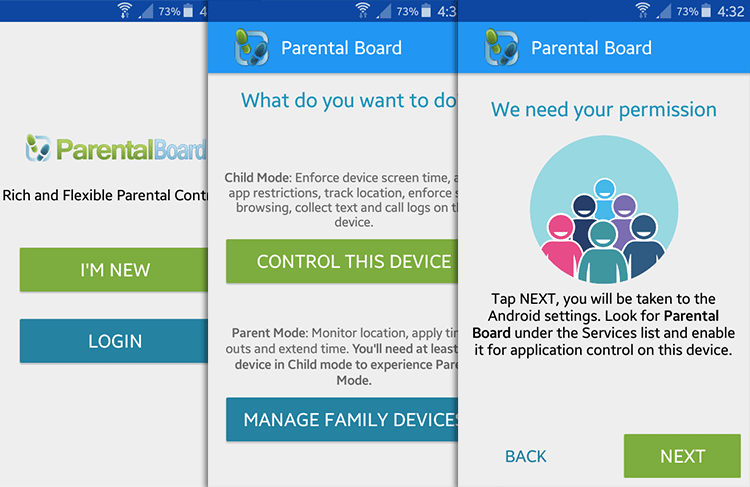
All the Android parental control apps need permission to "control" the device.
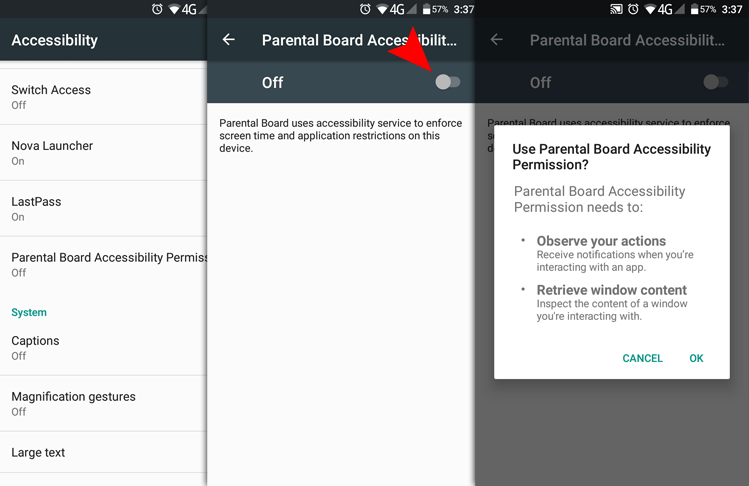
When we tap on "NEXT" we'll get transferred to the "Accessibility" settings. Here we'll choose “Parental Board Accessibility Permission, ".” and we'll turn the switch on. We confirm with "OK."
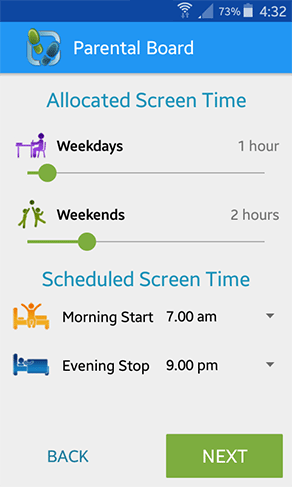
We can continue with a few extra settings.
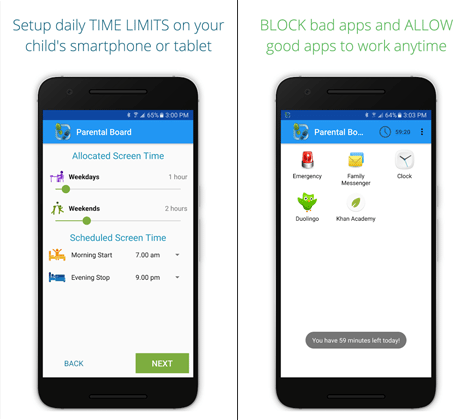
At first, we choose how many hours we allow our kids to use the device during the week and weekends.
Then we set their wake-up and to sleep time. Between these hours, they won't be able to use the device.
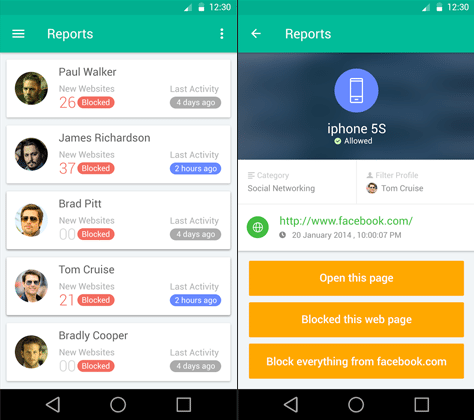
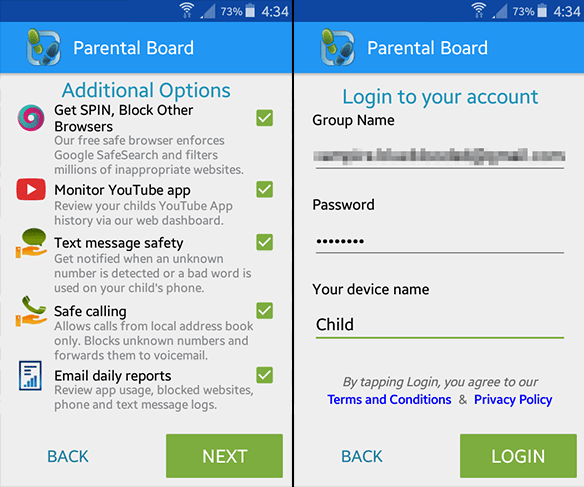
Moreover, we can choose the apps they have access to, add contacts they can call, and set the web pages they can visit.
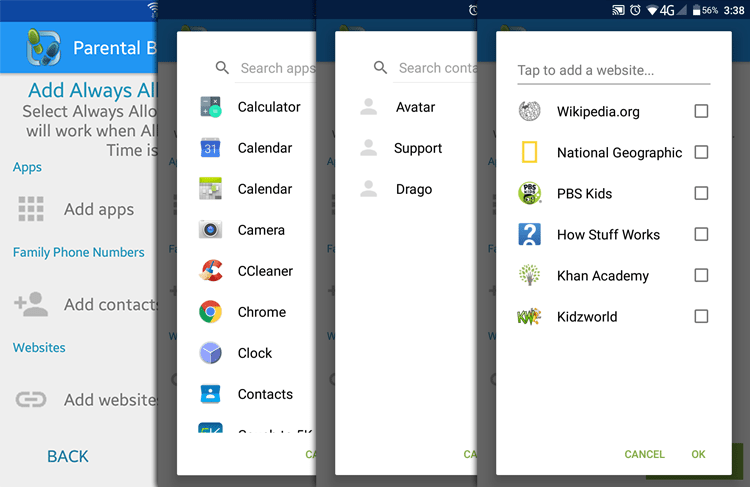
The app offers the SPIN Safe Browser that protects our children from dangerous content. By installing it, they won't be able to use any other browser.
Going a step further, we can track their YouTube usage, their calls and texts, and get an activity report through email.
We enable any of the options above and press "NEXT." On the next screen, we fill the login information and give a name to our kid's device. We are ready to hit "LOGIN."
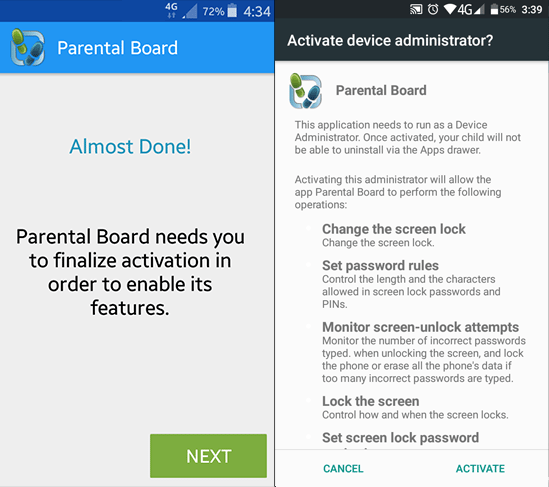
Before we're done, we need to give a final permission to the app. We press "NEXT > ACTIVATE," and now the app is set.
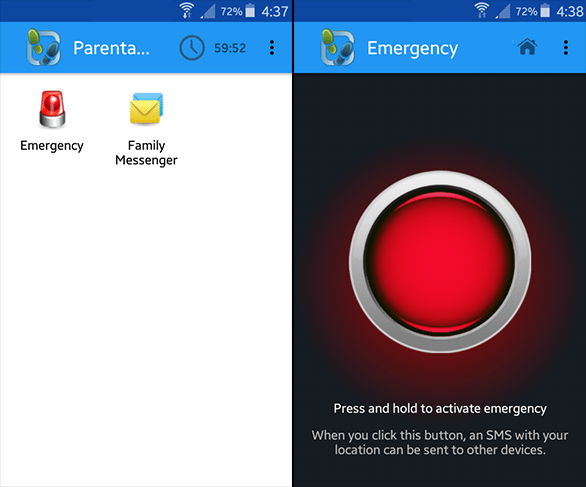
Finally, we need to mention the panic mode or "Emergency" as the company likes to call it.
"Emergency" is a function that we must show to our kid. In a case of crisis, the user can press the beacon, and a red button appears.
By pressing the button, every device that's connected with the parental control will get a text with the emergency location.
We must note that our kid has access to the app, but he can't mess with any of the settings. To do that, he'll need the password.
Obviously, we can apply Android parental control even from afar through this app.
FamilyTime Parental Control
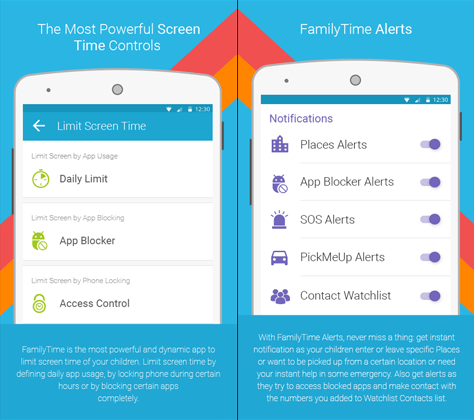
FamilyTime Parental Control is like a gift to every parent who wants to keep his family members safe. The app is free, and the features are plenty.
The app can limit the device usage time for weekdays and weekends.
Also, we can enter our kids' sleep schedule, studies, and meal times, so they won't be able to use the device during those hours. Moreover, it can block other apps, and track messages or location.
If we want, it can remind us to pick up our kid from school or let us know that they left without us. All this information is available on our device.
The app offers impressive features in general, and it makes Android parental control a breeze.
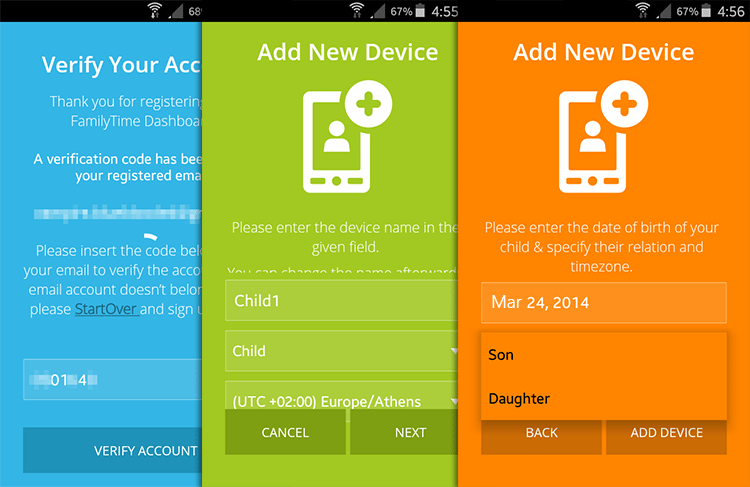
When starting the app, we need to log in or create a free account.
Since this is the first time using it, we choose "SING UP," enter a name and address, and tap "CREATE FREE ACCOUNT."

It'll send us an e-mail with our activation code that we're going to put on the next screen, and then press "VERIFY ACCOUNT."
After that, we choose our kid's device, tap on "NEXT," enter the necessary information, and press "ADD DEVICE."
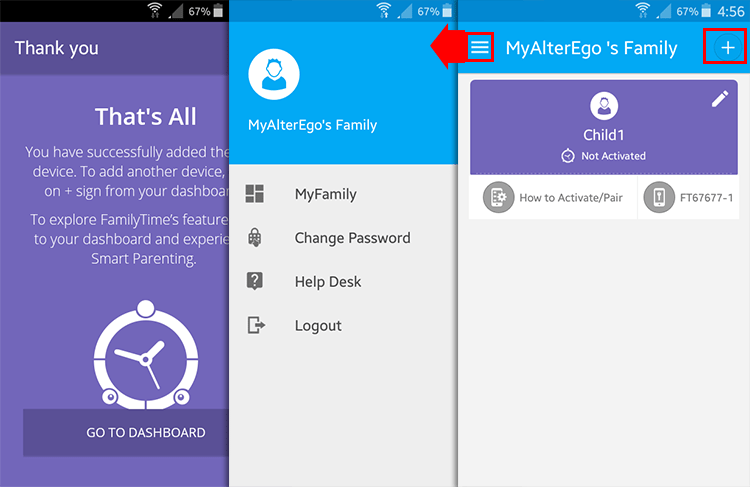
On the final screen, we press “GO TO DASHBOARD” to get transferred to the main page of the app. button
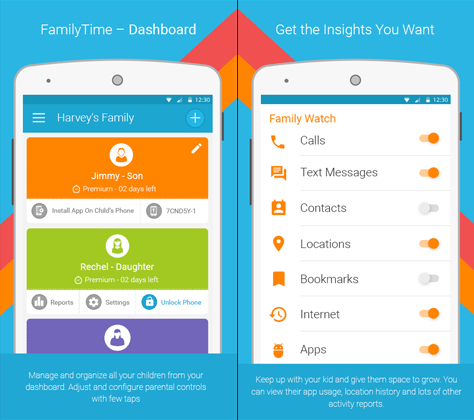
Here we'll see the settings menu and our family's name. With "+" we can add even more devices. Right below that, we have our kid's entry, and we can edit it from the pencil.
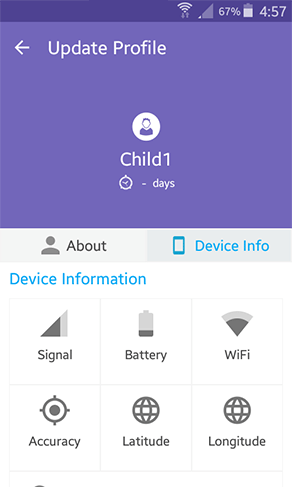
By pressing on our kid's entry, we can see plenty of information about his device.
For example, we can see if it has signal, battery, a WiFi connection, as well as its location.
This is FamilyTime Parental Control; it lets us apply Android parental control easily, it has all the features we will need, but most importantly it's free.
Launchers
A launcher can be the most elemental part when using a device since it has all the shortcuts for apps we may have installed.
Android has pre-installed its launcher, and in the Play Store, we can find even more, with many features.
Among all launchers we can find, a few of them are specially designed with kids in mind. These apps offer unique settings that let us apply Android parental control to their devices.
Of course, we could set any launcher for our kid, but these are more UI friendly for children.
Below we present the two best launchers for kids. These two are the first choice for parents when they decide to use a launcher to monitor what their kid is doing.
Kids Place - Parental Control
First up we have Kids Place, with 3.9 rating and millions of downloads on Play Store.
The app is free, but if we pay 4.99$, we will unlock extra features.
We don't have to create an account to use the launcher, but we need our email address in case we forget the PIN.
The app allows only the parent to make changes or disable the launcher. It also makes it possible to create a start screen for our kid, lock the device using time limits, and block incoming calls.
The list goes on, so let's start with the basic settings.
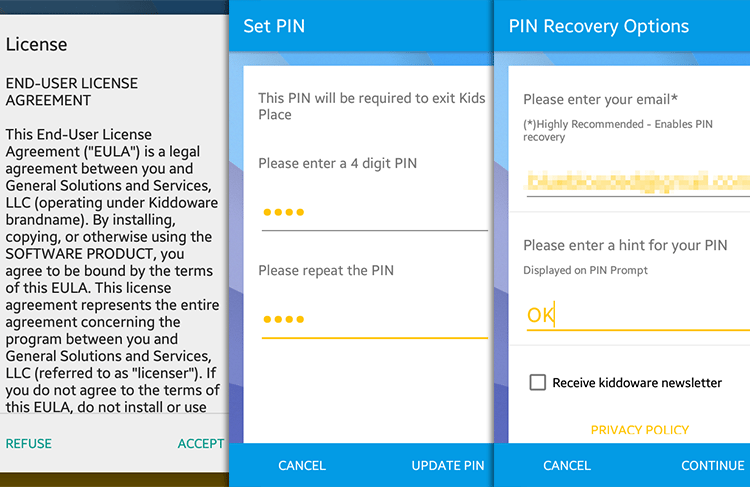
When we launch the app for the first time, we'll have to accept the Terms and Conditions. Then we set a PIN that we secure by giving our email address.
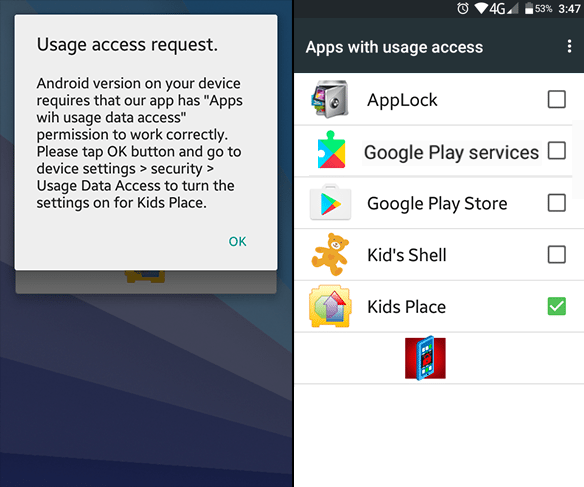
Next, before the app starts, we need to allow it to have access to usage data. We tap on "OK," and in the next screen, we choose the launcher.
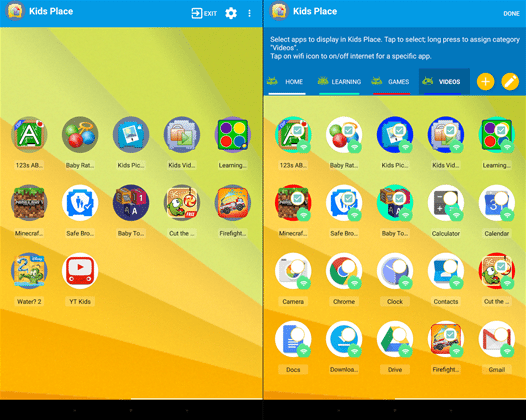
The launcher has now launched, and it has five buttons: exit, settings, menu, lock home button, and select apps for the launcher.
If we try to close the launcher or go to settings, it will ask for our PIN.
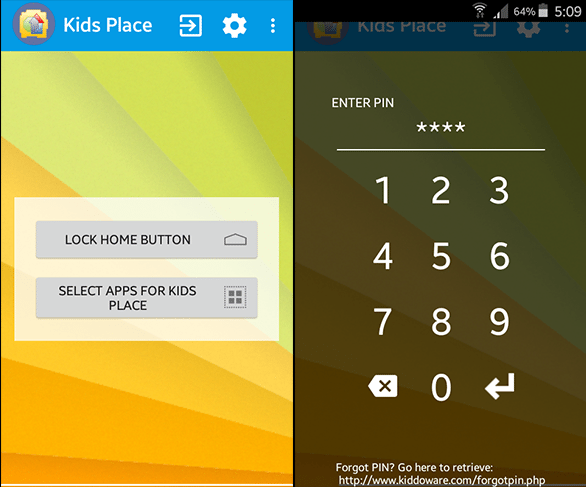
The “LOCK HOME BUTTON” prevents our kids swapping launchers by either a simple or long tap on the home button.
The “SELECT APPS FOR KIDS PLACE” helps us to choose the apps we want our child to see in the Kids Place screen.
When we press that button, a screen will come up to let us choose the apps we want.

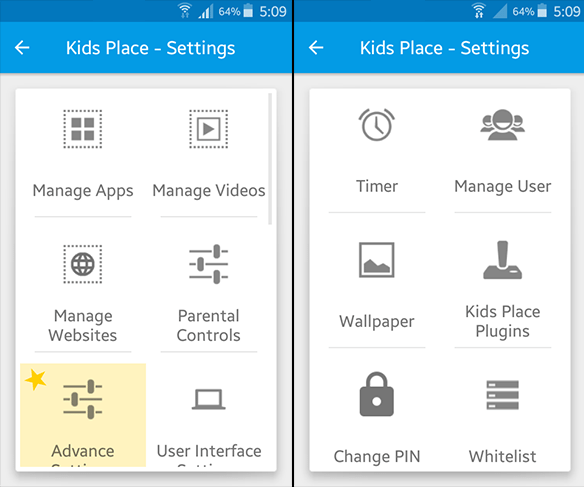
Last but not least, we have the settings where we can manage the apps, videos, and web pages our kid has access.
From there we go to parental control tool on advanced settings, and we edit the user interface.
We can also set time limits, manage the users, change the wallpaper, administer the Kids' Place extensions, create a list with the allowed data, and change our PIN.
By looking to all these features, we can see that there's a reason why this app is the first choice for many parents.
However, it's worth mentioning another launcher that has several options, and for some users, this goes higher on the list.
Kid's Shell - Kid Launcher
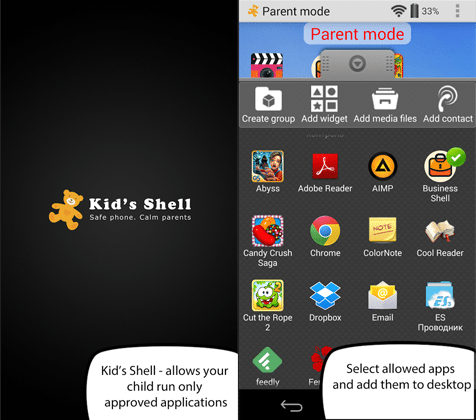
Whisper Arts is a company that focuses on apps for kids and parents and is the creator of Kid's Shell - Kid Launcher. The interface is very similar to any other launcher.
It is free, but it only costs 4.99$ to use the premium version, with a lot of added features.
With Kid's Shell - Kid Launcher we can choose the apps our kid can have access to, and it also has a unique child lock.
We can expand our Android parental control with options as prevent leaving the launcher, parent mode, security by PIN, and much more.
The first time we'll start the launcher, we'll see an informative window where we press "OK." Then we have to set a PIN.
Next up, we'll see a comprehensive getting started guide, where in the end, we click "FINISH."

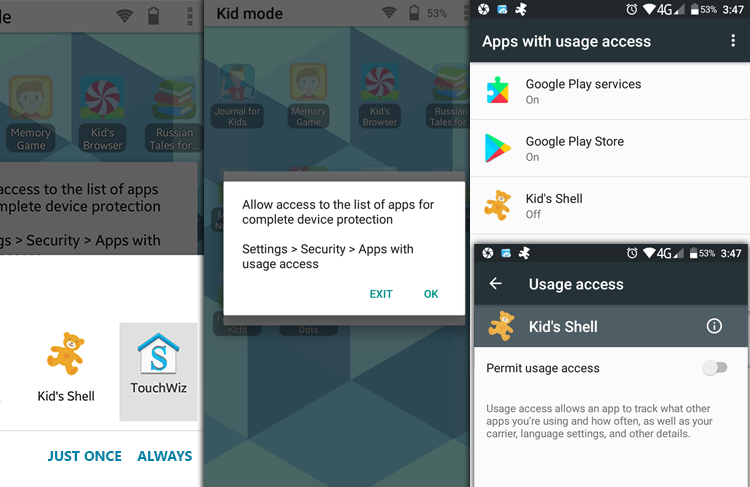
The following step is to set Kid's Shell as the default launcher by choosing it and tapping on "ALWAYS."
On the informational window, we press "OK," and now we must give the launcher access to use the data on the device.
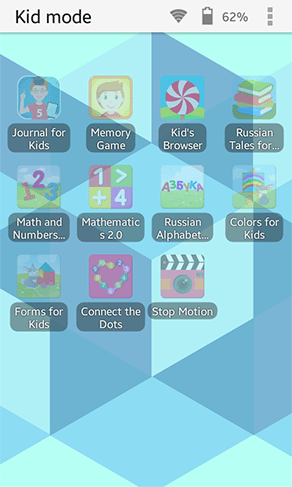
Now our start screen is the one from Kid's Shell. On the notification bar, we see the Wifi signal, battery level, and the settings menu.
Right under it, there are various of shortcuts to download apps specifically made for kids.
In case we want to download any of these apps, we just tap on them to go to the Play Store's download page.
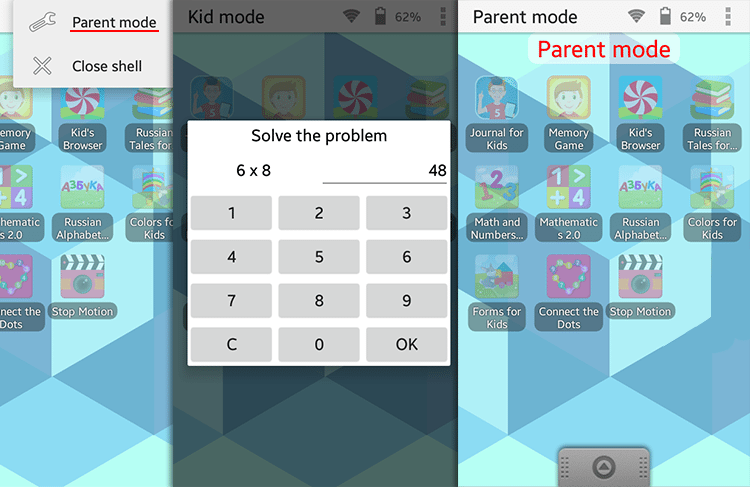
To make the changes we want in the interface our kid is going to use, we tap on the menu and choose "Parent mode."
The app asks us for confirmation by solving a simple math problem. We can change this authorization method through settings.
When we answer, Kid's Shell look has now changed to the one we see in the picture. We can remove any shortcut we want just by long pressing on it.
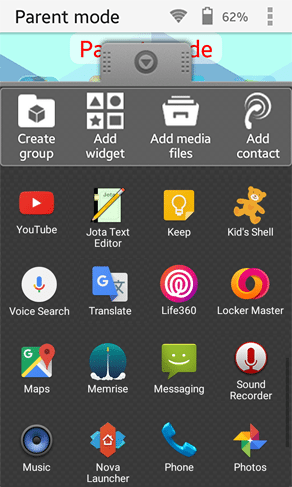
The button on the bottom of the page helps us create shortcuts we want our kid to have access. By pressing on it, we see a bar full of choices and all the apps we have installed on our device.
Sadly, the features of a group of shortcuts, widgets, folders with videos or images, as well as direct call shortcuts are only available in the premium version.
By long pressing on any of the apps on the list, we create a shortcut on the main page of Kid's Shell.
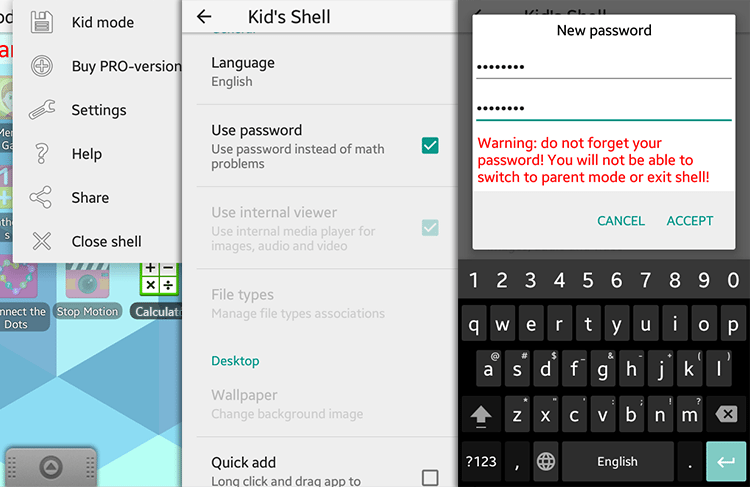
The settings menu has changed. The first option is "Kid mode," and when we tap it, the launcher will go back to kid's mode.
In settings, we can change the security lock with "Use password."
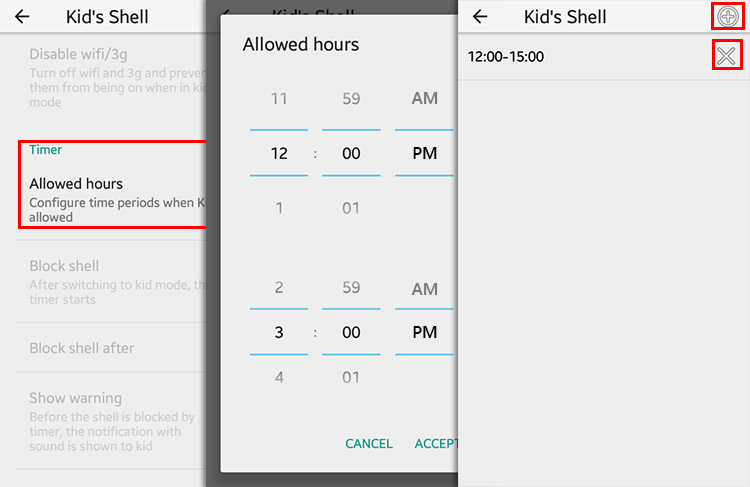
The "Timer" category helps us set the allowed hours for accessing the device.
On that screen, we can remove the selected hours by pressing on "X" and add more by tapping on the "+" button.
If our kids try to open the device in hours that they are not allowed to, they will see the following message.
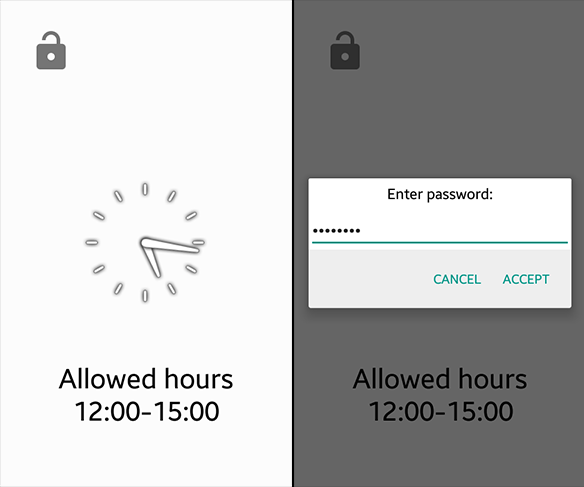
In case we want to grant access, we tap on the locket and give our code.
Kid's Shell is a remarkable app with many options for Android parental control, and it's worth it if someone wants to buy the paid version.
The only drawback we found was that it doesn't allow us to restore our password.
App lockers
In this section, we'll see another app category, known as app lockers, which restrict access to the apps of our choice.
AppLock
AppLock is an app that locks everything, and there's a reason it has millions of downloads and a 4.3/5 rating.
The application has an app lock, of course, and includes time limit settings, multiple accounts for different periods of the day, content restriction, and several other features.
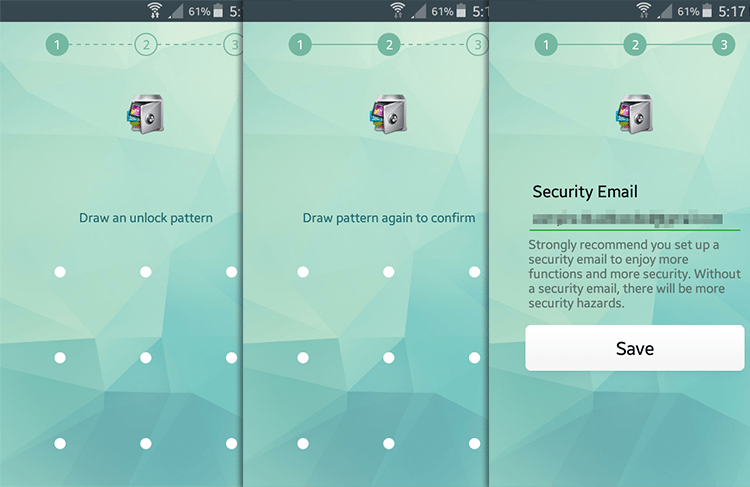
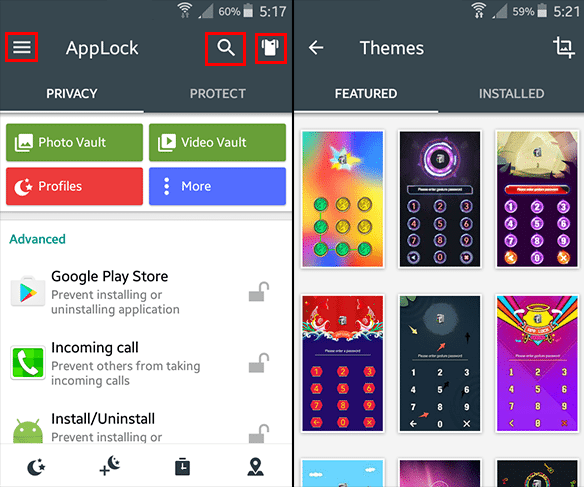
When we launch it for the first time, we need to set a lock pattern, confirm it, and give our email address for extra security.
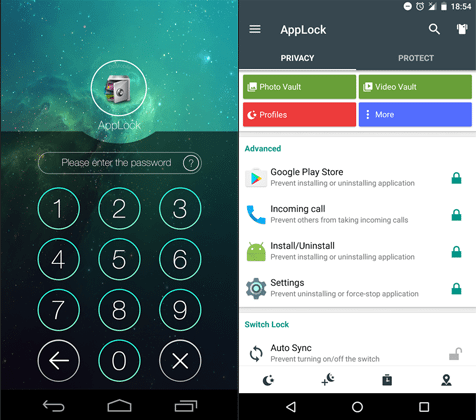
With a first glance, it might look a bit complicated, but it is quite simple.
The three lines hide the app menu. With the magnifying glass, we can search content and settings while with the T-shirt icon, we can change the theme.
On "Photo Vault" and "Video Vault" we can add images and videos. If someone wants access to them, he must use the password.
Through "Profiles" we can see and edit our profile settings, and from "More" we can install a series of add-ons with more functions.
With "Advanced" option we can lock any app we want.
Before we discuss the "PROTECT" tab, let's see the four buttons on the base of the screen. The first one helps us see the profiles and choose the one we want, while the next one helps us create a new profile.
With the third one, we can set time limits and set locations where apps will be locked. Moreover, we can create new profiles and choose which apps will get locked.

On the time restriction based on location, we select a Wifi network, and the ban is automatically applied when we connect to it.

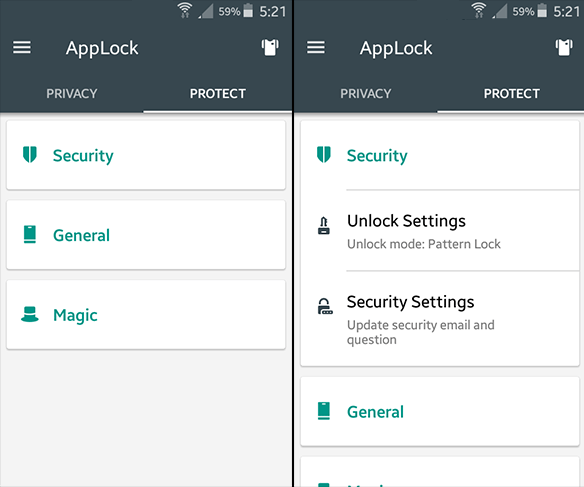
The "PROTECT" tab is about security and contains various settings. The "Security tab" has settings for the locking mode and security settings in case we forget the code or the pattern.
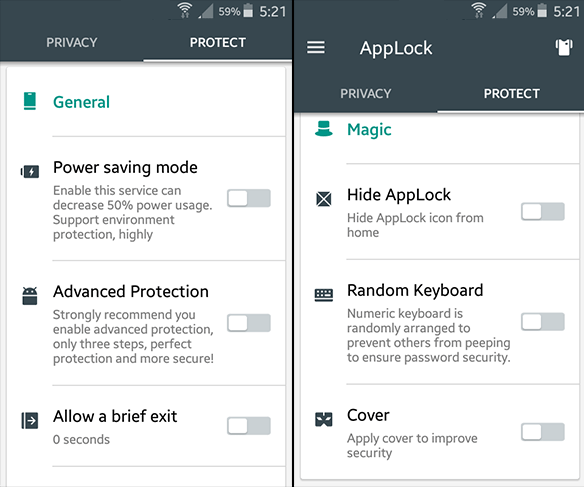
In "General" we'll find options to save battery and advanced protection.
Also, we can set a small period that it's allowed to exit an app without getting locked out, or we can configure to lock it when the screen turns off.
Let us note that the "Advanced Protection" is an add-on that prevents the uninstallation of the AppLock. In case someone tries to uninstall the app, they'll have to remove the add-on first.
Lastly, "Magic" is about a few display details, for example, to hide the AppLock on the app list.
What are your thoughts on Android parental control?
In the end, we saw that even apps that aren't made for parental control can be handy.
Android parental control isn't simple. We must not forget that these tools require the proper use and we need to respect the other person's freedom, even our children's. Protection is entirely different from the "prison" an over-protective parent can create.

Besides, we want to protect our kids from the dangers they might run into, not to be a watchdog and make them feel trapped all the time.
Are you interested in Android parental control? What are your thoughts on the applications we saw for Android? Does your kid use a tablet that you have set restrictions?
Leave a comment with your impressions and share your experiences with our readers.
Support PCsteps
Do you want to support PCsteps, so we can post high quality articles throughout the week?
You can like our Facebook page, share this post with your friends, and select our affiliate links for your purchases on Amazon.com or Newegg.
If you prefer your purchases from China, we are affiliated with the largest international e-shops:

Leave a Reply