Virtual desktops have been a feature in Unix and Linux operating systems since 1990. Until relatively recently, Windows users had to install 3rd party apps to get the same functionality. In Windows 10, Microsoft woke up and decided to integrate a virtual desktop system. In this guide, we will go through all the necessary information about the use of this feature, both in Windows 10 and on earlier versions.
Unblock any international website, browse anonymously, and download movies and Mp3 with complete safety with CyberGhost, just for $2.75 per month:
What is a virtual desktop
Virtual desktops are an invaluable tool for power users that keep multiple programs, browser windows, and files open simultaneously. They definitely are cost-effective, as opposed to buying multiple monitors.
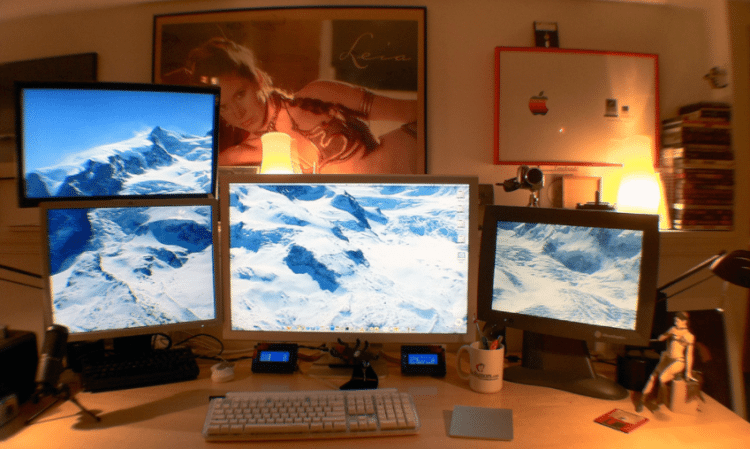
With virtual desktops, it is easy to organize as many open apps and windows as we want, as well as separate our "work desktop" from our "personal desktop" or our "music desktop."
With correct use, it's a brilliant way to stay organized and productive.
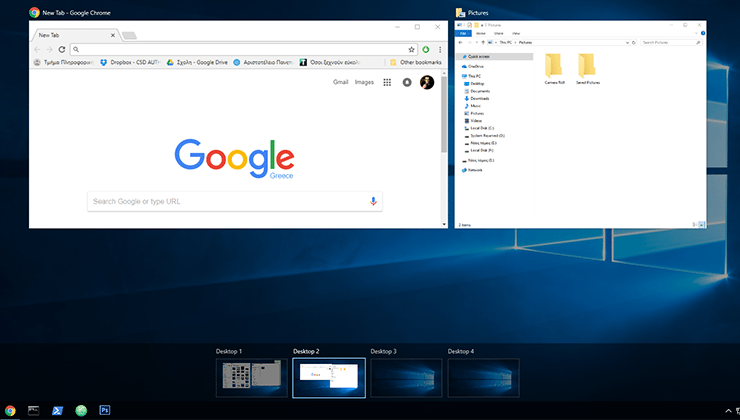
Virtual desktops on Windows 10
We can access the virtual desktops from the Task View button on the primary desktop.

The Task View is a Windows app which offers an overview of the current operations.
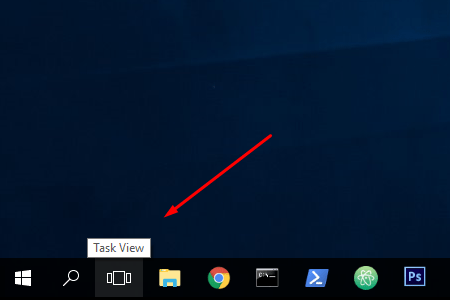
To open the Task View, all we need to do is left click the respective icon on the left side of the taskbar.
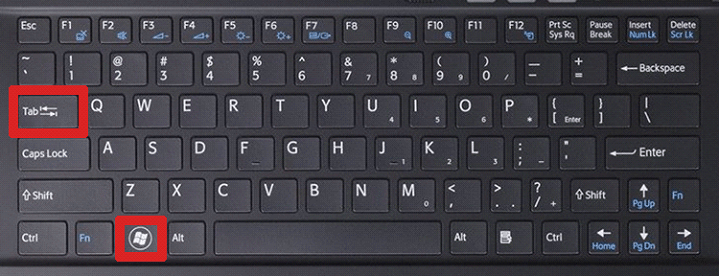
We can also access the Task View with the Win + Tab shortcut.
From the Task View, we can create a new virtual desktop, delete an existing one, or navigate between created desktops.
Adding a virtual desktop
Adding a new virtual desktop is quite simple. First, we left click on the Task View icon and choose the "New Desktop" icon on the far right of the screen. That was it; we have successfully created a new desktop.
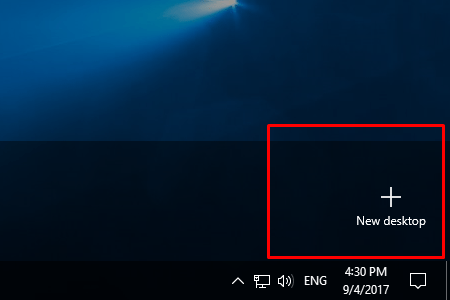
We can add more virtual desktops in the same way. All we have to do is press the plus icon as many times as we desire.
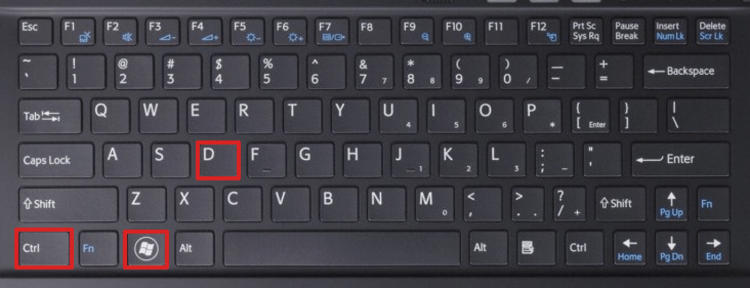
It’s also possible to add a new desktop by using the shortcut combination Ctrl + Win + D.
Deleting a virtual desktop
The deletion of a virtual desktop is just as simple as its creation. Firstly, we press the Task View icon.
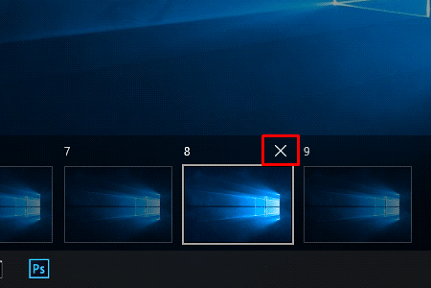
Then, we drag our mouse to the desktop we wish to delete. If done correctly, an "X" indication will appear on the top right corner of the window. Left-clicking on the "X" option will successfully delete the respective desktop.
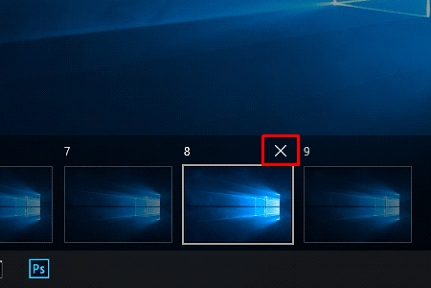
You should note that deleting a virtual desktop won't close the apps or windows inside of it. The system will transfer all the open windows in one of the other desktops.
Navigating between virtual desktops
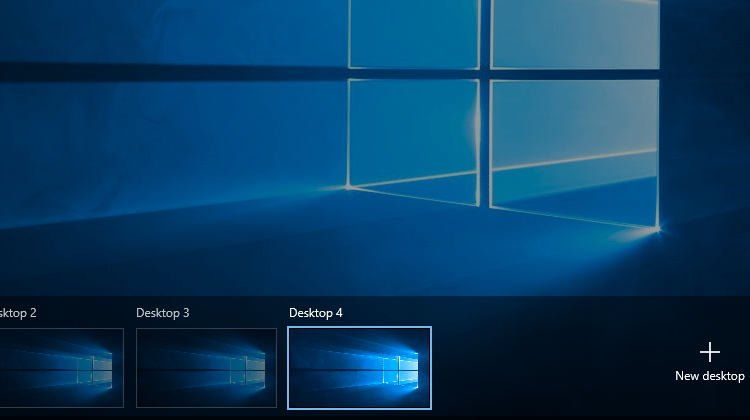
To navigate between desktops, once more we have to enter the Task View. There will be a new space above the taskbar, where we can find all the created virtual desktops.
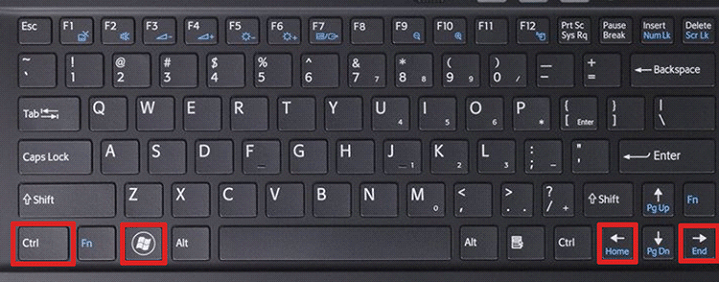
To navigate from your current desktop to a different one, we just need to click on the desired desktop. Otherwise, the shortcut combinations Ctrl + Win + Left and Ctrl + Win + Right can navigate left and right accordingly.
The Task View will only show five virtual desktops at a time. If we create more than that, we will find arrow buttons on the left and right, to navigate between all the desktops.
Using Windows virtual desktops
Having explained how to create and delete a virtual desktop, as well as how to navigate between several desktops, we will now see how to use this feature to its maximum potential.
Types of programs
To begin with, it’s worth mentioning that there are two kinds of applications that use the virtual desktops.
The first type allows us to have multiple windows open at the same time. One indicative example is Google Chrome.
Let’s now assume that we have two virtual desktops. In our first desktop, we have Chrome running. If we open Chrome in the second virtual desktop, this will result in an entirely different browser window.

This window will stay open on that virtual desktop until we either close it or move it to a different desktop.
The other type of programs allows us to have only one window active. Photoshop, for instance, is such an application.
Let’s now assume that we are running Photoshop on the first virtual desktop. If we try to open it again on the second desktop, we will be "teleported" back to the desktop that it was initially open.
Although we can’t have secondary windows in the second category, there is still the option to transfer our applications to a different virtual desktop.
Moving applications in various desktops
The option to move an active application from one desktop to another nullifies the limitations of programs that allow only one active window; we can achieve this in two ways.
The first one is through Task View. The only thing we have to do is press and hold the left click on the desired program...
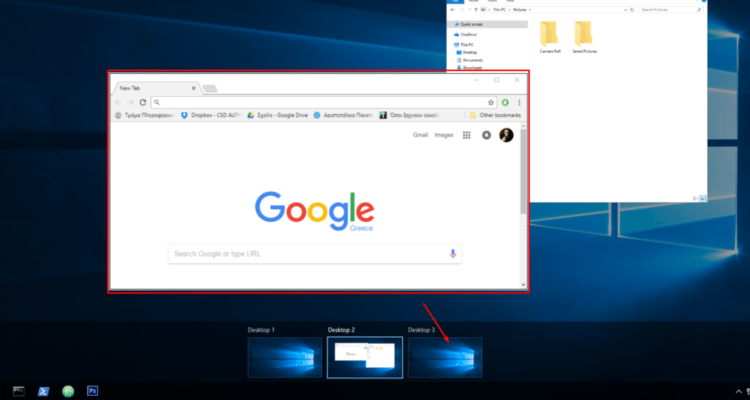
...and then drag it to the desired desktop.
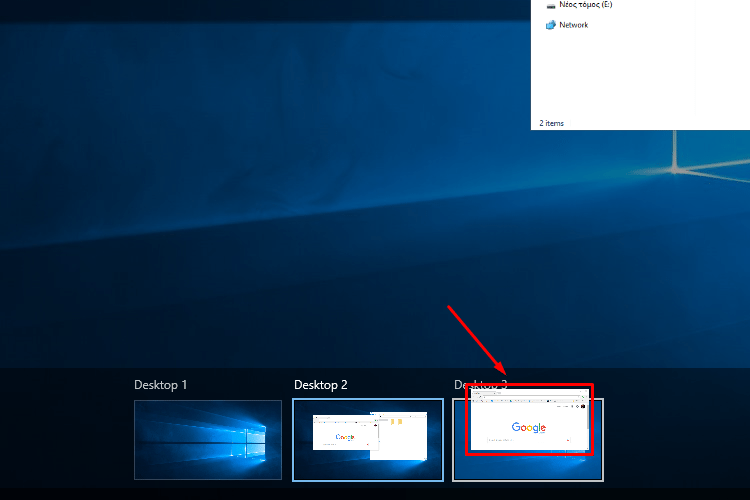
If we right-click on the program we want to move, a menu will appear from which we can choose the option ‘’Move to’’. This option will relocate the application to the existing virtual desktop of our choice.
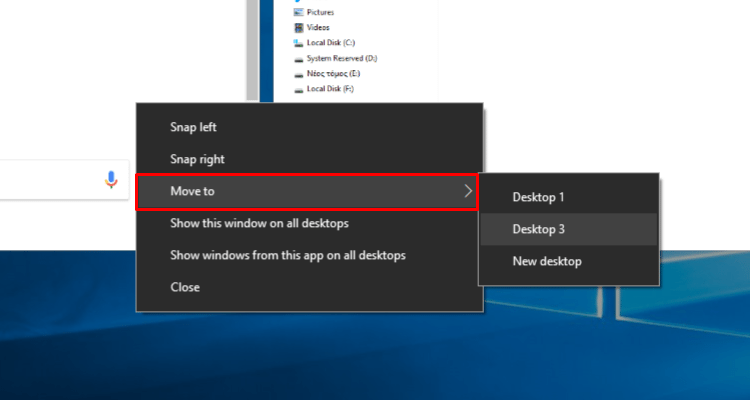
It’s worth mentioning that both ways work equally well for both program categories we mentioned above.
Finally, we can transfer a program directly to a new desktop. We either drag and drop the app to the new desktop icon or choose the option ‘’Move to’’ and then ‘’New Desktop’’.
Auxiliary programs
The virtual desktops of Windows 10 have made the users’ lives convenient and much more organized. However, there are certain limitations. For instance, there are no personalization features and the available directional keys to move between our desktops are somewhat limited.
We can fill this ‘’gap’’ by installing an auxiliary program. An excellent choice for Windows 10 would be the Virtual Desktop Manager. However, the program requires specific tweaks for us to get the most out of it.
Here you can find the current version of the program. After downloading it, you have to unzip it and run the "VirtualDesktopManager.exe."
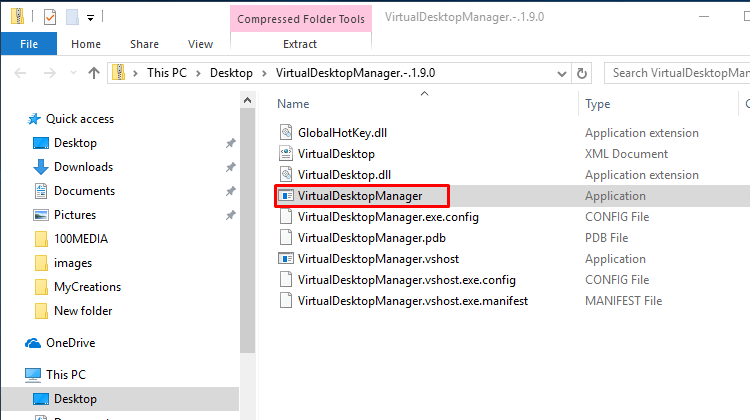
We will find the program running in the hidden icons section of the system tray.
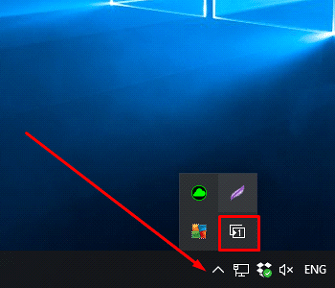
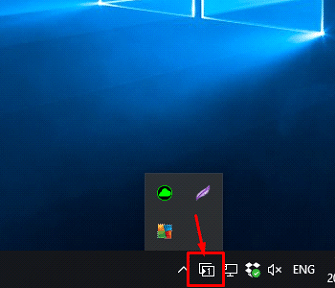
There will be a number on the program's icon which shows which virtual desktop we are currently using. If we want to know on which desktop we are at any time, we can drag and drop to move the icon on the taskbar.
We can always use the shortcut keys we mentioned to move between desktops. However, Virtual Desktop Managers offers a better option.
The new shortcut combination Ctrl + Alt + Left allows us to move to the left, and by pressing Ctrl + Alt + Right, we can move to the right desktop.
These key combinations can move us from our first desktop window to the last and vice versa, without having to go through our other desktops first. Lastly, the application offers an alternative shortcut combination, if the shortcuts above are already bound to a different function.
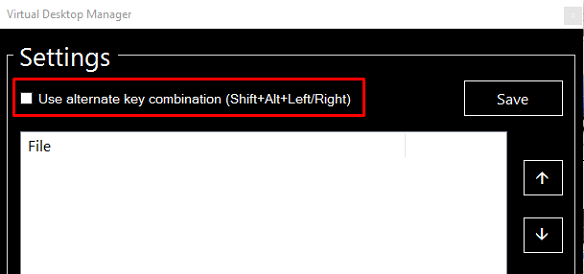
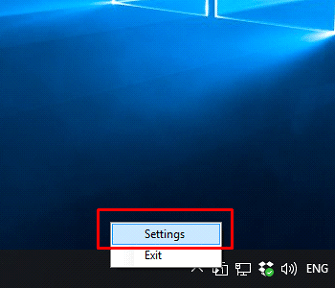
If this is the case, we can right-click on the Virtual Desktop Manager icon. From the menu, we need to go to Settings, and a new window will pop up. On the top of the screen, we can now choose the alternative shortcut combination.
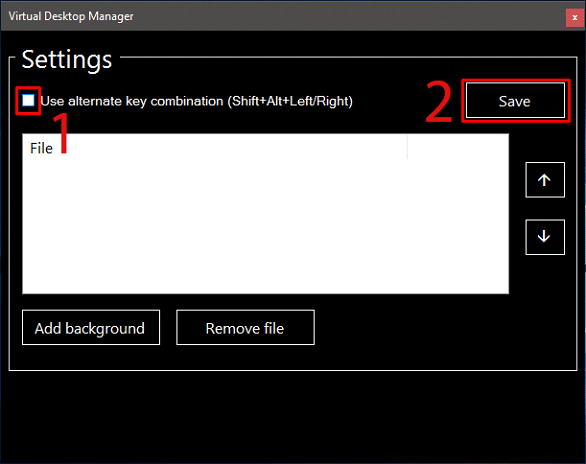
We just tick the ‘’Use alternate key combination’’ option and then hit "Save." We can now use the Shift + Alt + Left/Right shortcut.
Virtual desktops on previous Windows versions
If we have an earlier version of Windows, the following free programs can be excellent alternatives to offer the Windows 10 virtual desktops functionality. However, we can still upgrade our old operating system to Windows 10 for free.
VirtualWin Window 10/8/7
With VirtualWin we can use virtual desktops not only on Windows 10 but previous versions of Windows as well.
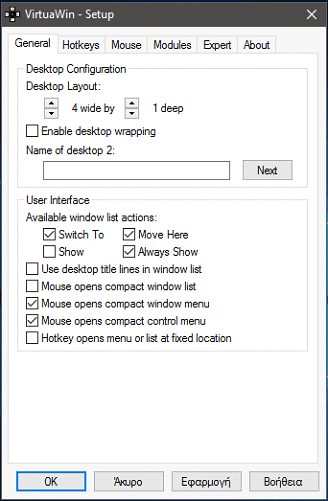
The program offers up to four virtual desktops, and it’s entirely customizable.
Dexpot Windows 10/8/7
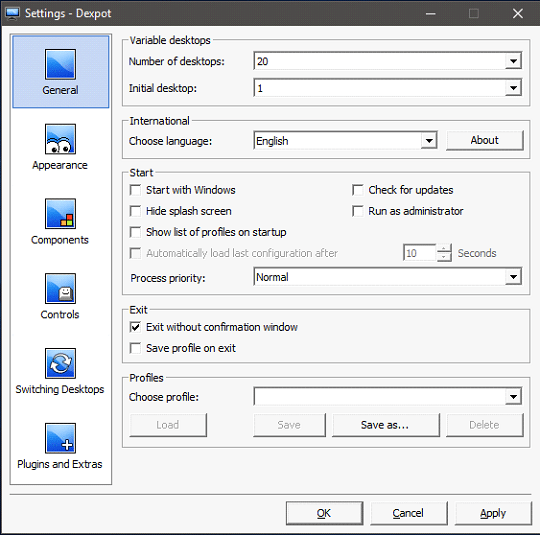
Dexpot is another free program that offers virtual desktops.

It’s very flexible since it allows up to 20 desktops. Moreover, we can also adjust every desktop based on our needs.
The ability to change the background wallpaper, the available icons, as well as the ease of moving between different desktops, make it quite competitive compared to other programs.
Especially with Windows 10, we can take it one step further by applying beautiful and impressive themes.
We can further expand Dexpot’s capabilities with additional plugins.
If your computer supports DirectX 9, Dexpot offers an excellent way of moving between virtual desktops.
Do you use virtual desktops on Windows?
A virtual desktop is a handy tool that allows us to stay organized and further increase our productivity. If you are using the virtual desktops of Windows, we’d be happy to see your thoughts and read your comments on the comment section below.
Support PCsteps
Do you want to support PCsteps, so we can post high quality articles throughout the week?
You can like our Facebook page, share this post with your friends, and select our affiliate links for your purchases on Amazon.com or Newegg.
If you prefer your purchases from China, we are affiliated with the largest international e-shops:


Leave a Reply