Formatting our hard drive and reinstalling Windows is a simple procedure even for inexperienced users, and it will usually take less than 20 minutes. However, it will probably take hours to install all the drivers, the necessary programs, and tweak the settings to suit our preferences. In this guide, we will explore all the methods to repair Windows 7, Windows 8.1, and Windows 10 without having to format our drive and lose any of our files.
Unblock any international website, browse anonymously, and download movies and Mp3 with complete safety with CyberGhost, just for $2.75 per month:
When and why do I need to I repair Windows?
In most occasions and with frequent usage of the PC, the longer we go without a format, the slower the Windows installation will become. This can happen for a number of reasons.
Malware is one of the prime suspects that can make a PC might slow down over time. Even on a "clean" system, though, the slowdown could also be due to Windows errors, registry problems, and other software related issues.
What is the Windows Registry and Should I Use a Registry Cleaner?
Of course, a slow PC could also mean that it might be time to upgrade our hardware, but this is a topic for a different post altogether.
In this guide, we will focus on repairing our system to fix possible Windows errors. Since we are going to keep our files and programs, if we are infected with malware, it will be transferred to the refreshed version of our OS. Thus, it is a good idea to run a full scan for viruses before we attempt to repair Windows.
Below we will examine two situations; firstly, we have the case where Windows are still usable, and we can log in to our desktop. However, there’s also the case that the OS doesn’t boot anymore.
In both cases, our goal is to repair Windows without losing our files. Let’s dive into how to repair Windows 10, 8.1, or 7.
What will I need to repair Windows
Before we proceed with the windows repair procedure, it pays to be well prepared.
We should first download a Windows ISO for the edition that we need, with the correct version (Home, Home Premium, Pro, etc.) and the correct architecture (32-bit or 64-bit).
Download Windows 10 Fall Creators Update ISO, for Free
After that, we can burn the ISO on DVD, or create a boot USB.
With this installation medium at hand, we are ready to proceed with the Windows repair for any version of the OS.
How to repair Windows 10
In Windows 10, Microsoft has made it easier to repair Windows, plus the company gave us several options to refresh our OS.
However, the fact that we can repair Windows with several ways can be confusing for some users. We will attempt to explain the differences between all those methods and break it down into simple steps.
So many options, so little time
Reset used to be the way to go for a fresh start on a Windows machine, but it seems it wasn’t enough for Microsoft. The company is giving us the option to Refresh the Windows installation from Windows Defender’s settings since the Creators Update.
Some may argue that Reset and Refresh are the same, but they have a significant difference.
Before we explain the difference, we need to mention that when we install Windows for the first time on a machine, it automatically creates a recovery image on the drive, within the installation.
However, if our machine came with Windows already installed, most of the times it comes with lots of third-party software. Besides that, the manufacturer has probably tweaked the recovery image, to include these programs and apps.
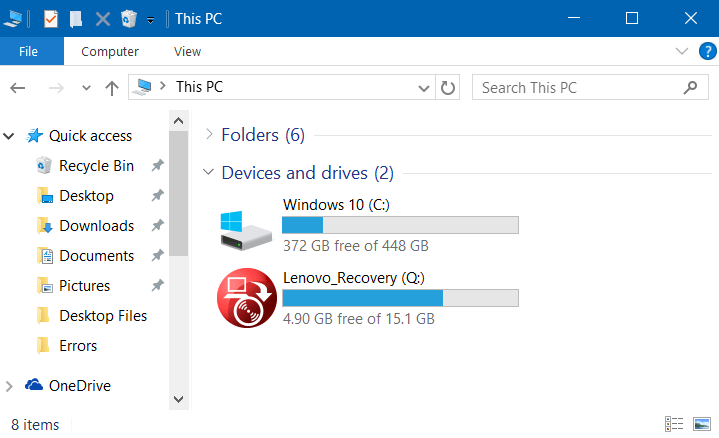
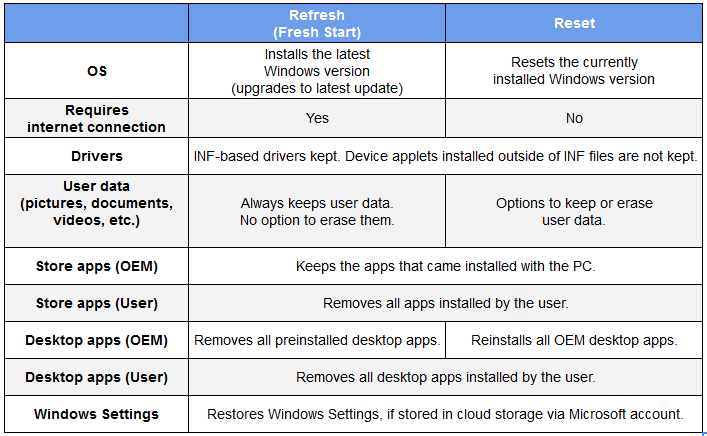
The Reset feature uses the recovery image on our drive to perform a clean install on our computer. As a result, if the image contains the OEM’s software, the Reset will install this software as well.
On the other hand, Refresh will download the latest Windows version from Microsoft’s server, and it won’t pull it from the recovery partition we already have.
In other words, the Refresh is “the freshest” option of the two, considering it doesn’t reinstall the OEM’s desktop programs. It keeps the manufacturer’s store apps though, but we can always remove them later.
As we already mentioned, if we installed Windows by ourselves from a legit copy of Windows, the recovery partition already has the cleanest possible files, so Reset will do the same job. Moreover, Reset will ask as if we want to keep our data, whereas Refresh will keep it anyway.
Refresh is probably the most “up-to-date” option since after the refresh, we the latest Windows updates.
Both options are useful if we want a fresh OS, without the need to boot from an installation media and format the drive. The fact that they can keep our files is also really helpful.
On the matrix below, we summarize the differences between Reset and Refresh.
Reset
The Reset option allows us to keep our files and data. However, it will remove all apps and drivers we installed, as well as all the changes we made to settings.
To find the option, we can navigate to Settings > Update & Security.
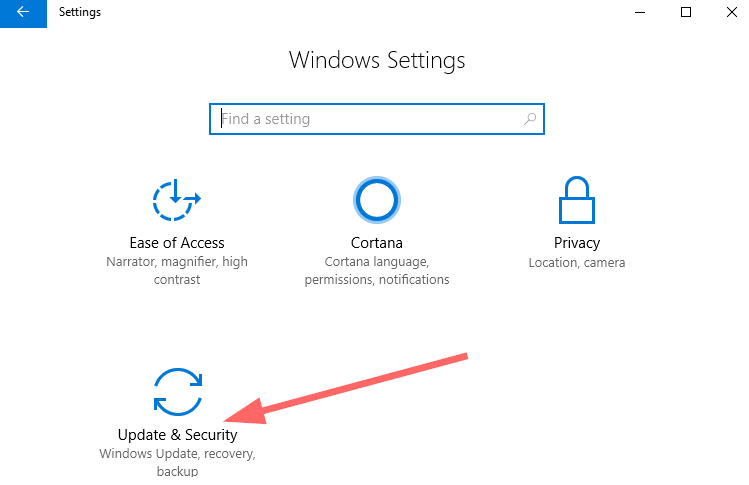
If we don’t mind losing our apps - since we can always reinstall them - all we have to do at this point is to click on “Get started” on the Recovery tab.
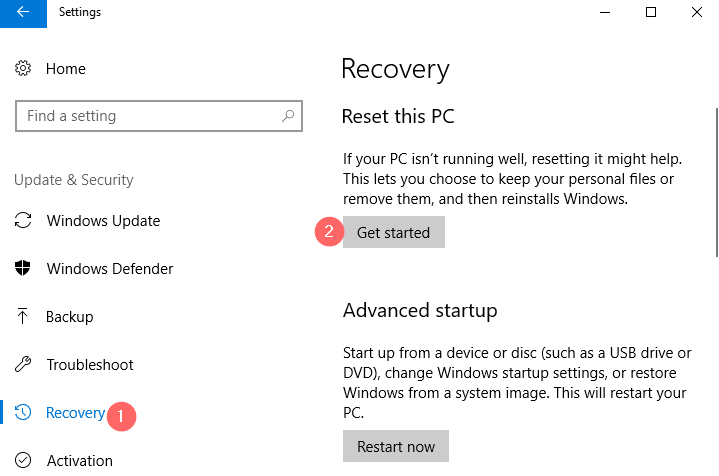
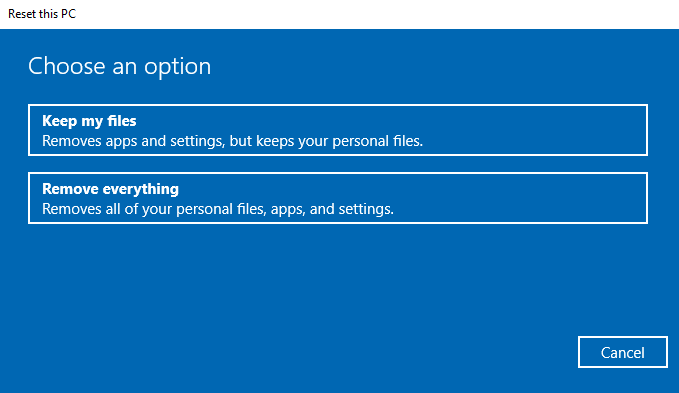
Windows will ask if we want to keep the files or remove everything. We click on the preferred option.
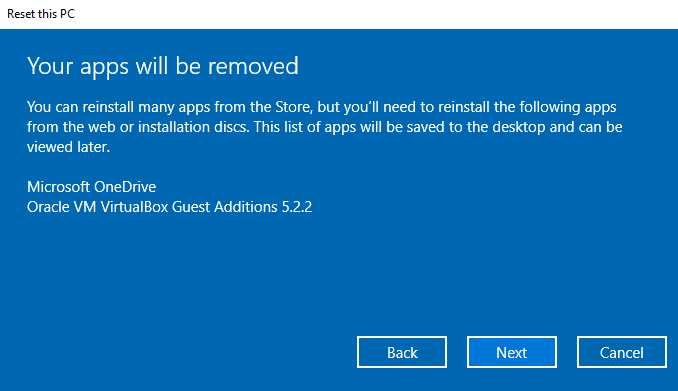
In case we miss-clicked, or we changed our mind, on the next step we will see a revision of all the apps we will lose. We click Next if we are sure we want to proceed.
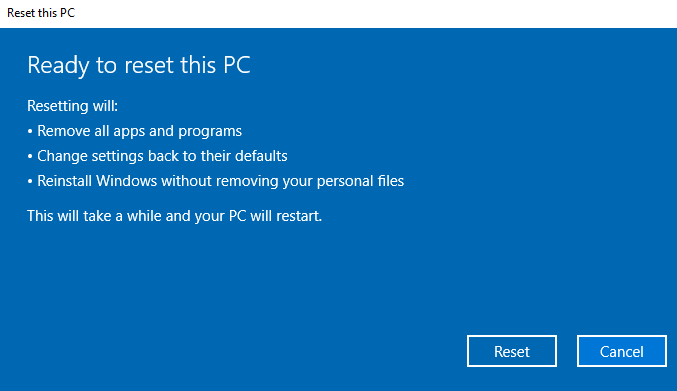
Once again, in case we changed our mind, this is the last chance to revert our decision. Thus, we click on “Reset.”
We won’t have to do anything from now on; just wait.
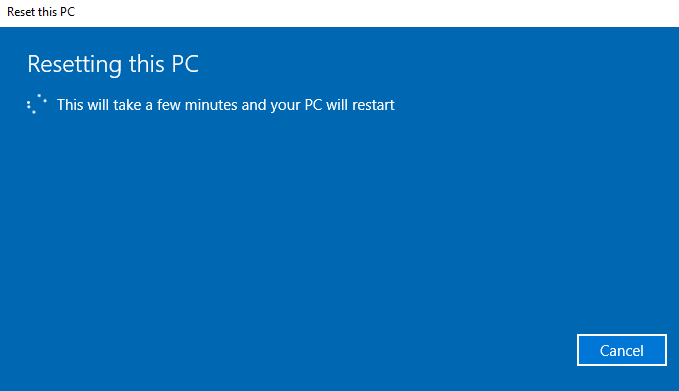
After a while, the PC will go into resetting mode.
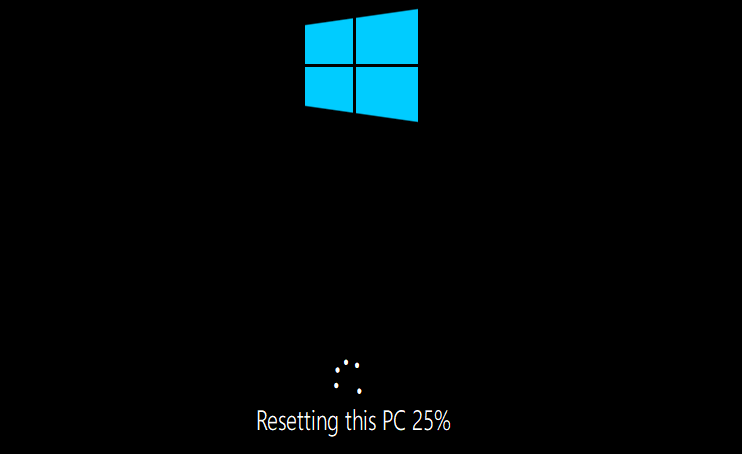
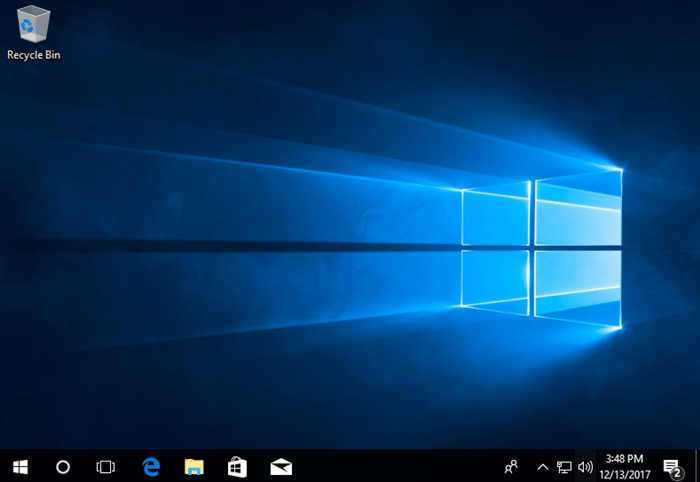
Once that’s over, we will be back to our desktop, with all our files on their folders, exactly as we left them - if we selected to keep them, of course.
As a bonus, we will find an HTML file on the desktop, marking all the programs removed during the reset.
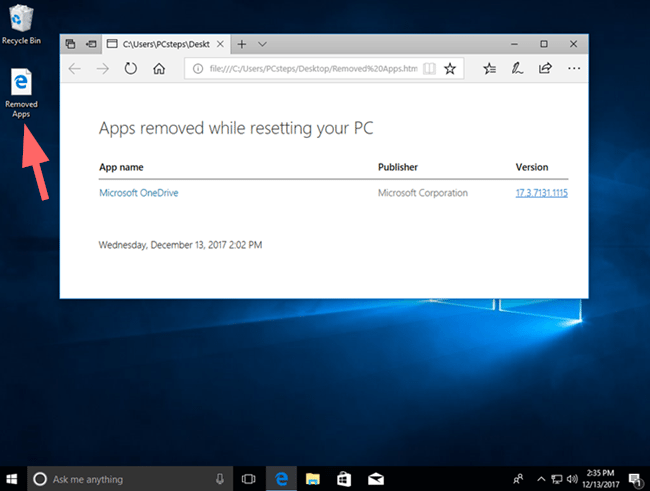
We can just open it and proceed with installing the apps from scratch.
Refresh
To refresh your Windows installation and “Give your PC a fresh start,” navigate to Windows Defender Security Center from the notification bar. Alternatively, we can type “defender” in the search bar.
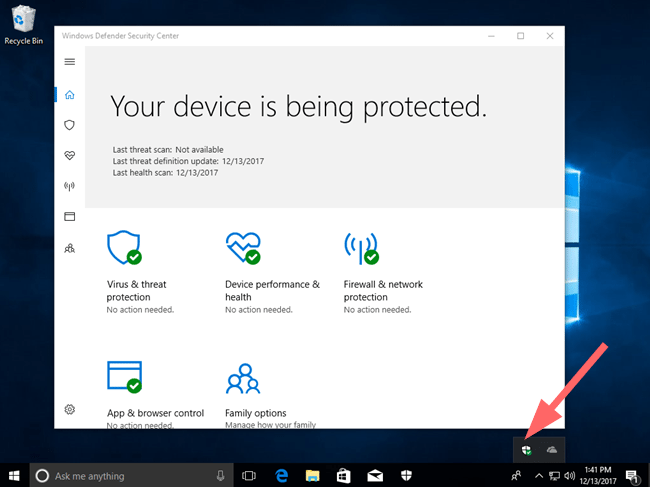
On the left panel, we click the heart symbol and go to “Additional info.”
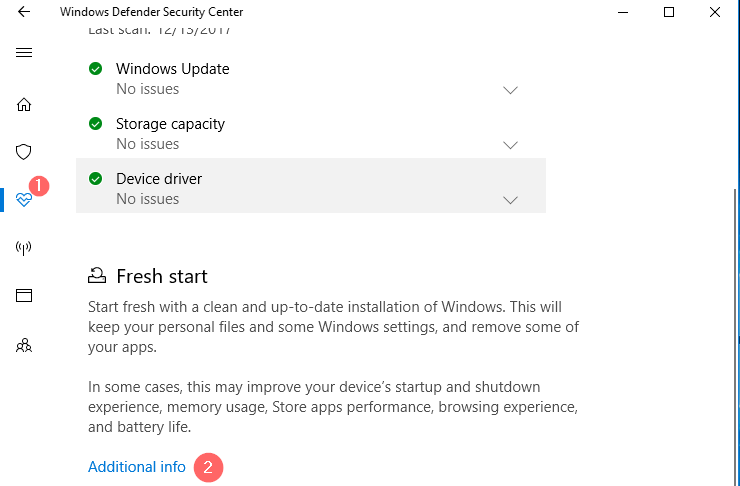
Then, we press “Get started.”
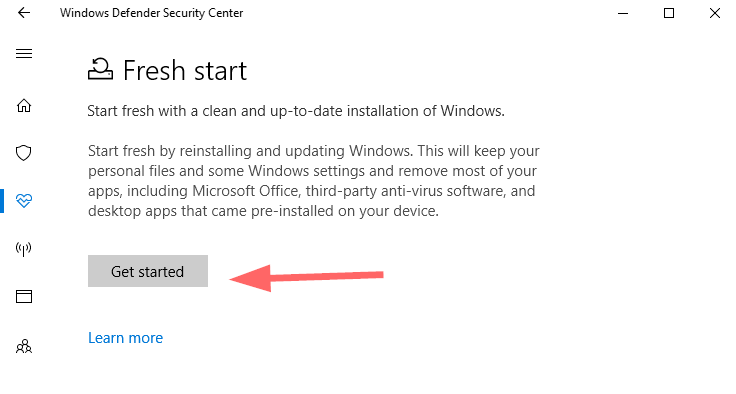
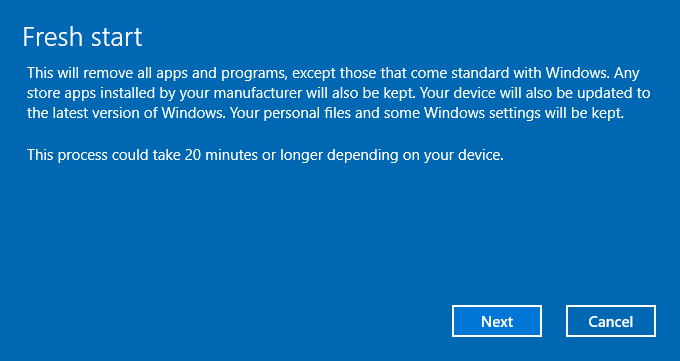
We make sure we want to proceed, and click Next.
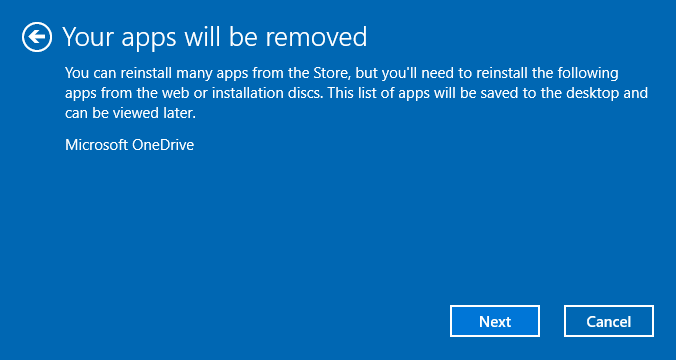
In case we were wondering, Microsoft informs us that all our apps will be removed, and provides a list with all of them. In our case, the system was clean, so the only app removed was Microsoft OneDrive.
Finally, we press “Start.”
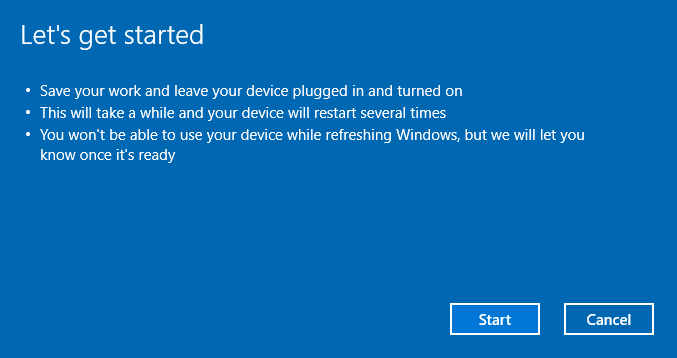
Refreshing our PC will take some time, depending on the updates it will need to download to repair Windows.
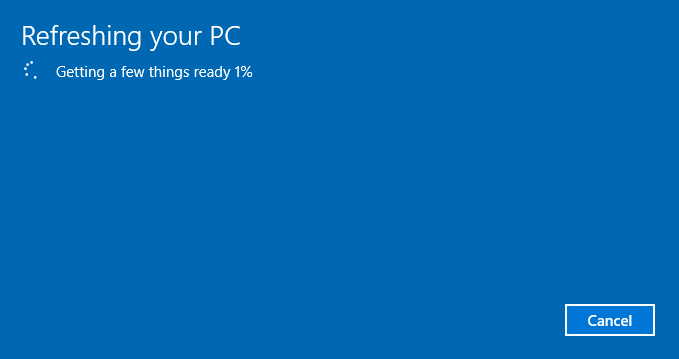
All we have to do is wait, and the computer may restart several times.
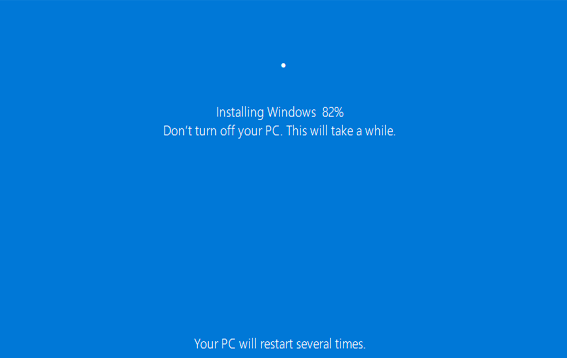
After that, we have a refreshed Windows installation, and we can find the removed apps on our desktop.

Repair Windows 10 with reinstallation
For this method, we will need to use a bootable Windows USB or DVD media. We should make sure that the media contains the same version of Windows we run on our computer (Home, Pro, etc.), as well as the corresponding architecture (64-bit or 32-bit).
Once we insert the USB or DVD, we double-click.
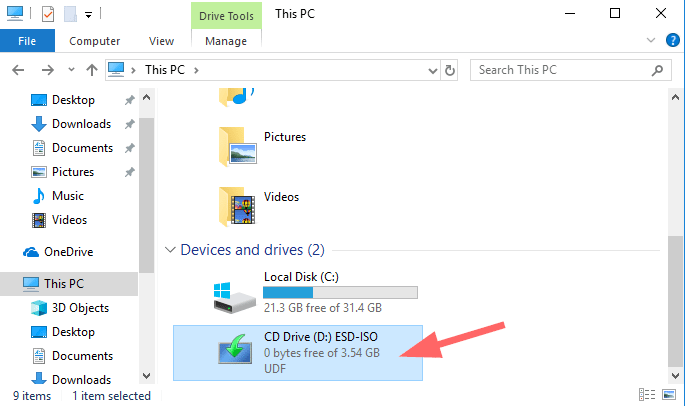
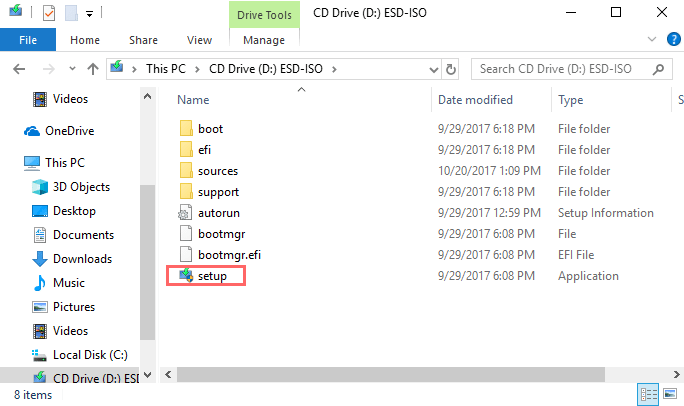
If the installation doesn't start automatically, we must manually run the setup file.
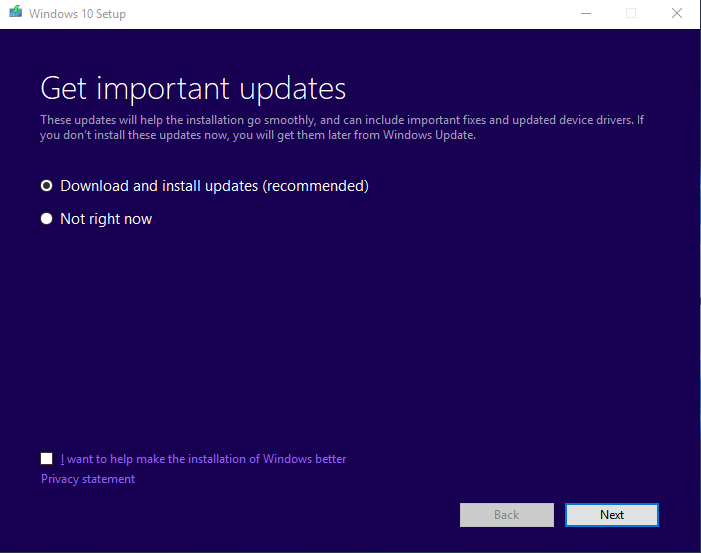
The setup will suggest installing the latest updates. We can always skip this part and install them later, so it is up to the user.

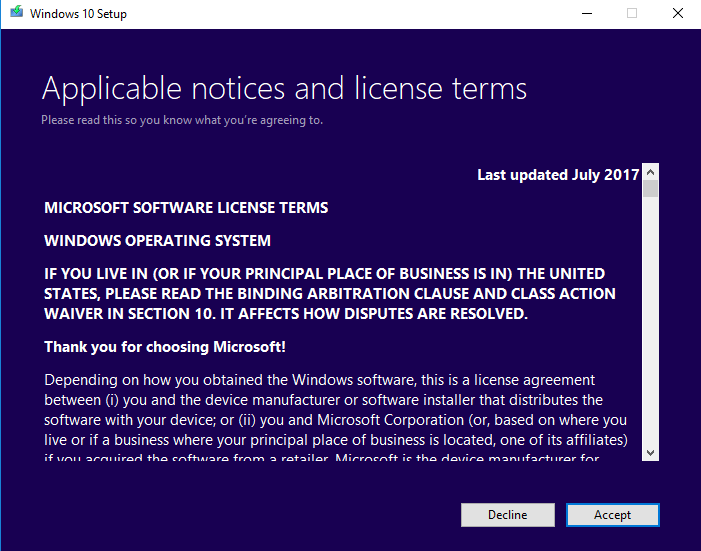
On the next step, we have to accept Microsoft’s EULA.

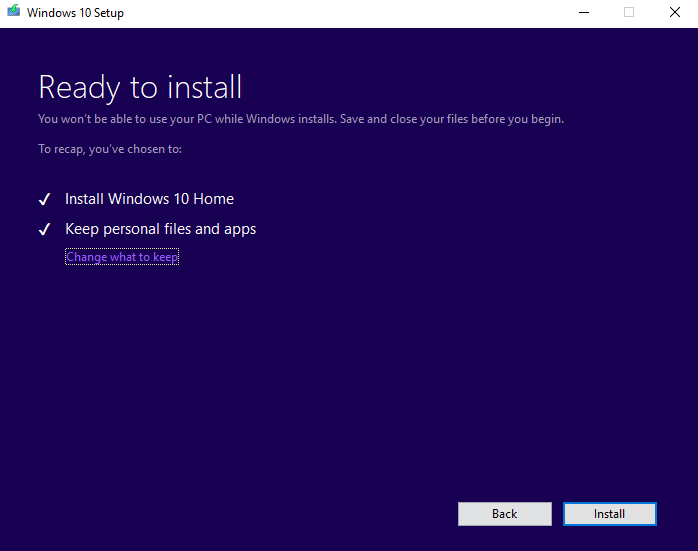
At this part, we get to choose what we want to keep or remove. If we're going to change the default option of keeping everything, we click on “Change what to keep.”

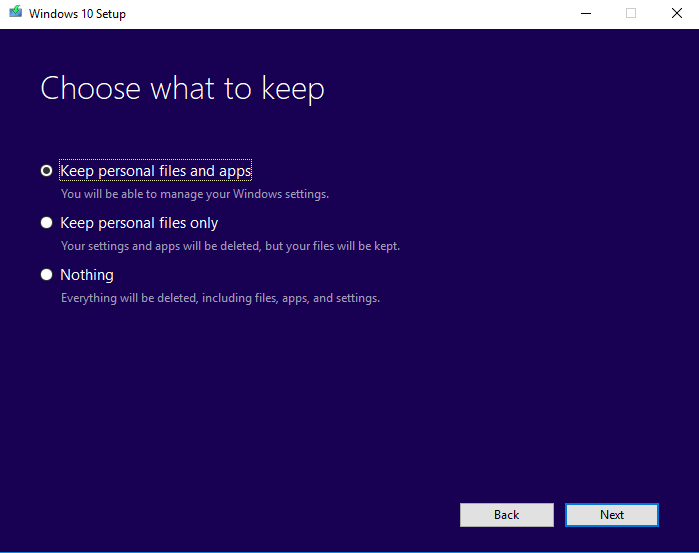
From there, we have three options; we can keep our files and apps, only save our files, or erase everything.

When we pick the best option that suits our needs, we proceed with the installation.
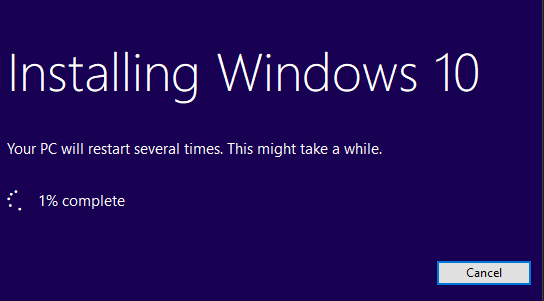

After the updates, our computer is as good as new, with all our programs and files installed, if we went with that option.

How to repair Windows 10 that doesn’t boot
All the above cases refer to a still functional Windows installation. If our system is unstable or can’t even boot to desktop, we can still try to repair Windows.
We will once again need the installation media, whether it is a DVD or a USB. However, this time we have to boot from the media. If you don’t know how to do that, follow our guide.
Change the Boot Order to Boot from USB or DVD on BIOS / UEFI
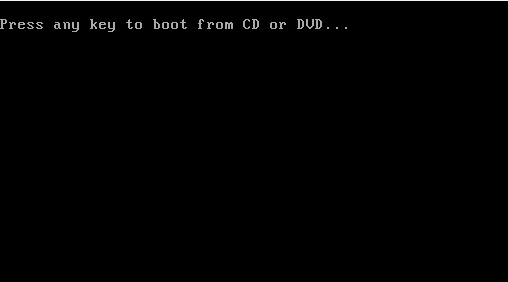
We will be prompted to press a key to boot from the media. We can press any key on our keyboard.


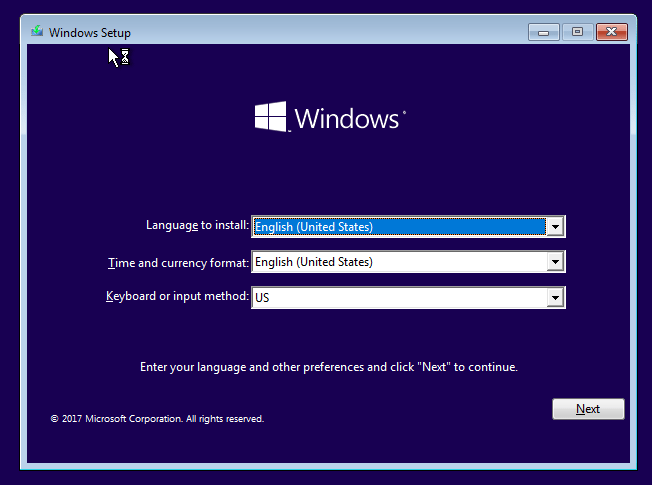
We press Next on the language selection since it doesn’t matter what we’ll pick.

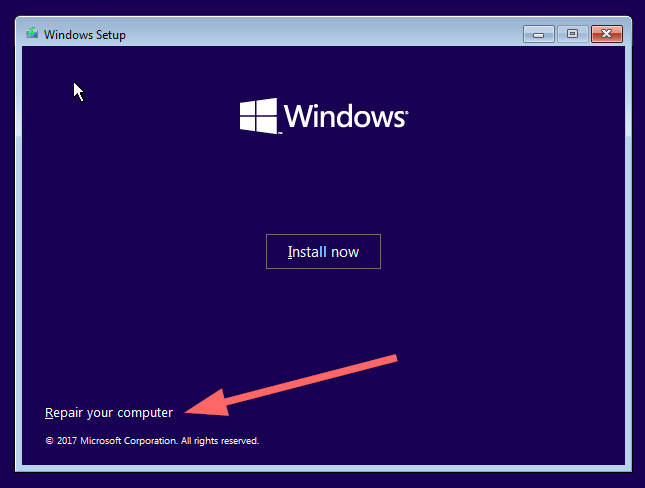
On the following windows, click on “Repair your computer.”

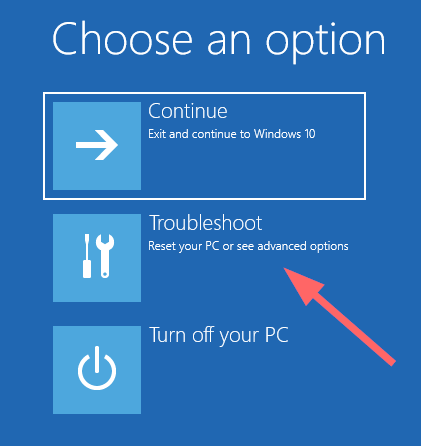
Then we want the Troubleshoot option.

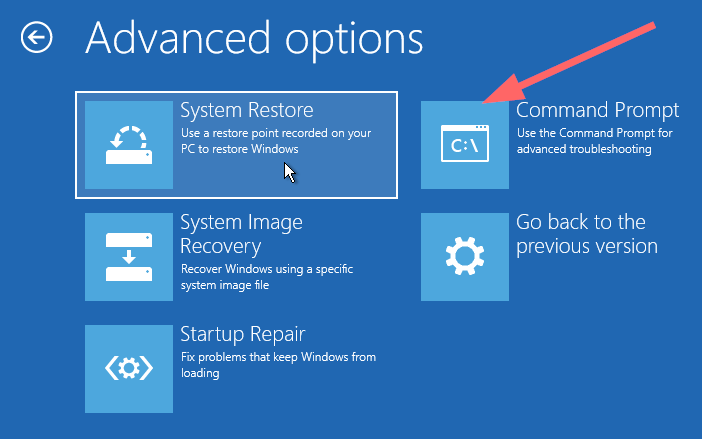
We open a Command Prompt.

Then, depending on which drive we have Windows installed, we will type the following.
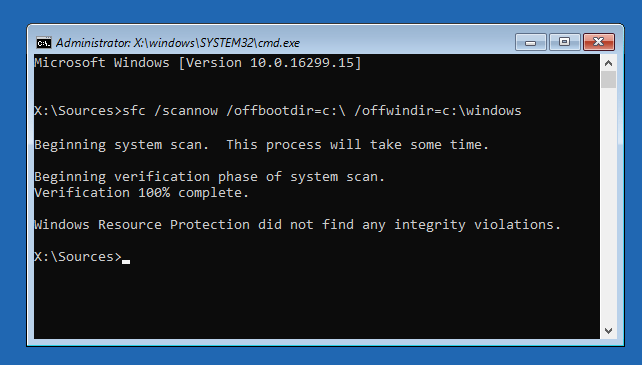
sfc /scannow /offbootdir=DRIVE_LETTER:\ /offwindir=DRIVE_LETTER:\windows
Naturally, we replace the “DRIVE_LETTER” part with our own drive. In our case, it was C.
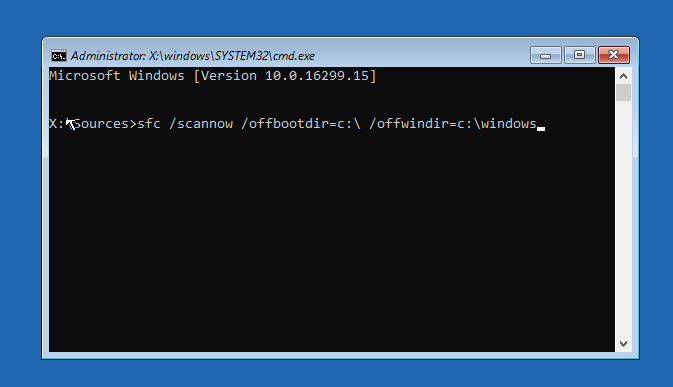

The installation will start searching for errors and corrupted files that prevent Windows from booting. If it finds errors, we should re-run the scan by pressing the up arrow on our keyboard.
When we reach the point that the command finds no integrity violations, we can close the command prompt.

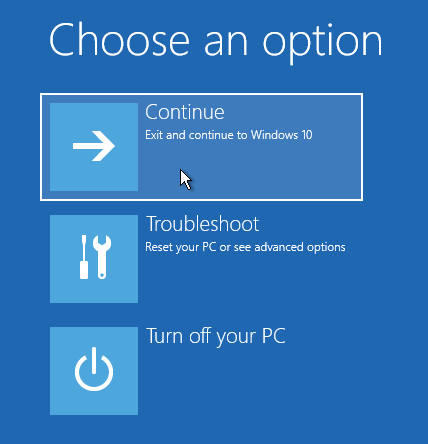
Finally, we press Continue to boot into Windows.

We should be able to boot into our desktop with these steps, and probably our issues are gone. If we want to refresh our installation and not only repair Windows files, we can reset or start fresh with the steps described above.
How to repair Windows 8 and 8.1
Windows 8 and 8.1 are similar to Windows 10, and thus they have both the Refresh and Reset options as well.
However, they are slightly different from what they offer, and we will see our options in detail below.
Reset
The Reset option in Windows 8/8.1 doesn’t offer to keep our files or apps. It will remove everything and reset the PC to its initial stage. It will also remove all the settings.
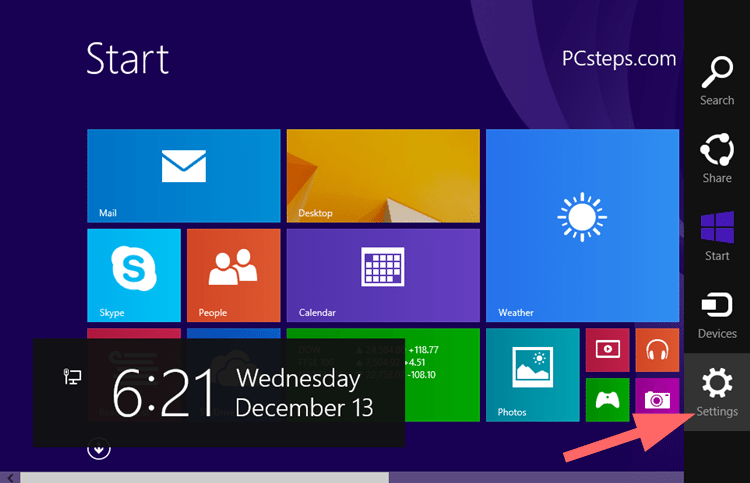
To find Reset, we go to Start and swipe our mouse to the right, and tap “Settings.”

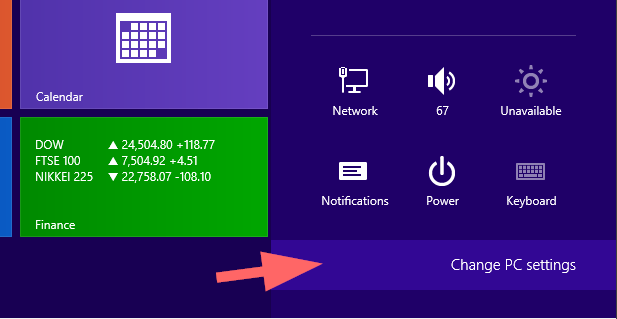
We go to “Change PC settings” on the right corner.

After that, we choose “Update and recovery.”
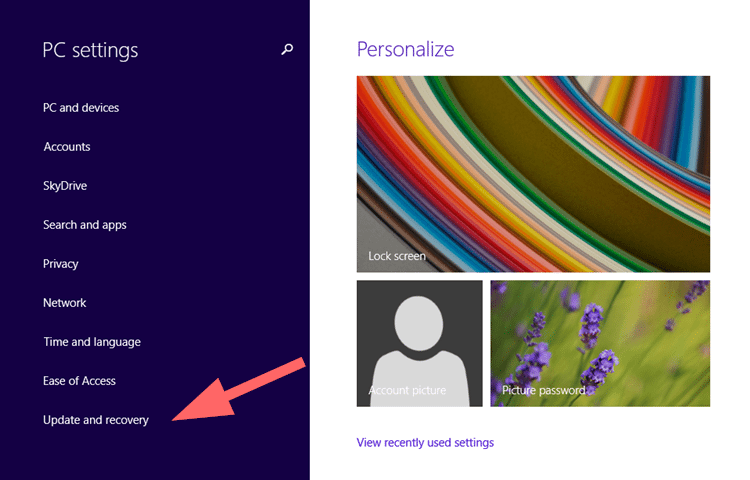

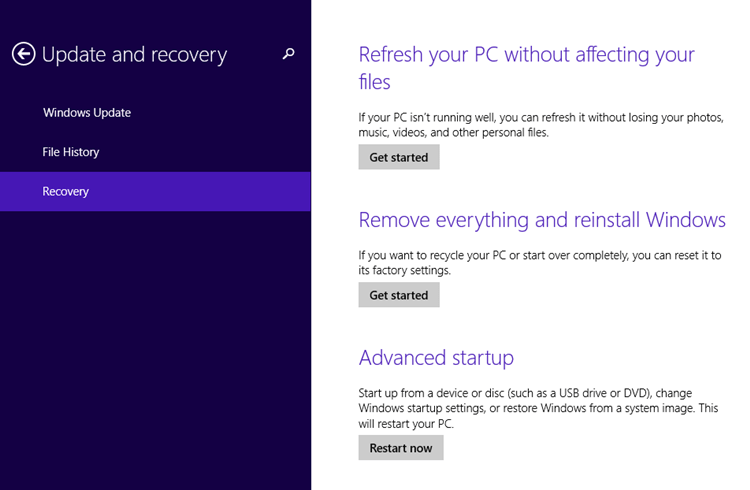
On the Recovery panel, the Reset option is the second one, labeled as “Remove everything and reinstall Windows.” To open it, we click on “Get started.”


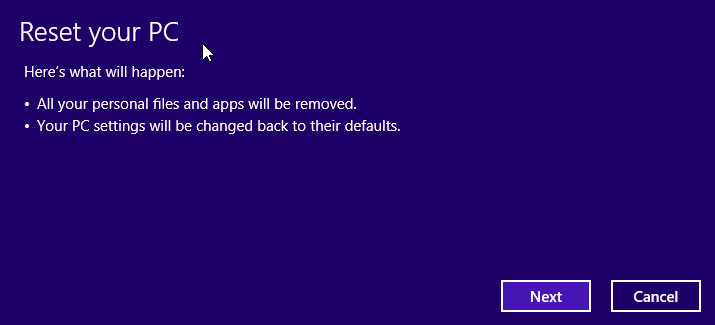
On the first screen, we get to see what Reset can do. We can just press Next.

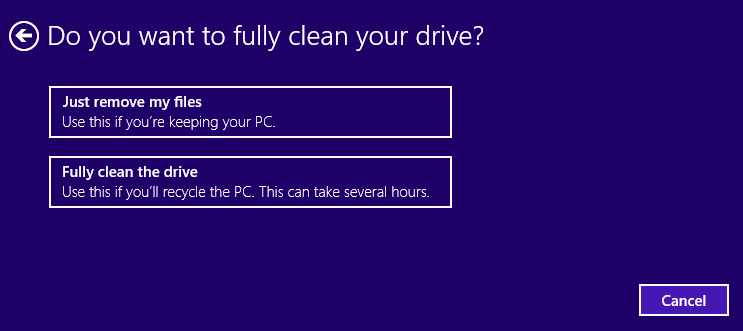
Here, our only options are to either just remove the files, or clean the drive thoroughly.
Most of the times, we want the first option. The full cleaning is worth it only when we are selling or recycling the PC, and thus we want to eradicate any chance that a third person will recover our data.

If we are ready, we press Reset.
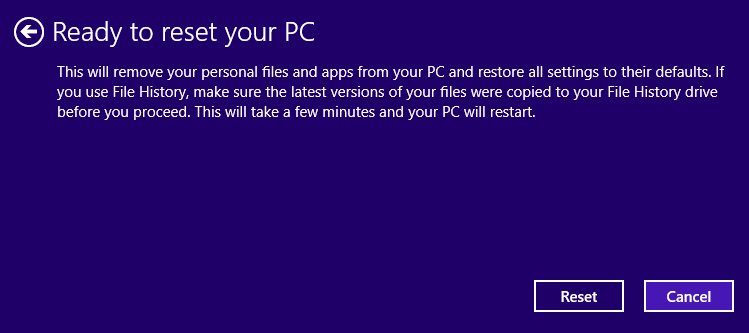

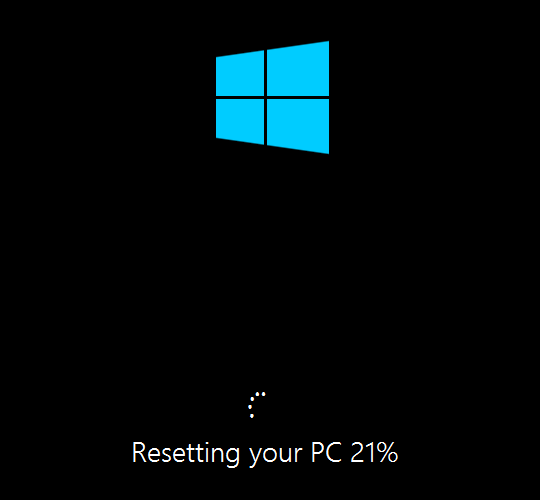
All we have to do is wait for it to finish.

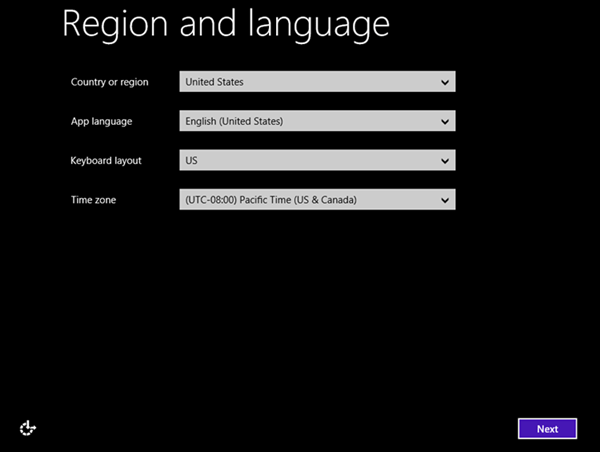
Then we will need to pick our region and language settings, as well as set everything from the beginning. It’s a clean installation of Windows.

Refresh
The Refresh option requires the installation media in Windows 8/8.1, whereas in Windows 10 the latest version is downloaded from the internet. Furthermore, we will find it in Settings, instead of Windows Defender.
With Refresh, our files and personalization settings will remain the same. However, the PC settings will revert to Windows default.
As for the apps, Refresh will keep all the Store apps we have, but it will remove the desktop programs.
To access it, go to the Recovery panel on Settings, as described above on Reset. From there, choose the first “Get started” option, that will “Refresh your PC without affecting your files.”


Microsoft informs us of what we lose and what we keep.
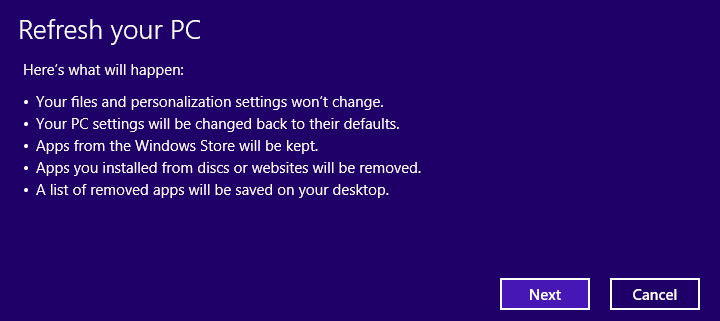

If we are ready, we can click the Refresh button.


From here on, the procedure is automated.
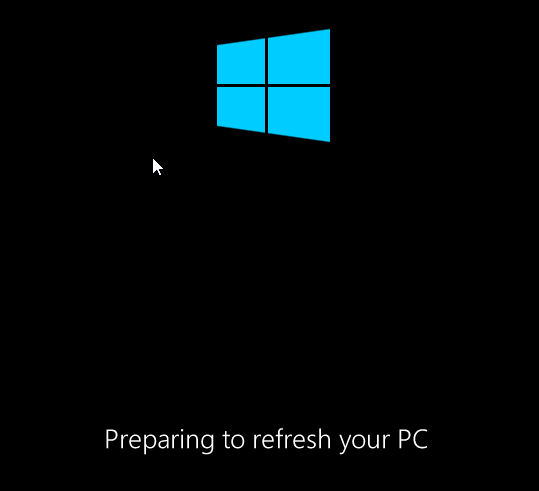

It will take some time, but eventually, our Windows 8/8.1 will be back and running and indeed refreshed.
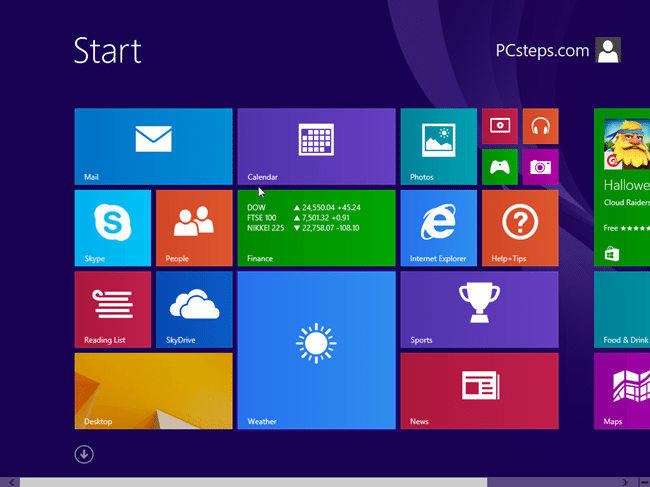

How to repair Windows 8/8.1 with reinstallation
If we want to keep everything we have, such as data, apps, and programs, we can repair Windows 8 by reinstalling the OS.
We will need the Windows 8/8.1 disk or USB that matches our version and architecture (64-bit or 32-bit). We can always download the Windows 8.1 ISO from Microsoft. Furthermore, we’ll need our Windows product key.
After we inserted the disk or USB to our computer, we run the setup file.


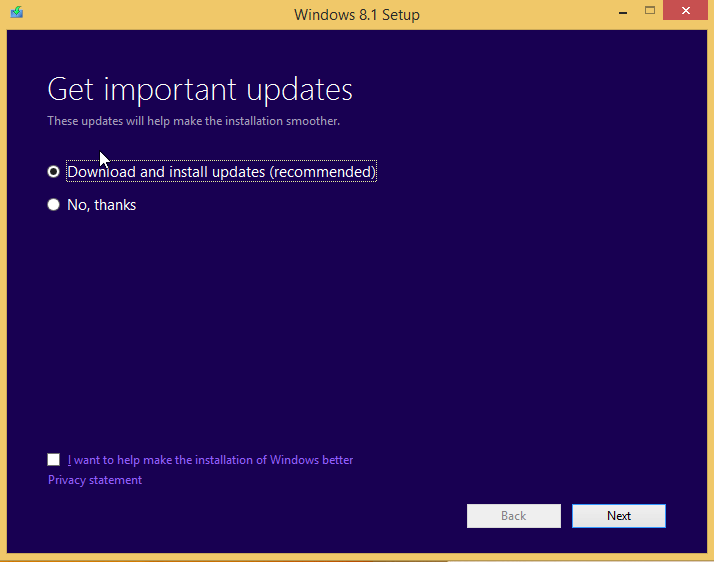
We can choose to download any available updates or skip this part for later.

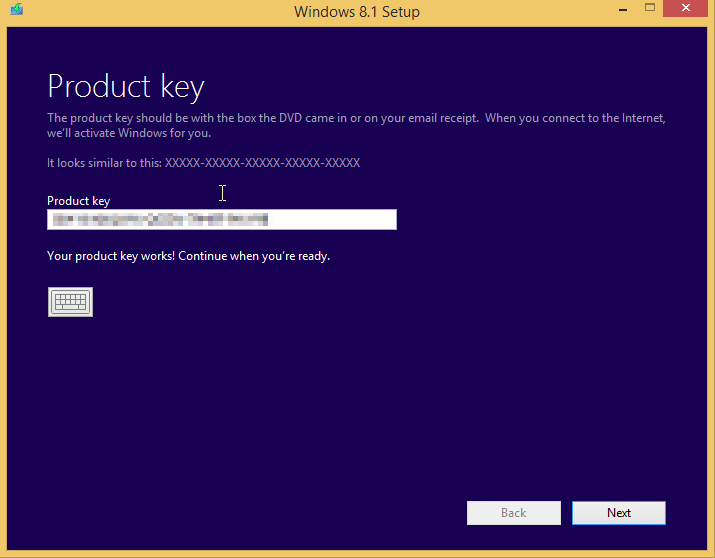
That’s the part that we enter our product key. If it is legit, we are allowed to press Next.

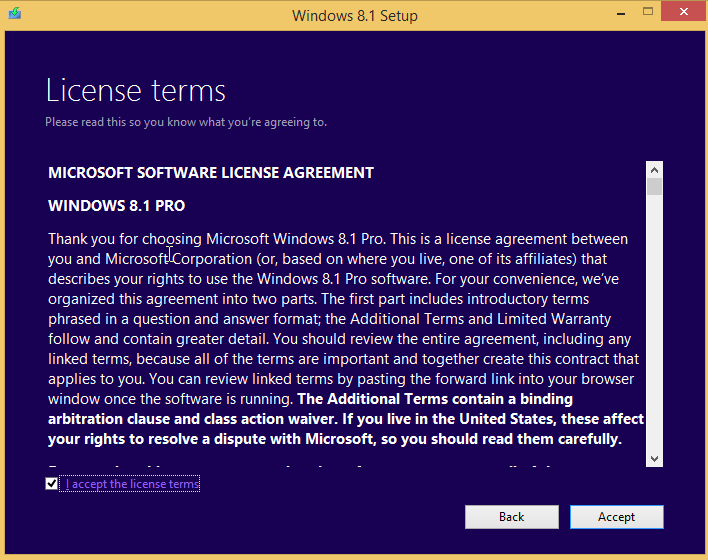
Then, we accept Microsoft’s EULA.

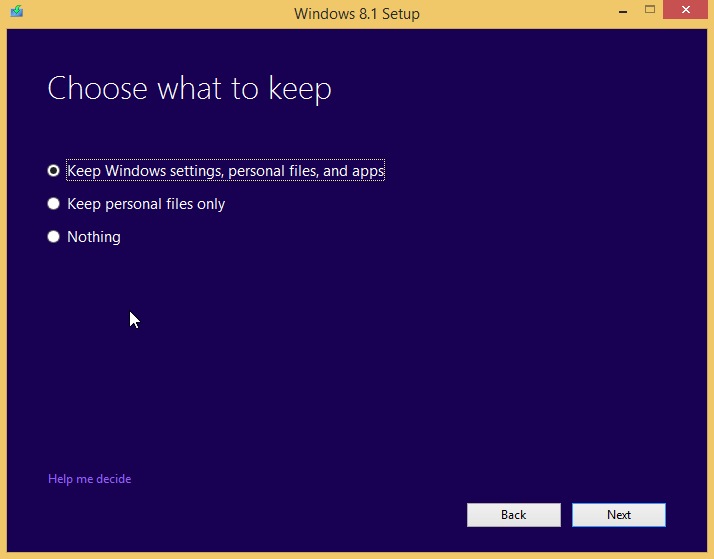
Here’s the part we get to choose what to keep. We can save all our files, apps, and Windows settings. We can also keep only our files and remove apps and settings, or remove everything and start fresh.

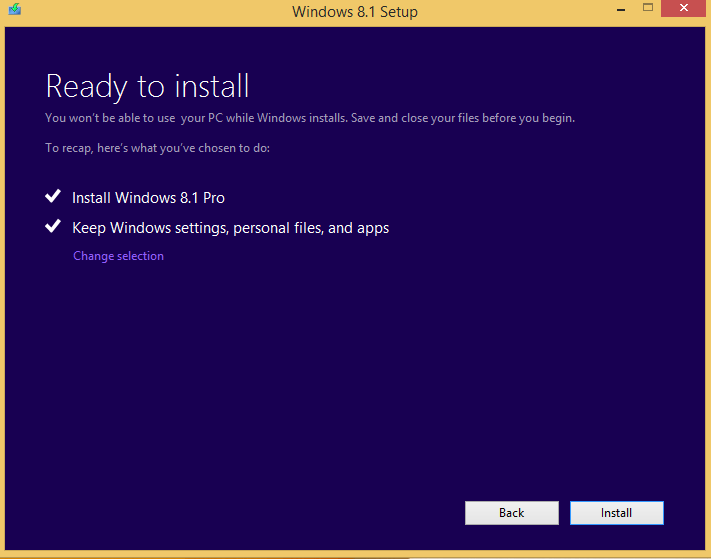
A final check that everything is in place before we hit “Install”...

...and the process begins.
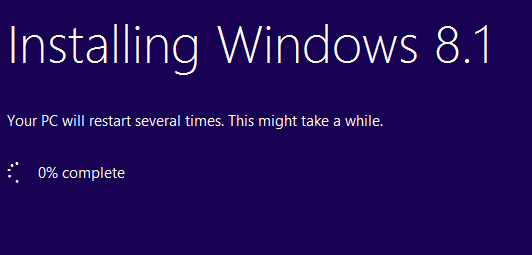

This might take a while, but once done, we will be able to login back to our PC after we set a few Windows settings.
Repair Windows 8/8.1 that doesn’t boot
If we have problems accessing the desktop, and we can’t use any of the methods above, we have to repair Windows with the installation disk or USB.
The steps are the same as Windows 10, and you will find them here.
How to repair Windows 7
This time, we don’t have any Reset or Refresh feature. If we want to repair Windows 7, we have to use a bootable USB or DVD with the version currently installed on our computer. For example, if we have Windows 7 Professional, we need the same DVD/USB.
We should also make sure that we kept our Windows product key because we’ll need it to proceed.
First, insert the bootable DVD or USB, navigate to its file path and run the setup file.
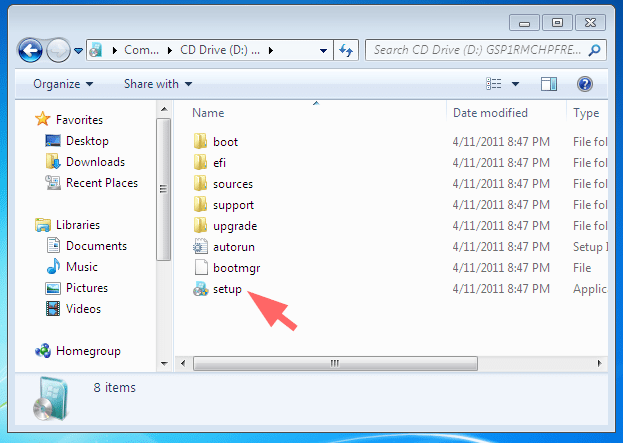

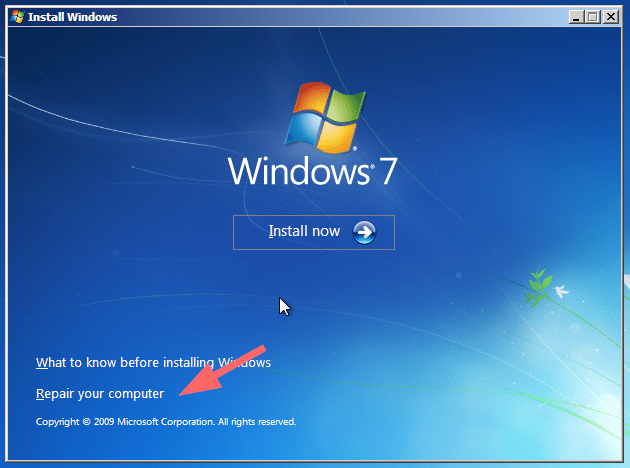
Press “Install now.”
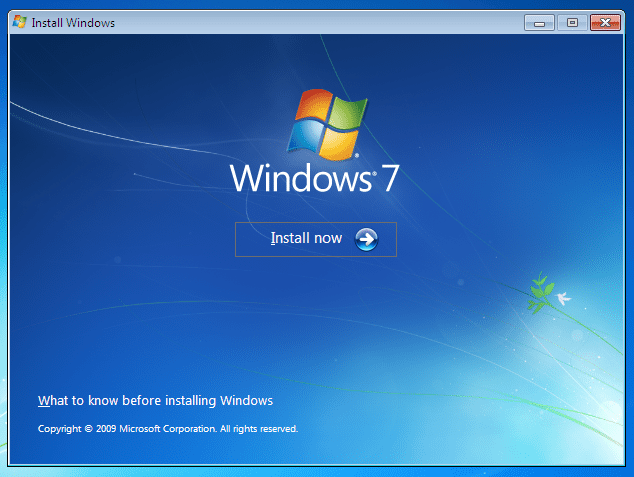

The setup will start, asking to install updates or not. We can choose to download the updates now or install them later. It’s always advised to install the updates now; otherwise, the installation might fail.
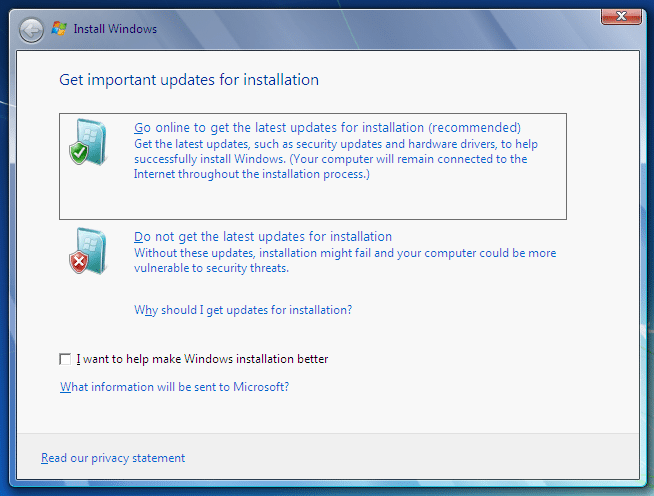

We accept Microsoft’s terms of use and press Next.
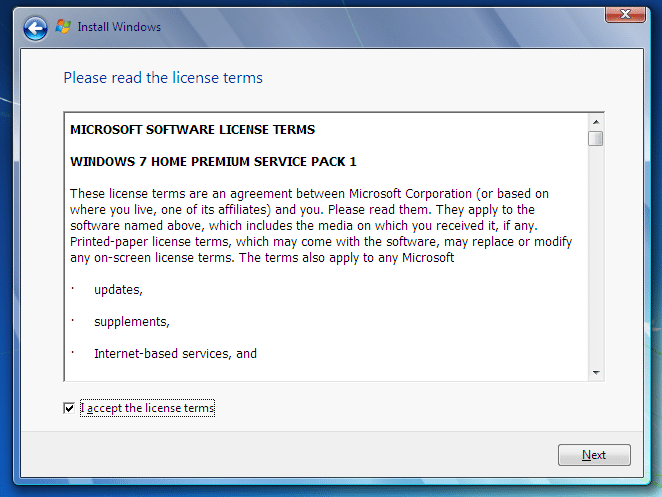

Now we choose the Upgrade option.
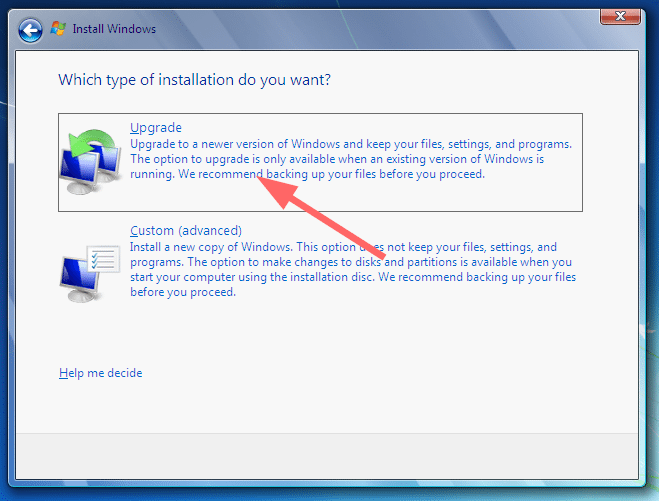

Our job here is done. The setup will finish the upgrading process that will repair Windows, retaining all our files, programs, and settings.
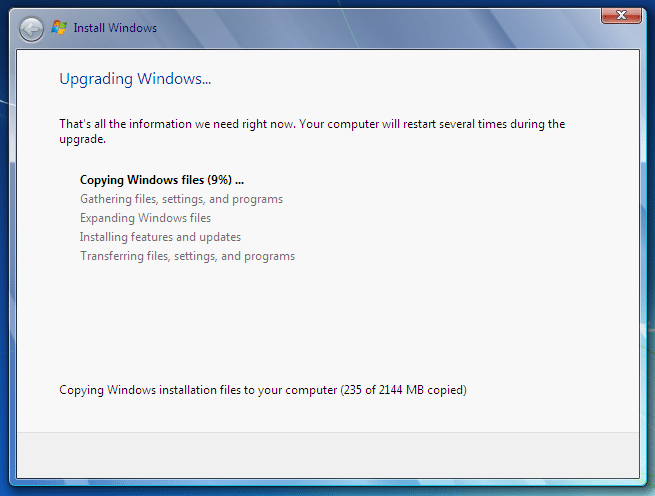

The only thing left to do is enter our Windows 7 product key, and we will back on our desktop.
Repair Windows 7 that doesn’t boot to desktop
In this case, we will need to boot from the bootable Windows 7 USB or DVD.


We press next on the language screen, and then we click on “Repair your computer.”

The setup will locate our system’s OS. Usually, we have just one operating system, but some of you may have multiple Windows installations. Make sure to note down the partition letter of the correct installation; the one you are trying to fix.
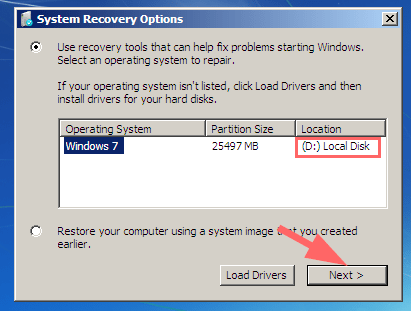

On the next screen, we will see a list of options. We want to choose the Command Prompt.
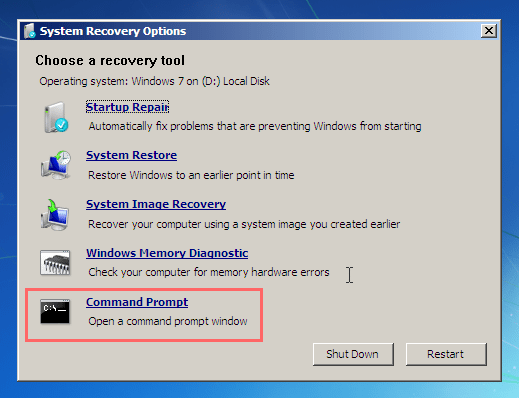

Now we just type the following, replacing DRIVE_LETTER with the partition we saw above:
sfc /scannow /offbootdir=DRIVE_LETTER:\ /offwindir=DRIVE_LETTER:\windows
The process will take some time to finish. When it ends, we will see all the repairs it did to our system.
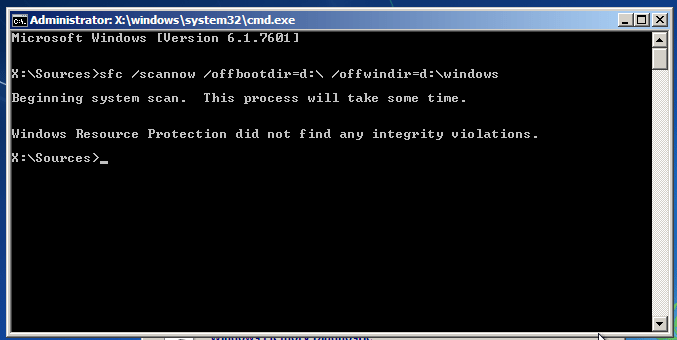

We want to run the same command multiple times until it reports that there are no integrity violations found.
Now we can close the command prompt and restart our computer; we should be able to boot into Windows. The issue might have been fixed, but we can also run a Reset, Refresh, or Repair as described above if we want to have a clean installation.
Is your Windows installation smooth?
These are the best methods to repair a Windows installation without having to format our drive. Did you face any problems trying to repair Windows?
If you need more help to make your Windows run like day one, feel free to leave a comment below.
Support PCsteps
Do you want to support PCsteps, so we can post high quality articles throughout the week?
You can like our Facebook page, share this post with your friends, and select our affiliate links for your purchases on Amazon.com or Newegg.
If you prefer your purchases from China, we are affiliated with the largest international e-shops:



Leave a Reply