Google Photos is Google’s program for online storage, sorting, and sharing of photos. For those who haven't heard of Google Photos before or haven't used it extensively, we will thoroughly analyze all of its features and subtleties in the following guide. Additionally, we will also present a few clever tricks that will help enhance the user's experience while using the service.
Unblock any international website, browse anonymously, and download movies and Mp3 with complete safety with CyberGhost, just for $2.75 per month:
About Google Photos
For many of us, mobile phones have become the best cameras we have. As such, we now take more photos and videos than ever before.
But what happens when we want to save all these data?

Google's solution to this problem is Google Photos. Google Photos might look like an average online store for our photos and videos, but there's more to it than that.
We can save our videos and photos, organize them, even group them, and search them. We can also automatically create several GIFs (animated images) from our existing collection.

But let's look at what Google's service can do for us.
Installing Backup and Sync (Windows 7+)
By installing Backup and Sync, we can easily manage the files that we want to upload to Google Photos. Installation is straightforward, and it only takes three steps.
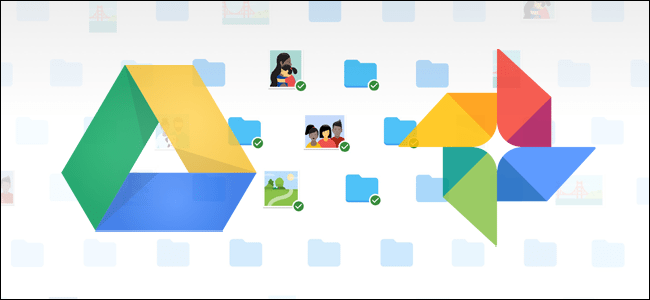
We may also download the Backup and Sync feature from Google's official website.
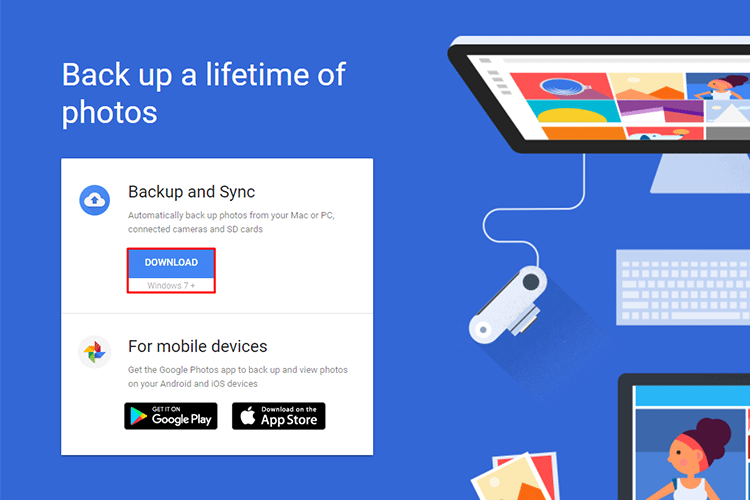
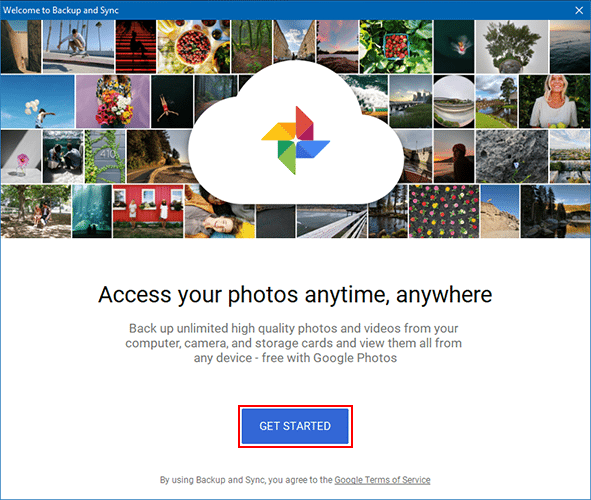
After downloading the executable file, we open it by double-clicking on it. To continue, press "Get Started" at the bottom of the pop-up window.
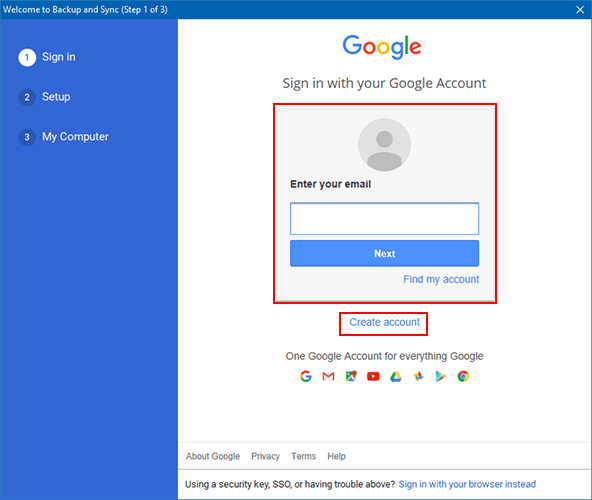
For the first installation step, we'll need to log in to our Gmail account. In case we don't already have one, we can create a new account by clicking the relevant link.
For more ways that will further enhance your productivity using Gmail, visit our official guide.
Once we log in, we select which files we want to back up. The first option is to back up image and video files, while the second option allows us to back up all available file types.
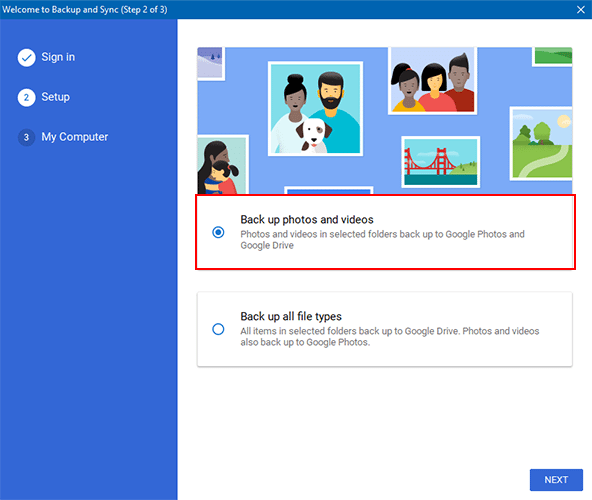
With the second option, photo and video files will be saved in Google Photos, while the other files will be stored in Google Drive.
During the last step of the installation, we are asked to choose the preferred download quality and the folders we want to keep backed up.
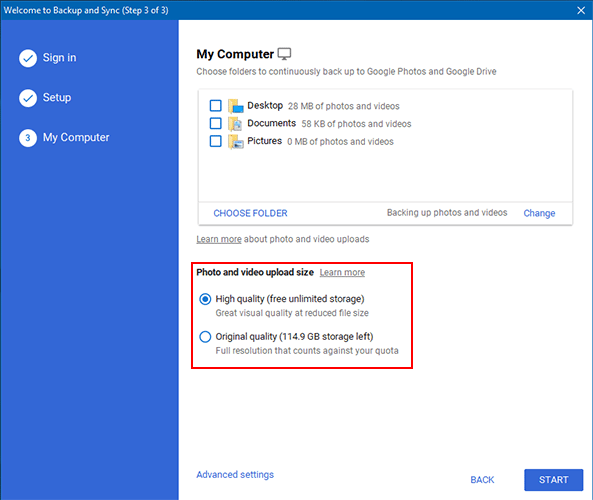
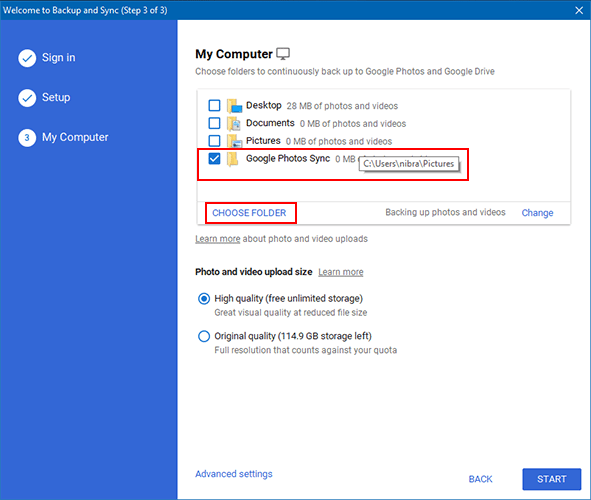
To select the folders we want to sync with Google Photos, click in the folder selection box.
If the folders we want to synchronize do not already exist in the box, press "Choose Folder," and from there, select the desired folder.
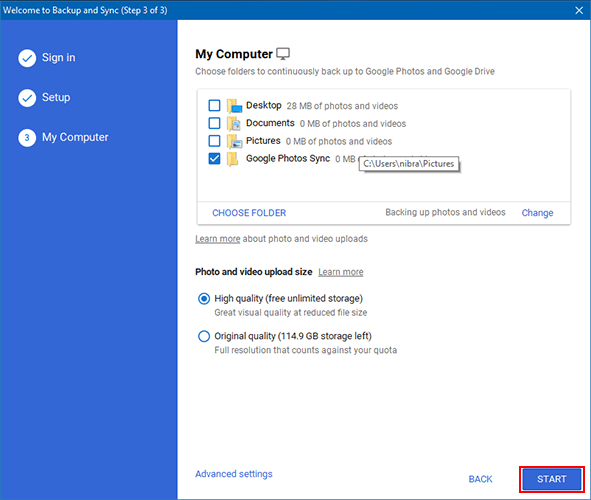
After selecting the upload quality and the folders we want to sync, click on "Start" to complete the installation of Backup and Sync.
Upload quality and image/video quality
Concerning the upload quality, we get two options.
The first option allows us to store images and videos in high quality with reduced size. The "High Quality" upload offers us unlimited storage space, as opposed to the second option.
The "Original" upload quality allows us to keep backups by uploading the original file size but restricting storage to 15 Gigabytes.

With "High Quality," our photos and videos are compressed to have a smaller file size. In most cases, the reduction in size achieved reaches up to 95%!
Therefore, it is reasonable to ask about the impact on image quality. Thanks to Google's smart compression algorithms, the difference in image quality is minuscule.
Below are two 13 MegaPixels original size photos
The original ...

The compressed...

The original zoomed by 100%...

The compressed...

For images, a resolution higher than 16 MegaPixels will be reduced to 16 MegaPixels, while videos with a resolution larger than 1080p will get downgraded to 1080p (Full High Definition) video.
If we want to upload photos or videos to their original size and need more storage space than the 15 Gigabytes offered, we can expand it according to our needs.
Google offers expansion packages of many sizes. Packages start at 100 Gigabytes and reach up to 30 Terabytes! We can see expansion packs in detail.
You should note that storage is used not only by Google Photos, but by other Google services such as Gmail and Google Drive as well.
Google Photos tips and tricks
Now let us see some additional features offered by Google Photos, and why it is considered one of the best services for image and video synchronization.
Searching
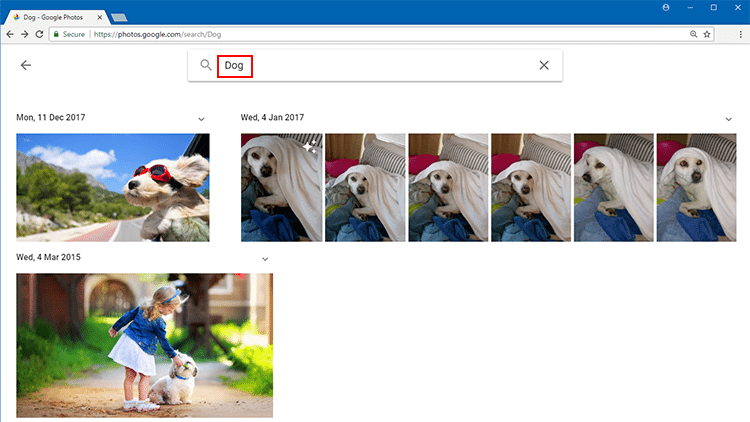
Searching for Google Photos looks like something out of this world, since we can search for objects, people, or anything else we want in our collection from the search box!
For example, we can type the word “dog” in the search box to look at those photos of our collection containing a dog.
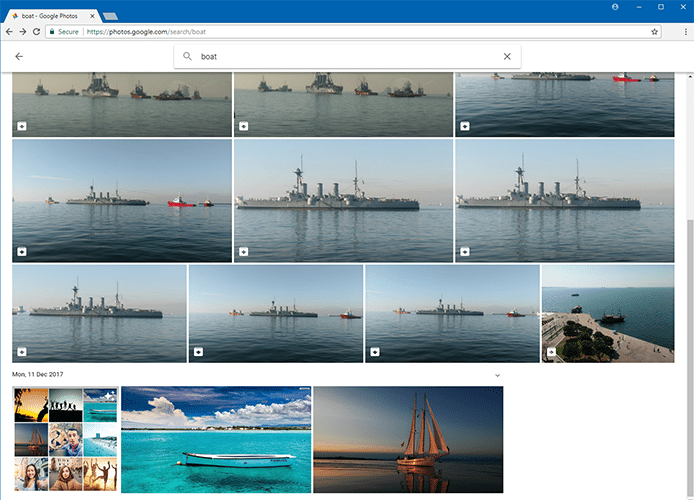
Boat as a keyword…
Tree as a keyword…

By clicking on the search-box, circular thumbnails of people on our photos will appear.
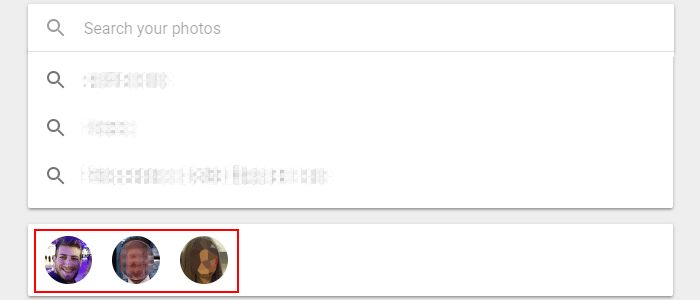
By clicking on a thumbnail, we can name the respective person.
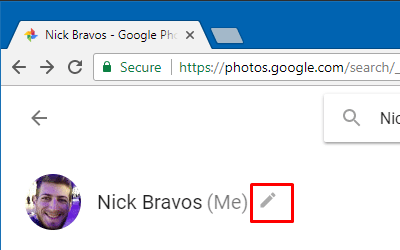
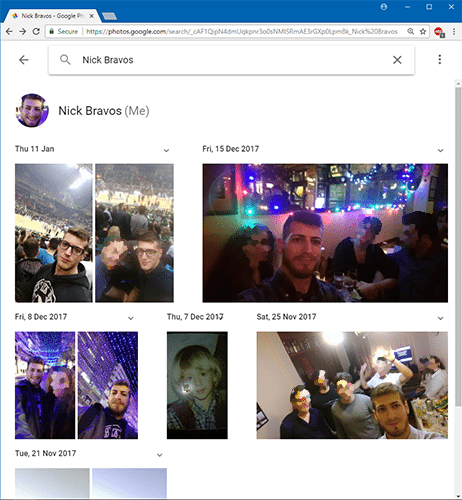
Then, we can search for people, with their names as the keyword.
Google Photos and Google Drive
If we have photos whose size and resolution we want to keep unchanged, Google Photos offers a solution.
We can choose to upload photos that we do not want to go through compression.
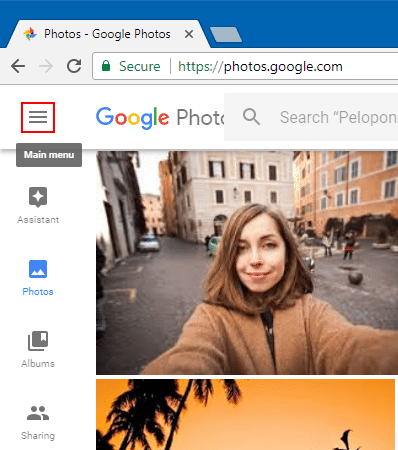
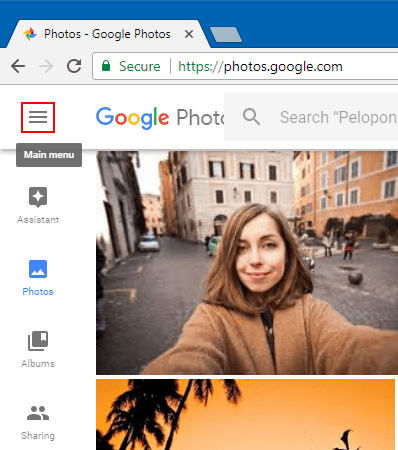
To do that, we open Google Photos, and then go to "Main Menu."
Head to "Settings."
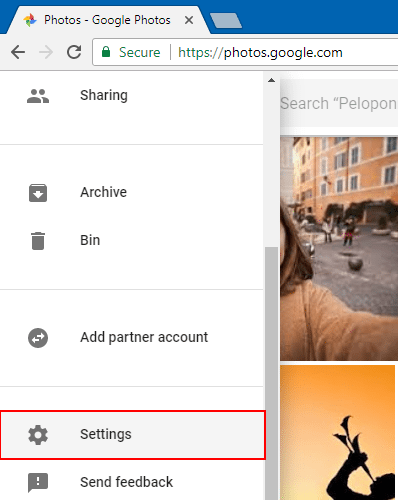
Finally, toggle the "Google Drive" option.
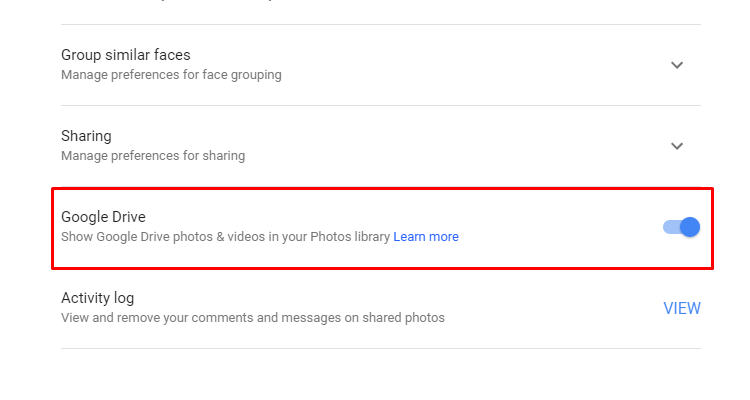
This is how Google Drive photos and videos will appear normally in our Google Photos album without being downgraded.
Keep in mind that photos stored on Google Drive consume our Google Drive space (even if they are at a resolution lower than 16 MegaPixels).
Sharing photos/albums
We can easily share one or more photos, albums, or videos. We select the item that we want to share, and click on the notification icon at the top right of our screen.
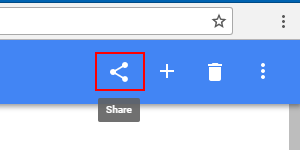
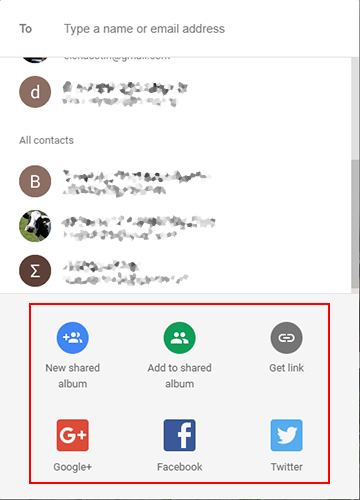
Then, we choose how we want to share it. Here, Google Photos gives us several options. We can share our records in the following ways:
- Create a new shared album
- Add the files to an existing shared album
- Share our files on Google+, Facebook, or Twitter
- Sharing our files via a link
- Sharing our files with specific people through Google Contacts
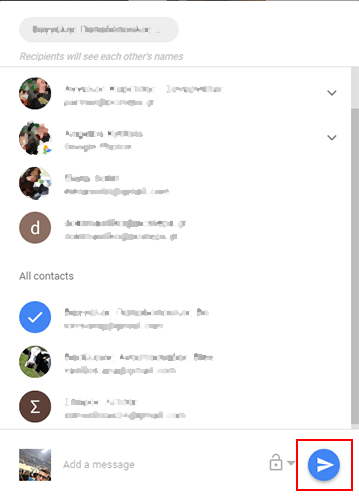
Finally, we have the option to choose whether people with whom we share our photos and videos can also add photos and videos to the album. To enable this option, click on the lock icon.

Once we are done with the settings and are ready to share our content with the selected people, press "Send."
How to hide the photo's location in a shared connection
If for some reason we do not want a photo's location to appear when sharing it with others, we can hide this information.
Go to Google Photos' Main Menu...

...and then click on “Options.”
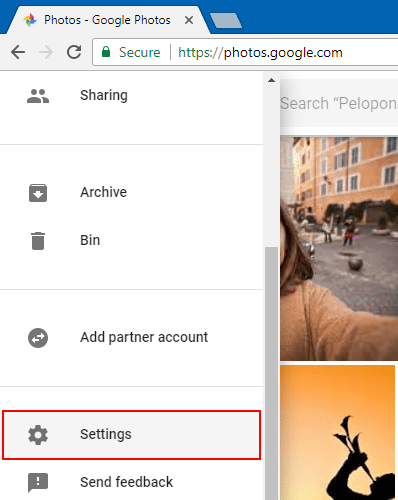
.
After that, select "Remove geo-location in shares via link" under the "Sharing" tab.
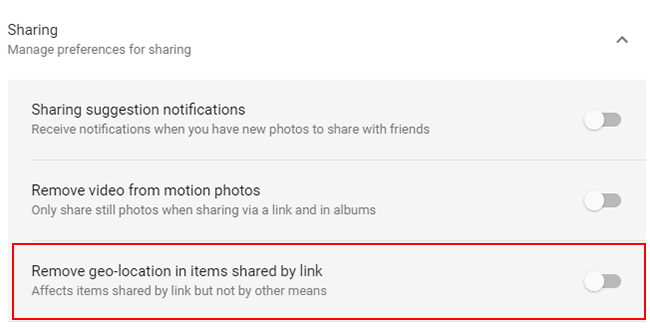
The photos we share via a link will not contain the geographic location where we shot them.
The geographic location of the photo still appears if we share it with someone via social networks such as Facebook.
The information is hidden only in the photos we share. This means our photos will contain the location's information and will appear normally on any searches that contain them.
Quick navigation and photo selection
Here, we go through specific navigation features, as well as the option to select certain items only.
Using the online application
To select multiple consecutive photos, select the checkmark icon at the top left of the first photo.

Then, holding down the Shift key and moving our arrow will show us which photos are about to be selected. By holding the Shift key, we click on the last picture in the sequence.
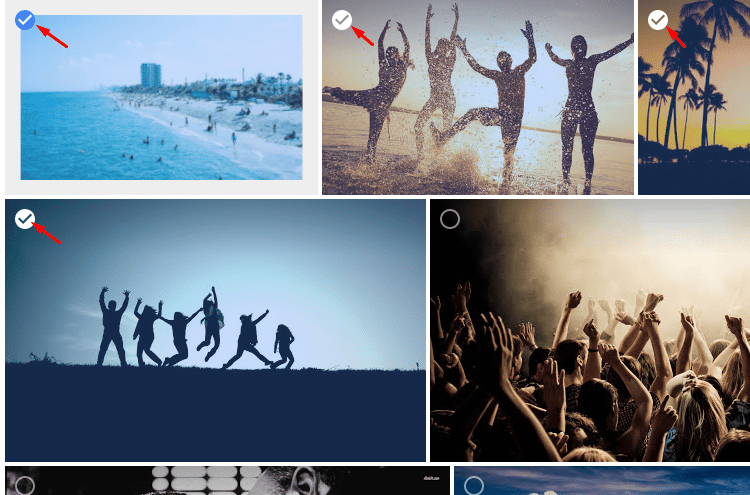
This way, all intermediate photos will automatically be selected.
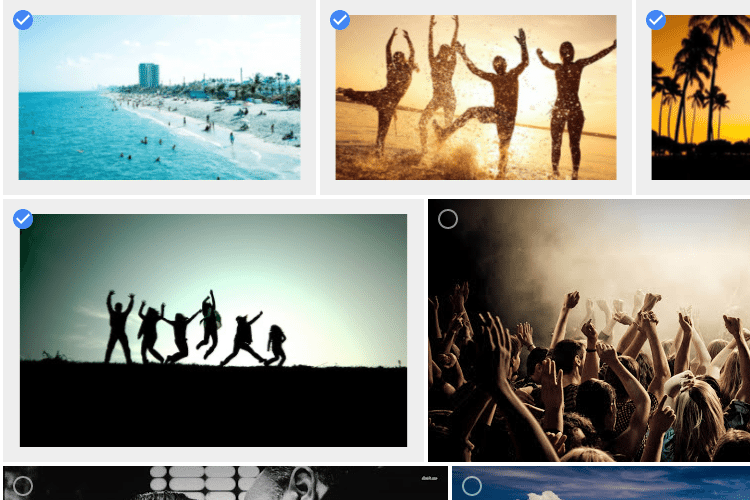
We can also select all the photos taken on a specific date. Dragging our arrow on that date will make a checkmark icon appear.
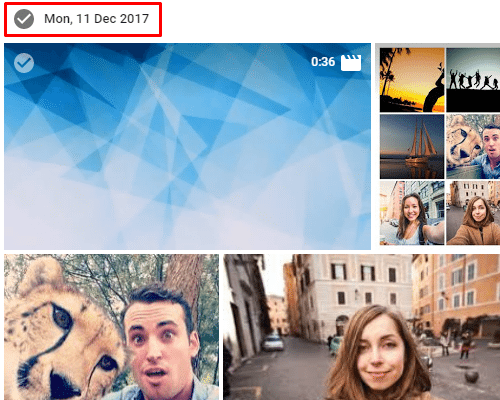
By selecting this icon, we mark all the photos that were shot on that date.
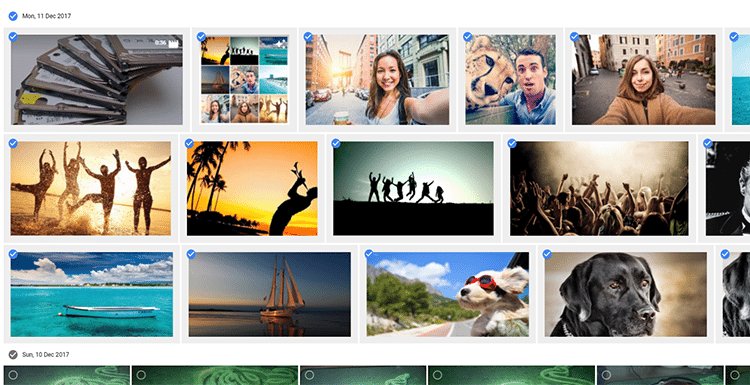
Lastly, it's worth mentioning that navigation is made easy thanks to our Timeline, which pops up if we move our cursor to the right side of our screen, or if we scroll down.
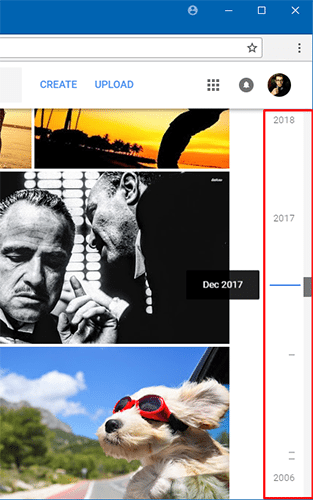
This way, we can easily find a photo without having to scroll through our entire collection.
Using smartphones
Google did not forget about mobile phone users when it comes to navigation. Pinching our fingers together will change the way our collection appears.
Starting with a single photo, we place our fingers on the screen and either pinch them together or spread them apart.

We can change the way images are shown to one per day, month, or even year.
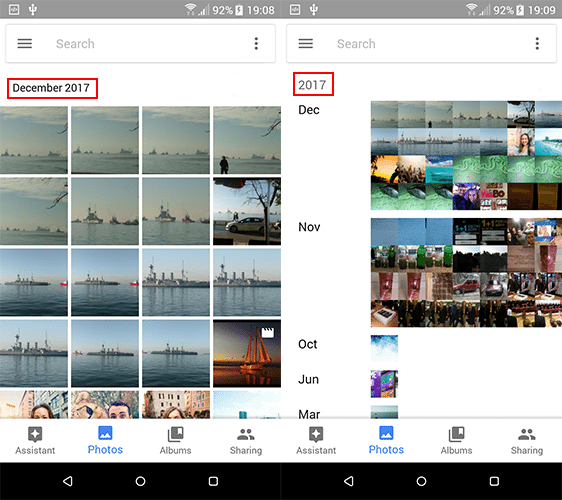
In conjunction with the above, we can also select all the photos taken on a specific day or month. We just change the way images are displayed to once per day or month by pinching our fingers together or spreading them apart...
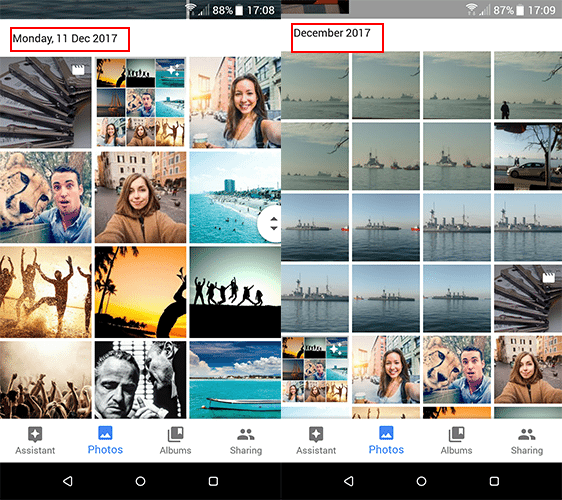
...and pressing on the day or month we want.
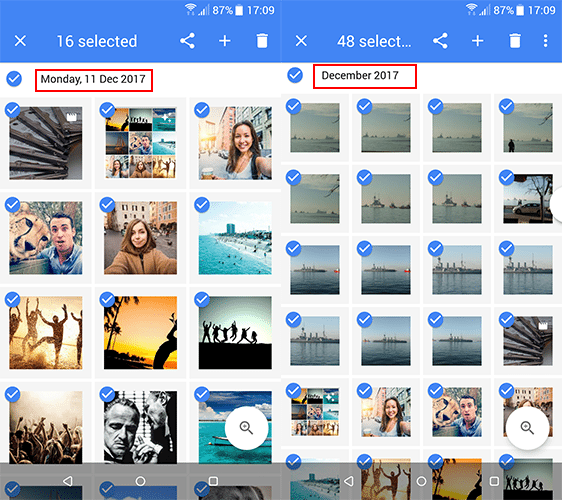
We can also use our mobile phone application to quickly select photos or videos with the Google Photos online app.
To select multiple consecutive photos, we select the first one we want by pressing and holding on the photo's thumbnail.
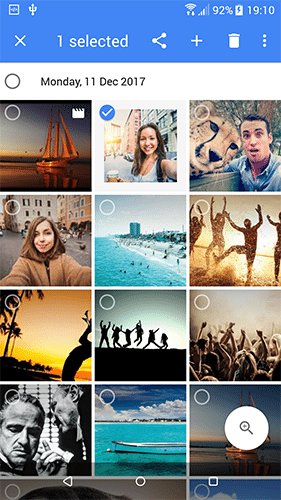
Then, we drag our finger all the way over to the last photo, and all the photos in-between are automatically selected.
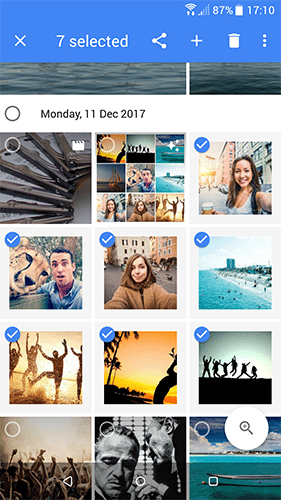
In this way, transferring, editing, collage making, and animation creation using multiple photos becomes easy.
Easy and fast digitization of our old photos
If we have old photos or posters, we can scan and digitize them with Google PhotoScan.
We can download the application from the Play Store.
After we open PhotoScan, we center the photo we want to digitize within the frame as shown below.
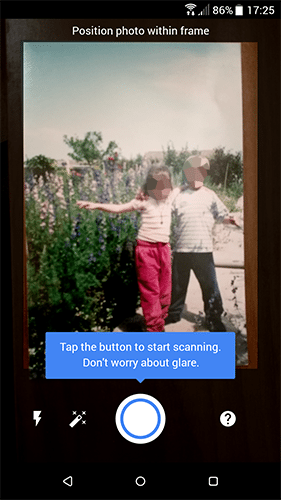
After taking a shot, a circular pointer appears in the middle of our screen, as well as four target dots. We pass the pointer over each target dot and wait for a few seconds until it disappears.
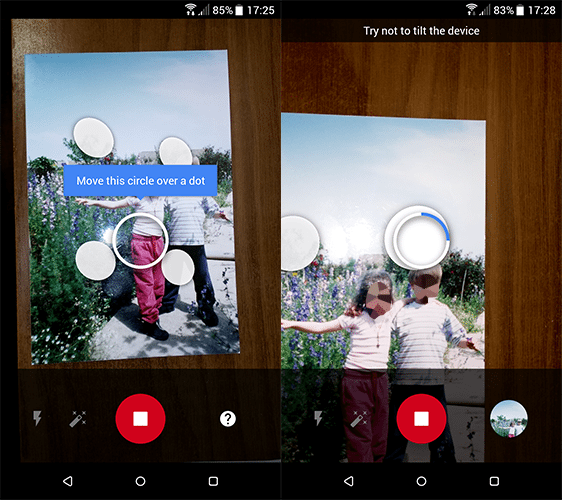
As soon as we finish with the last dot, our photo is digitized with no dull spots and no reflections.
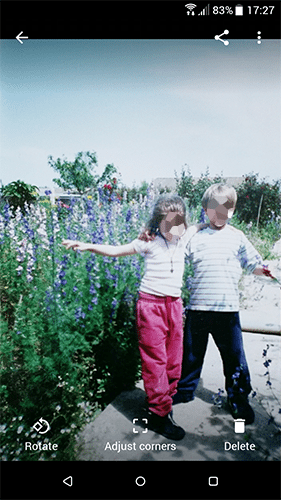
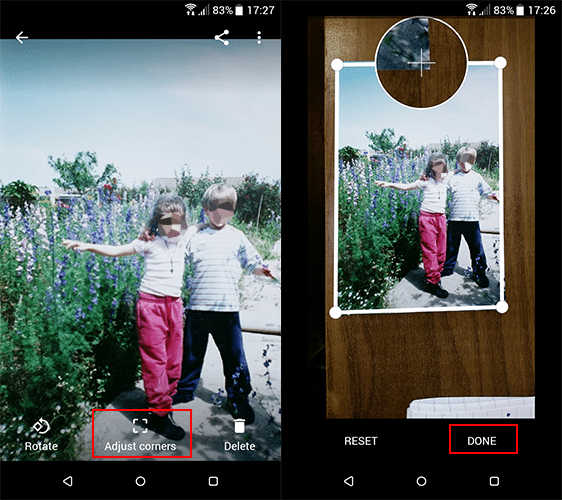
After the digitization, we can also rotate a photo and adjust the corners.
Saving storage space
To save space on our smartphone, Google Photos gives us the option to delete all the files we have backed up so far.
To do this, we select "Main Menu," and click on "Settings."
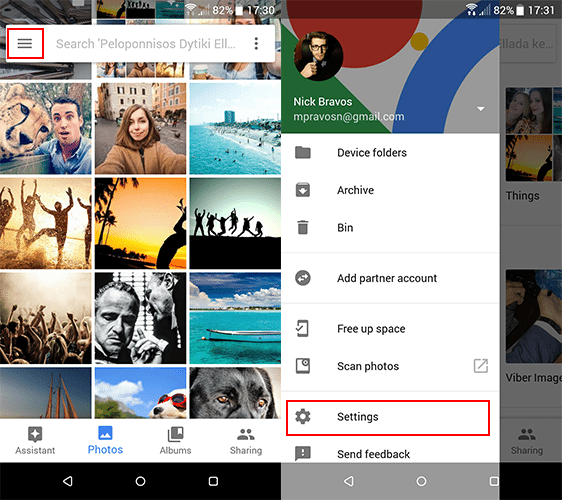
Then, we select "Free up device storage."
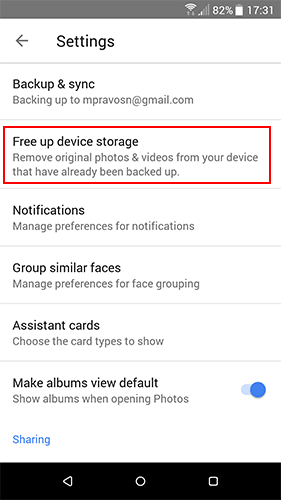
Caution! If we use this feature, the unique copies of our photos will be on the Google servers in the resolution in which they were saved on Google Photos.
If we want to keep our copies, or keep copies of photos in their original size and resolution, we should take care of that before using the "Free Space" option.
Backing up photos using WiFi
There are several ways to run out of mobile data. Backing up our photos when we are not connected to WiFi is one of them.
To disable backups via mobile data, go to "Main Menu," "Settings" ...
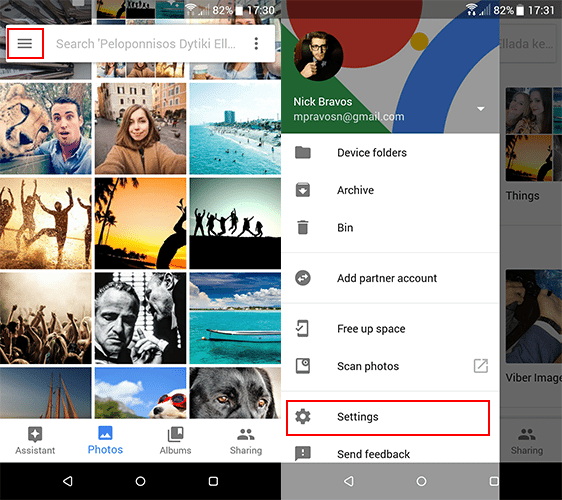
And then disable the "Photos" and "Videos" options underneath the
“Back up with mobile data” column.
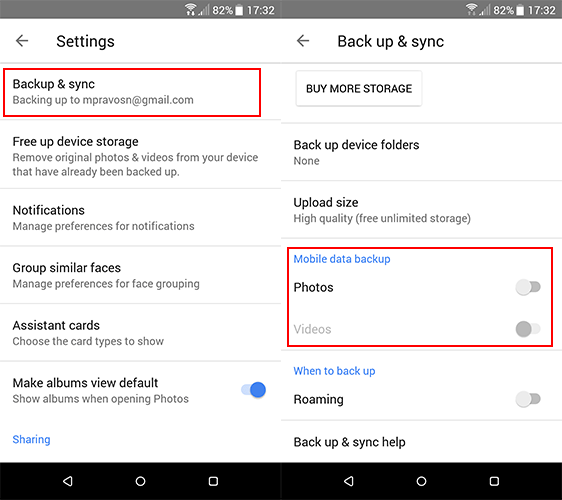
This way, our files will only be backed up when we connect through WiFi.
For more ways to save data, you can visit our detailed guide.
Recover deleted photos
The Google Photos trash bin resembles the Windows Recycle Bin and allows us to restore recently deleted files.
The following procedure is available in both the Google Photos online application and the mobile application.
In the online application, we can restore files as follows. First, we select "Main Menu" to display the options menu.

Then, we click on the “Bin” option.
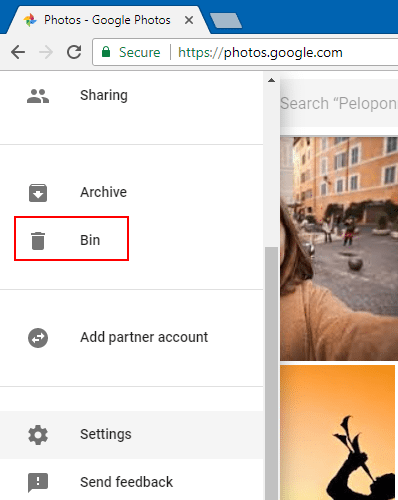
In the window that appears, select the items that we want to restore, and hit the restore icon at the top right of our screen.

In the mobile app, the process to access deleted files is the same. Once we go to the bin, we can select the files that we want and tap on the "restore" icon.
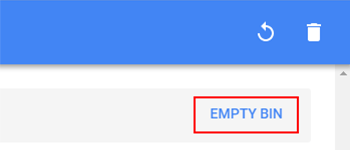
The items we send to the bin stay there for 60 days. At the end of the 60th day, the data gets permanently deleted.
We can choose to delete them earlier by clicking "Empty Bin" at the top right of our screen beneath the "restore" icon.
Archiving
All of us have taken a photo of a note, opening hours, our ID-card, or something we need to remember in general. There are even photos we want to keep but do not want to see often.
We can archive photos that we might need in the future, but do not want them to appear in our albums.
To archive one or more photos, select them and click on the "More Options" icon located at the top right of our screen.
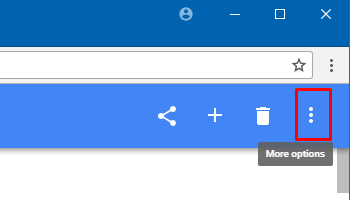
Then, we select "Archive."
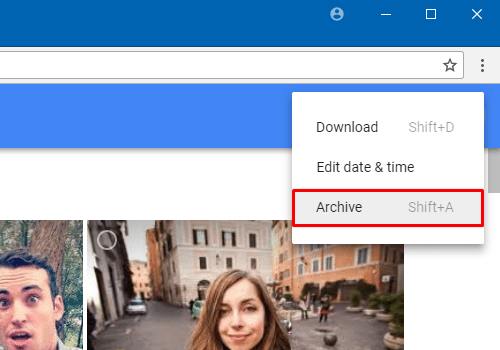
Another way of archiving photos is to press "Shift + A" after having selected them.
Archived photos will no longer appear in our albums. However, the photos we have archived will continue to show in any search results in our collection.
We can undo the archiving of one or more photos by virtually following the same steps. After opening the "Main Menu"...
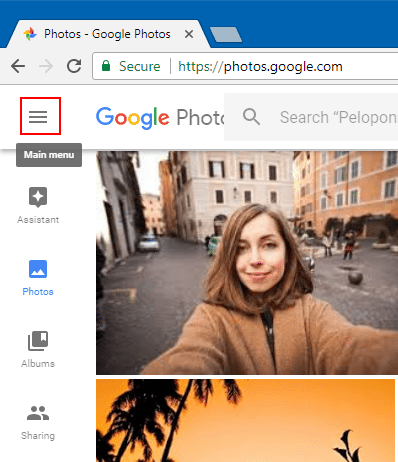
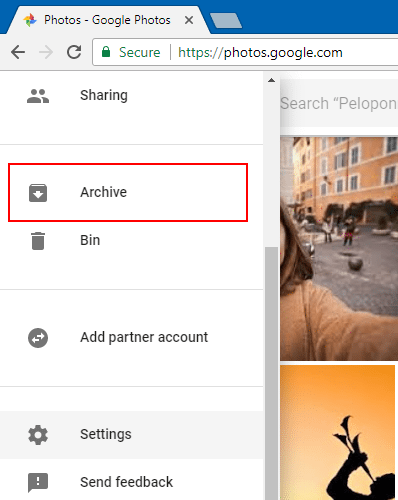
... we select “Archive.”
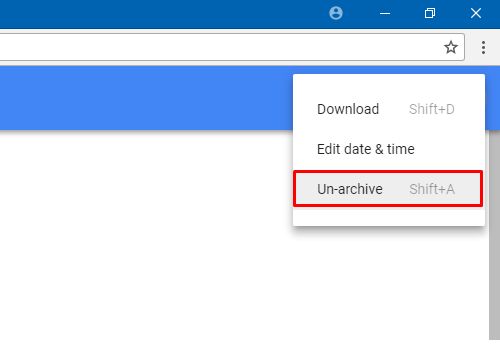
Then, select the photos that we want to un-archive, and either press "Shift + A" or the "More Options" icon.

The "Un-archive" option should be available.
Easily uploading videos on Youtube
We can upload videos to Youtube by selecting them from our Google Photos collection.
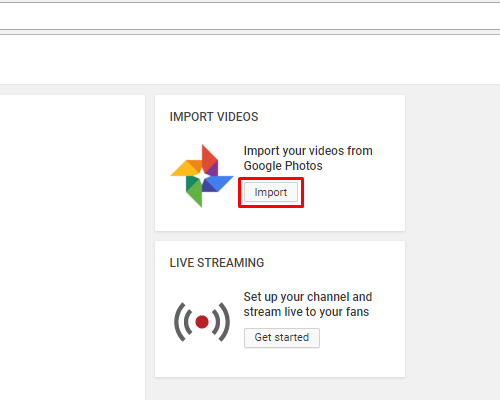
Simply sign in to your Youtube account and select "Upload" at the top right of our screen.

Then, click on "Import" as shown below.
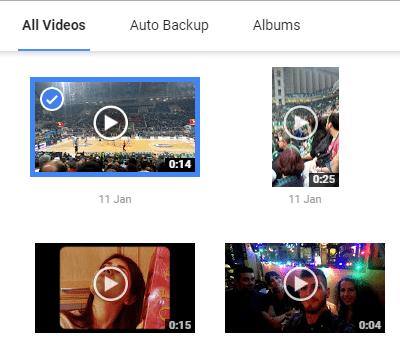
Finally, we select the video(s) we want to upload ...
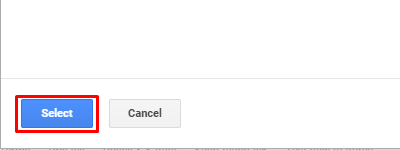
...and press "Select."
Changing the upload quality
Having chosen to store our files in their original size is something we might end up changing our minds about. In that case, we can set our files to be stored in high quality at any time.
All files that we have saved in their original size will be converted to files of reduced size from Google Photos, as explained in the upload quality and image/video quality section. Caution! This action is irreversible.
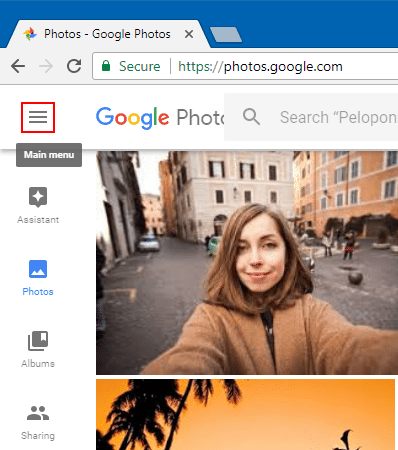
To change the way we have stored our photos in the online app, we open the "Main Menu"...
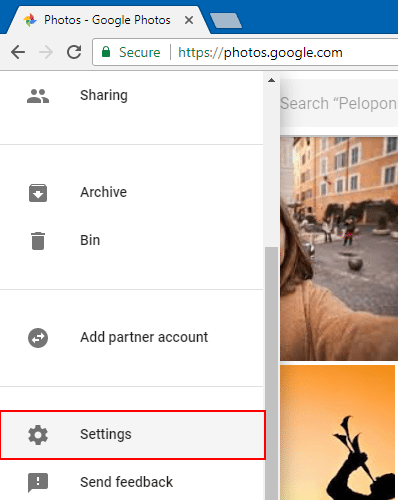
...and select “Settings.”
From there, we can change the quality of the upload.
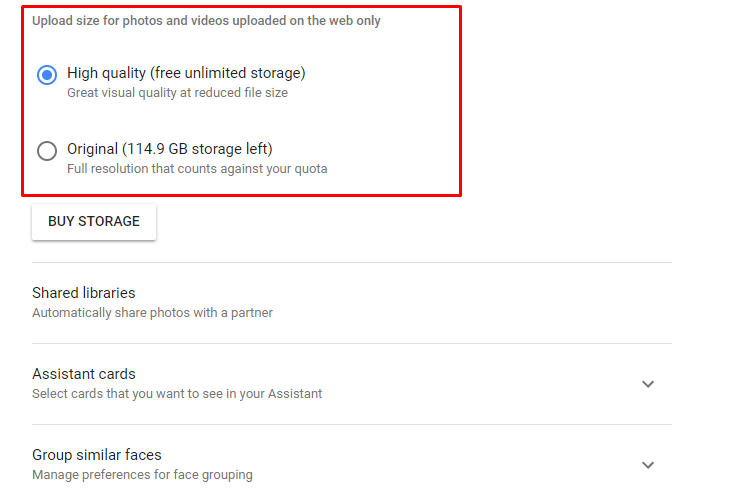
Photo processing
Google Photos comes with some basic image editing tools. Here, we thoroughly explain all the online features offered to the user regarding image editing.
Editing a single photo
To edit an image, we first click on the desired photo.
Once the photo we chose appears in full size, we will be able to see the options menu at the top of our screen. There, we select "Edit."
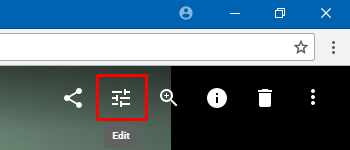
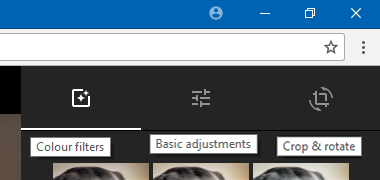
Now, the right side of our screen will show the tools menu.
There, we can find "Color Filters," "Basic Adjustments," as well as a tool to "Crop and Rotate" our photo.
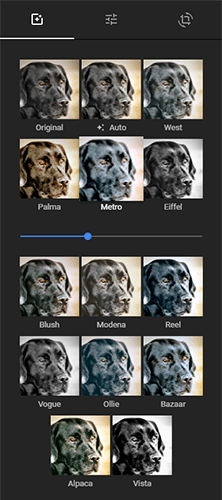
In the first tab, you will find a number of filters. Selecting each filter displays a bar which adjusts the filter's intensity.
On the Basic Adjustments tab, we will find three basic categories of adjustments: "Light," "Color," and "Pop."
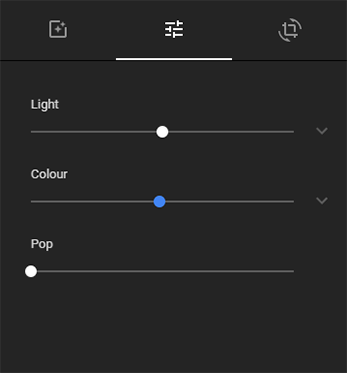
The first two settings, "Light" and "Color," consist of several components that we can see by clicking on the arrow to the right.
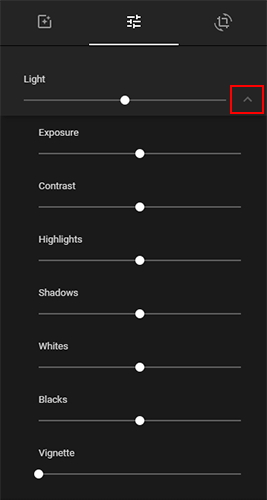
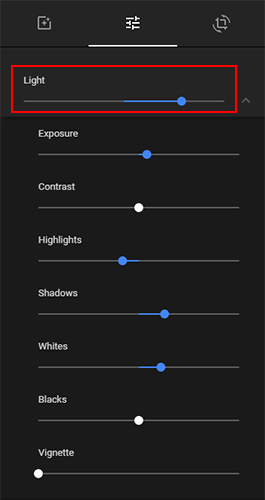
Otherwise, we can adjust the basic categories, and Google Photos will automatically take care of their components. Adjusting the "Light" bar, for example, changes all of the subcategories, too (Exposure, Contrast, etc.).
Finally, on the last tab, we will find a cropping tool, an option for the "Aspect Ratio" of the photo, and the "Rotation Tool."

In the first two tabs, the changes are applied dynamically, while in the last tab, for the changes to apply, we must click "Done."
Saving a copy of an original photo
Also, we have the option to automatically save a copy, in case we want to have both the original and the processed photo.
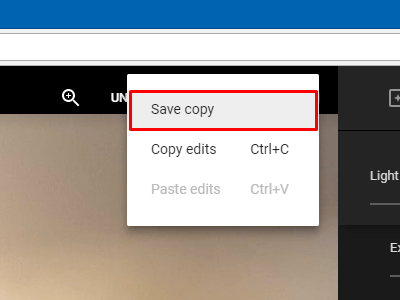
To save a copy of the original photo while on the editing menu (we will see the toolbar menu on the right side of our screen), select the "More Options" icon...
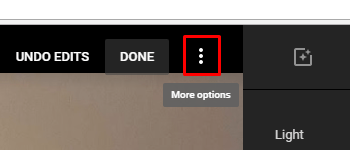
...and press “Save Copy.”
Editing multiple photos (web application)
Finally, Google gives us the choice to apply a series of changes to multiple photos.
To do this, we initially select one of the photos that we want the changes to apply to, and press "Edit."
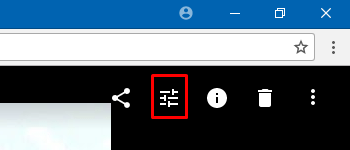
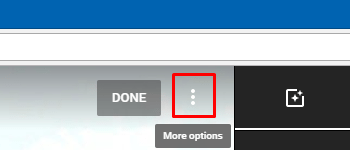
Then, we select the changes we want to make, and after we finish with them, we click on the "More Options" icon.
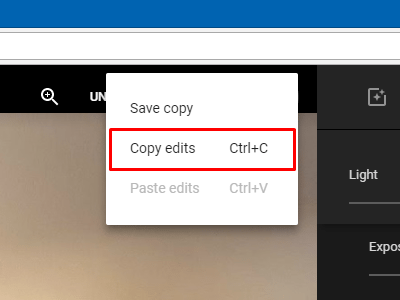
In the menu that appears, select "Copy Edits" or press Ctrl + C.
As soon as our changes are copied, we will be informed by a similar popup message at the bottom of our screen. Then, press "Done."
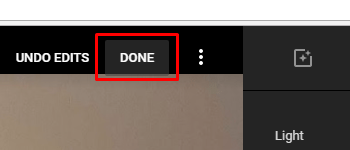
Now we're ready to apply the changes to the rest of the photos. Here, we should emphasize that changes must be applied to one photograph at a time.
All we have to do is select the photo we want to apply the predetermined changes to, and click "Edit."
Then, click on "More Options" and "Paste Edits," or press Ctrl + V.
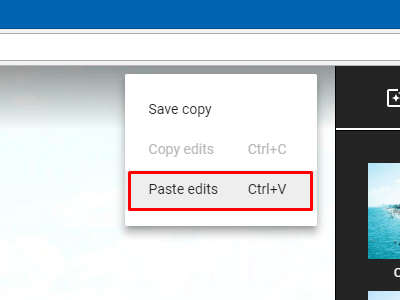
It is worth mentioning that only changes in options for the first two tabs in the tool menu can be applied this way. The third tab (dimension ratio, crop, rotation) is off limits as far as this feature is concerned.
Comparing an edited photo with the original (web application)
Holding down our left mouse click on top of the processed photo gives us the option to compare it with the original one.

So, at any time, we can see the changes that the original photo has undergone without even having to pause the process.
Editing cancelation
If we, at any point, decide that we no longer like the changes we have made to a photo so far, we have the option to undo them.
Selecting a processed photo and clicking on the "Edit" icon at the top right of our screen will present us with the "Undo Edits" option.
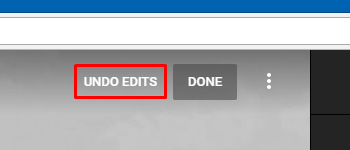
All the changes done on a given photo so far will be undone.
Finally, note that the online application and mobile app are synchronized. This means that we can undo processes that have been made by our mobile application from the online application, and vice versa.
Downloading all our photos from Google Photos
Google Photos undoubtedly is an excellent solution for backing up our photos and videos.
But what if we want to use our photos, keep them locally on a computer, or even change services?
There are several useful services like Flickr, Dropbox, and iCloud, which are just as good.
There are two ways to download the content from our Google Photos account. The first way is to select our photos from the app, click on "More Options"...
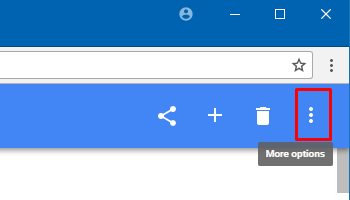
...and select "Download."
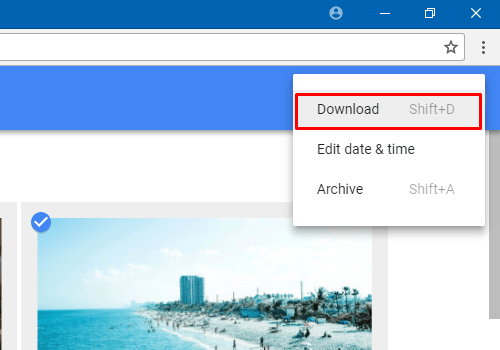
We can also download our selected photos by using Shift + D.
However, Google sets a limit of 500 photos per download. The figure looks great, but even for an average user, it is somewhat insignificant considering we're probably talking about years of memories and experiences. Chances are, we might need to repeat the process several times.
The only way to download all our photos is the Google Takeout service. From there, we can download all of our images stored in Google Photos and any other Google service.
After visiting Google's Takeout webpage, we press on the "Select None" option...
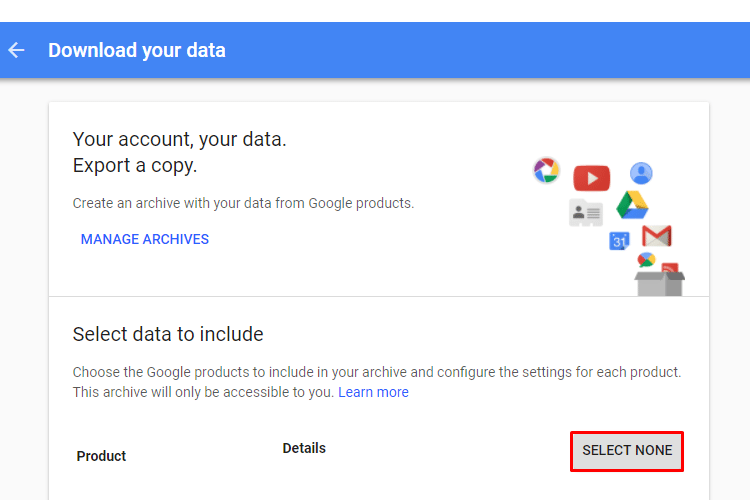
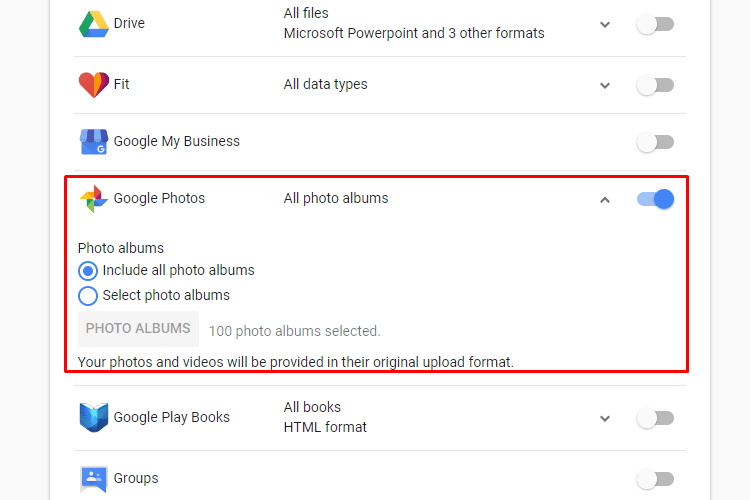
...and then only toggle Google Photos.
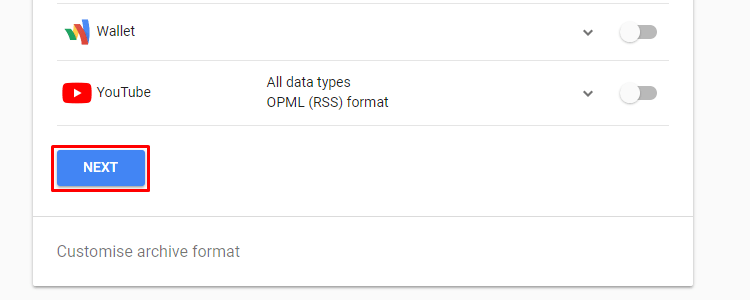
Then, we head to the end of the page and press "Next."
Now, we will find ourselves on the creation page of the file we are about to download. We select "Create File."
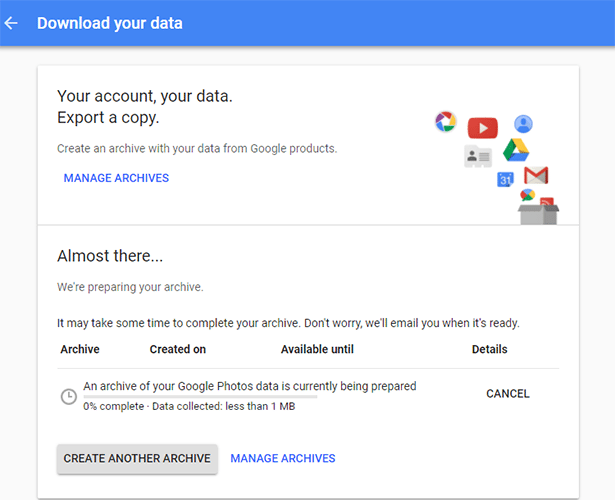
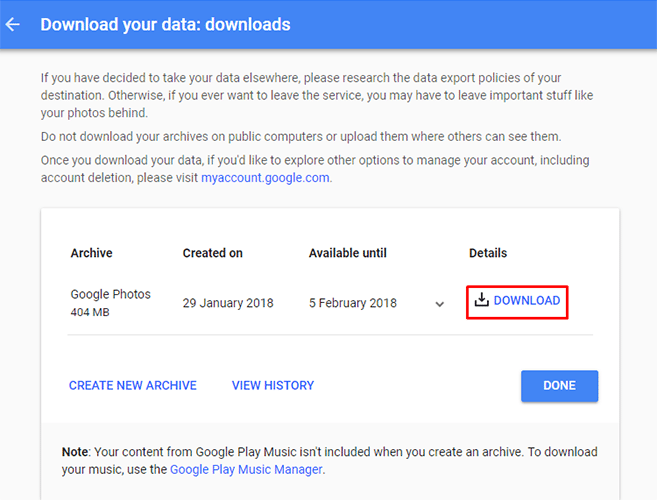
We wait until the process is completed, and then download, as shown below.
Google Photos Assistant
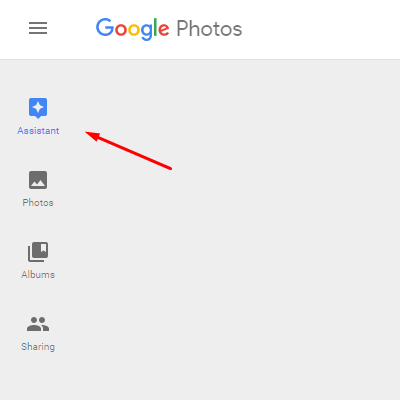
In the online application, we go to "Assistant" by tapping on the appropriately named icon in the column found on the left side of our screen.
There, we can create albums, collages, and animations...
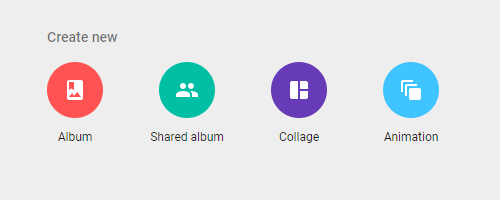
... as well as smartphone movies.
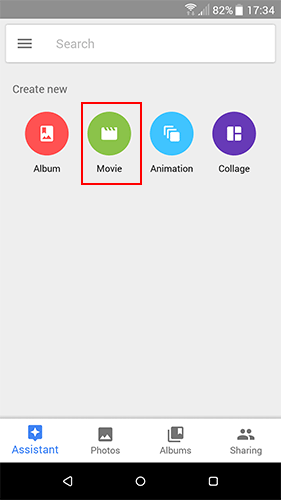
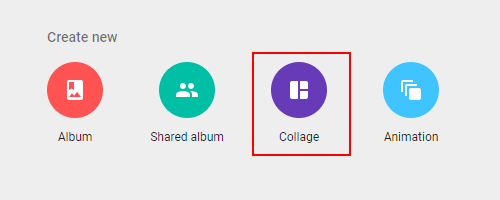
We'll also see an option named "Shared Album," in which we can create albums, and then add people with whom we want to share them.
To create a collage, select the "Collage" icon.
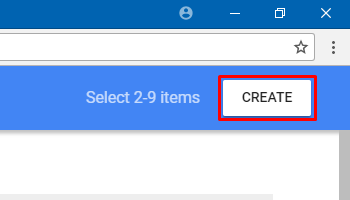
From there, we move to our collection, where we can choose two to nine photographs. After we are done selecting, press "Create" at the top right.
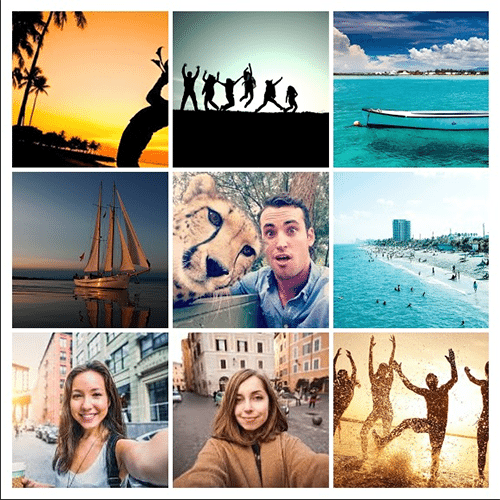
Our collage is ready!
The process that we have to follow to create our moving images is similar. We select the "Animation" icon...

...and we will be transferred to our collection. There, we can select up to 50 photos. After we finish the selection, we click on "Create" located in the top right corner of our screen.
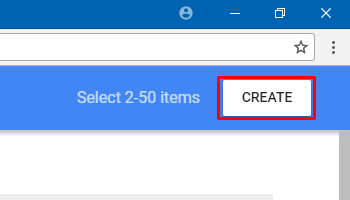
And voilà!

An application feature for mobile phones, which is not yet available in the online application, is the "Movie" feature.
To create a "Movie," we select the icon with the same name on the "Assistant" tab.
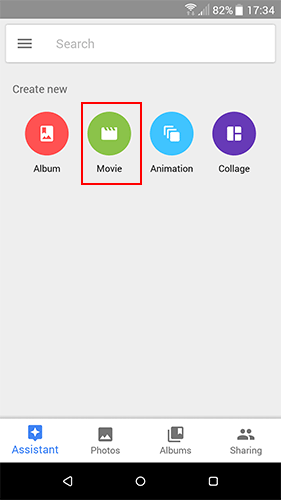
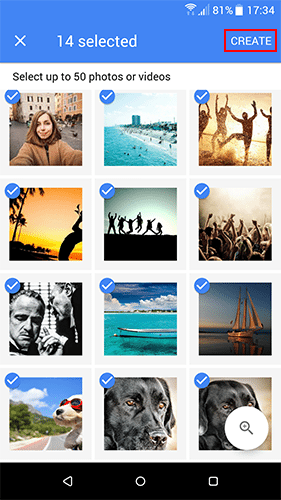
We will be transferred to our collection, where we can select 2 to 50 items, photos, or videos. After we finish the selection, press "Create."
Once the creation of our movie is complete, we can change its title by clicking on the corresponding field.
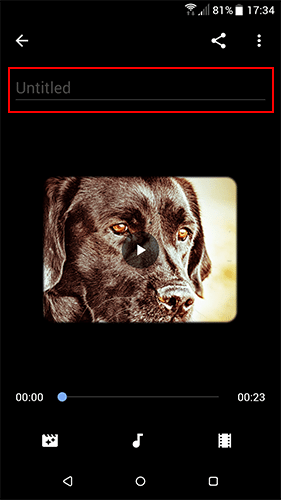
Add some music from our existing music collection...
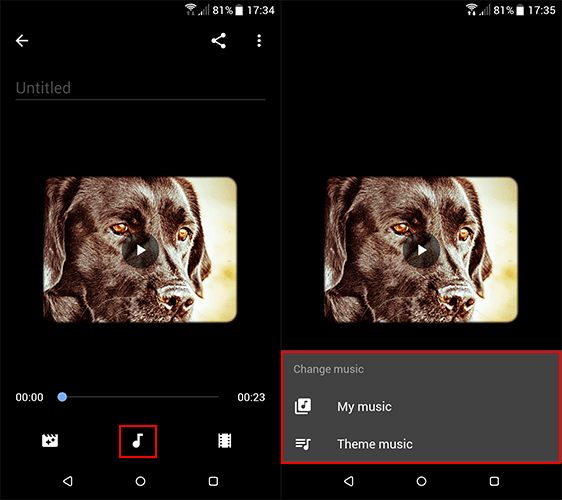
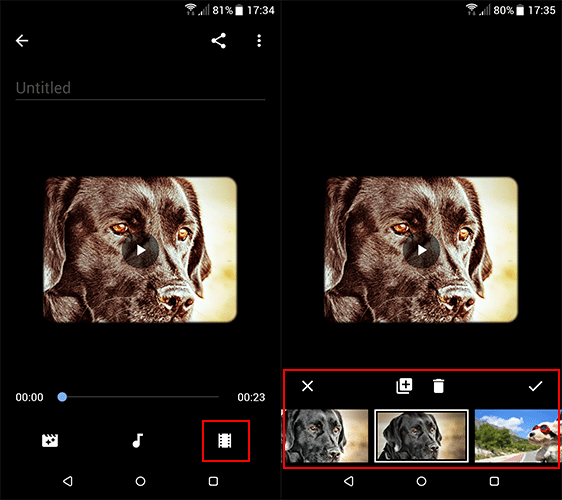
...change how it looks...

...and add or remove an item.
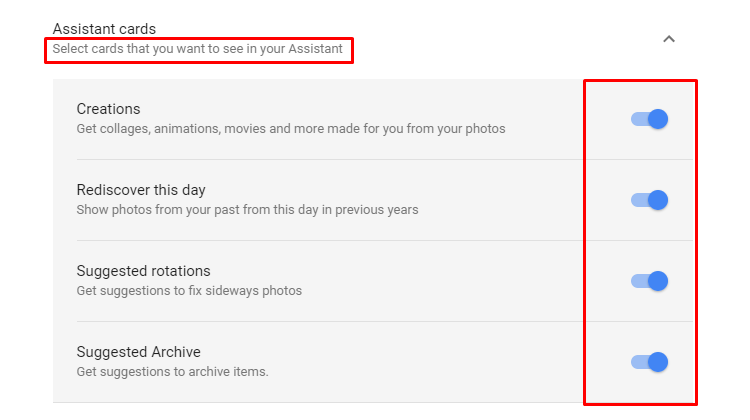
If we do not want to see the Assistant's suggestions, we can disable them by going to "Main Menu"...
...clicking on “Settings”...
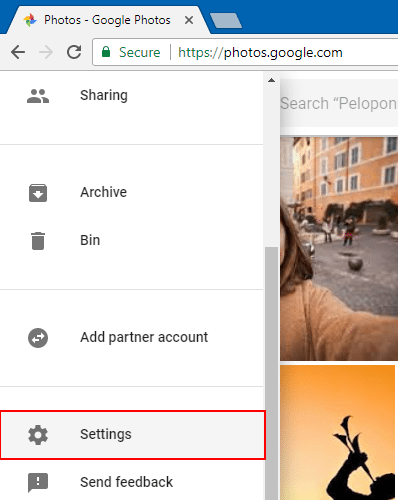
...and from there, disabling the tabs we do not want to see.
Did you like the post?
Which application do you use to store your photos? Did we forget to talk about any of Google Photos' features? What are your general thoughts on the topic? If you have any questions, or simply want to share your thoughts with us, feel free to let us know in the comments.
Support PCsteps
Do you want to support PCsteps, so we can post high quality articles throughout the week?
You can like our Facebook page, share this post with your friends, and select our affiliate links for your purchases on Amazon.com or Newegg.
If you prefer your purchases from China, we are affiliated with the largest international e-shops:





Leave a Reply