With the April 2018 Windows 10 update, Microsoft gave us the highly anticipated Timeline. In as few words as humanly possible, it's a simple tool that has a lot of potential. In this guide will thoroughly describe what exactly the Windows 10 Timeline is, how to use it and everything it has to offer. Was Microsoft's creation worth the wait? Is it even useful? We will certainly try to answer these questions, among others.
Unblock any international website, browse anonymously, and download movies and Mp3 with complete safety with CyberGhost, just for $2.75 per month:
What is Windows 10 Timeline?
Timeline has been a part of Microsoft's plans since the last Fall Creators Update. Eventually, its launch got postponed for the April 2018 Update.

Essentially, Windows 10 Timeline takes Task View a step further by adding a history of the activities we have performed on our PC.
In this list, we will find apps that we have recently opened, websites we visited with Microsoft Edge, articles we read in the News app, or documents we have edited with Microsoft Word.

The purpose of the Timeline is to facilitate the continuation of our activity from where we left off. In fact, there is a sync feature between different devices.
How to use Windows 10 Timeline
It is easy to use the Timeline, and we don't need any specialized knowledge. However, let's take a closer look at how to take advantage of every aspect of it.
Enable and disable
Microsoft has Timeline enabled by default. However, if we do not want to use it, we can easily disable it.
First, we go to "Settings," and we go to the "Privacy" category.
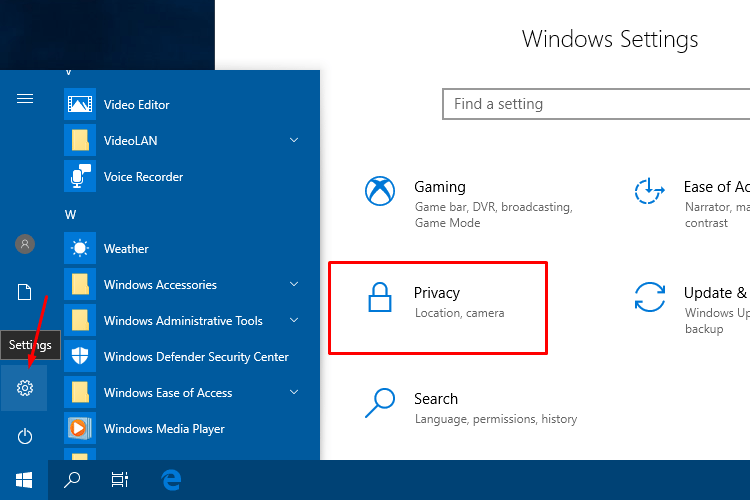
Among the settings on the left, there is "Activity History," and the Timeline settings will be on the right.
If we want to disable the Windows 10 Timeline, we uncheck the "Let Windows collect my activities from this PC."
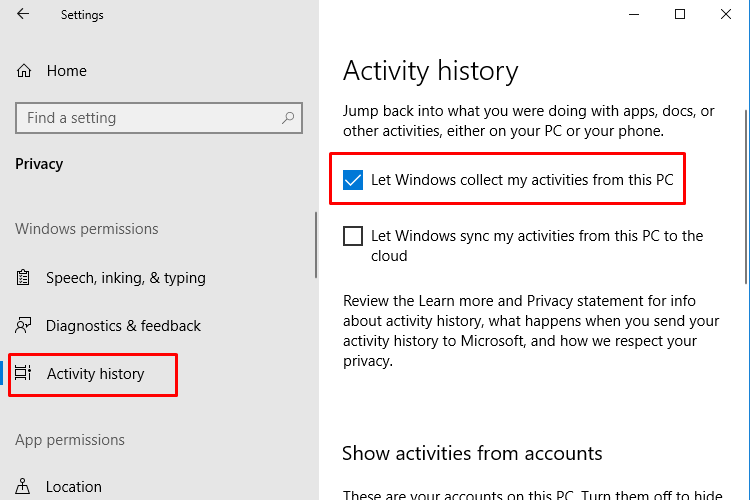
If we change our mind, we can come back here and check the same box.
From this screen, we can sync our activity history with Microsoft's cloud. This will allow us to have this information available on a different computer of our own.
Show Timeline
To visit the Timeline, we go to the Task View button, at the bottom left of our taskbar, next to the search box.

We can also open the Windows 10 Timeline by pressing "Windows key + Tab."
We should note that if we disable the Timeline, the Task View button will still be visible.
To hide this button, we right click on the taskbar, and choose the option "Show Task View button."
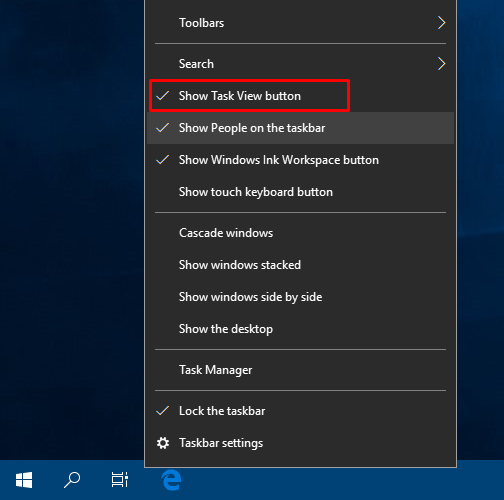
In an instant, the button will disappear, and if we want, we can bring it back by right-clicking on the taskbar and choosing "Show Task View button."

Managing the Windows 10 Timeline
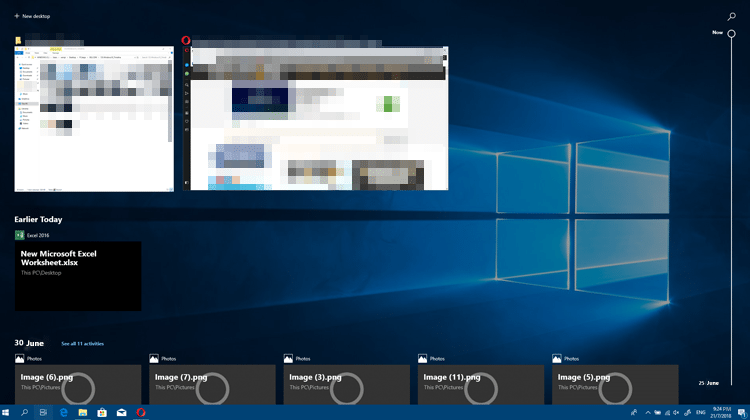
On the Timeline, we can see our entire activity starting from several days ago, complimented by a neatly designed UI.
Firstly, on the top right there is a button which allows us to add a virtual desktop. We touched on the virtual Windows desktop in an older guide, and it still functions the same.
Underneath it, we can see the programs and files that are currently open.
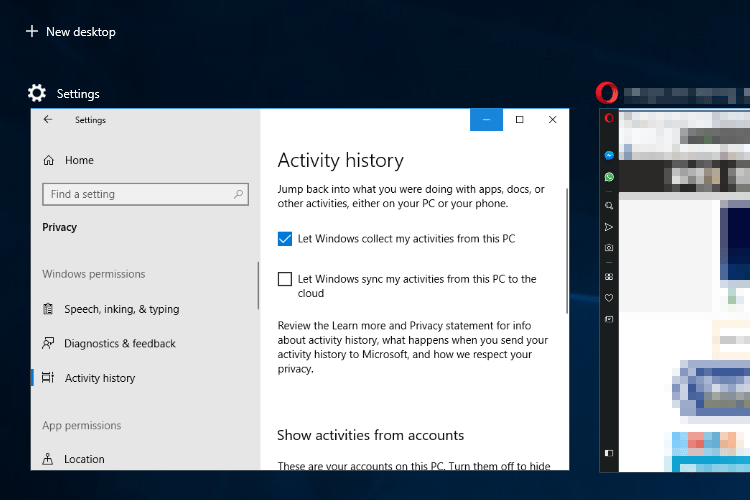
Right below we can see our past day by day activity.

Initially, we are able to see a maximum of ten activities per day. If more than ten recent activities are available, then the "See all X activities" link appears.
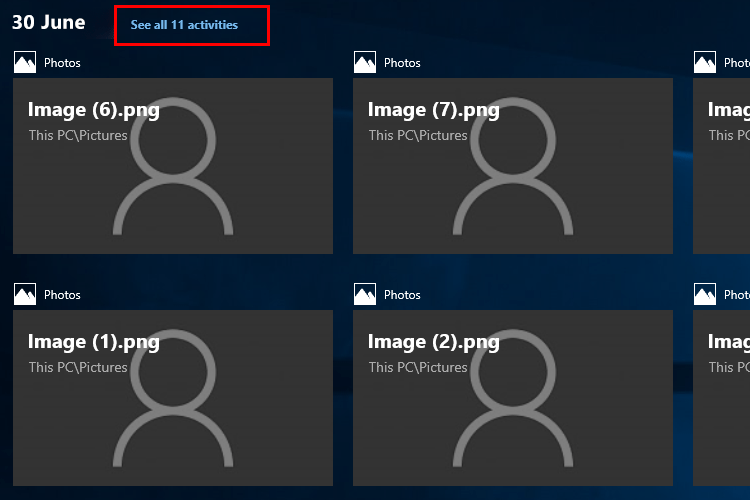
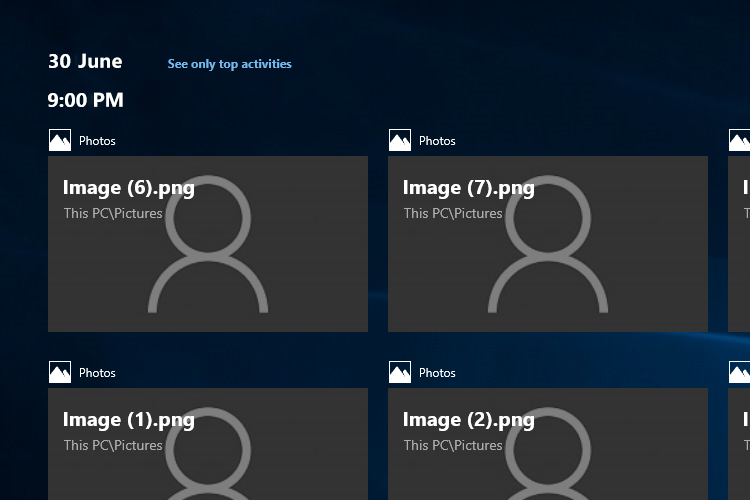
Once we click on the link, we will be able to see all of our activities, which will be grouped based on the time each took place.
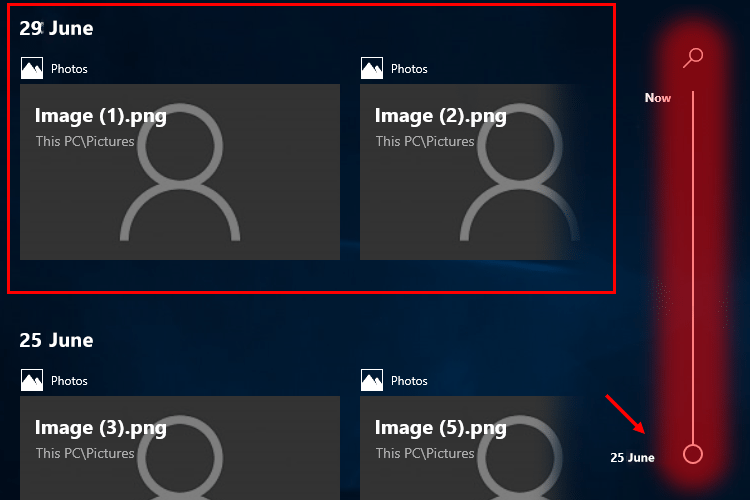
Another way to navigate between activities is with the scroll bar on the right.
All we need to do is choose the date that we want, and we will move directly to that day's activities.
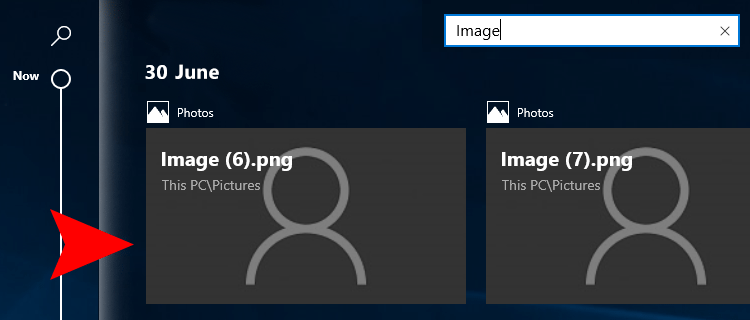
Also, Microsoft has added a search ability on the top right. By clicking on the magnifying glass, the search box will show up.
We can type what we are looking for, and the Timeline directly displays the results.
The last Windows 10 Timeline feature is the ability to delete or close specific activities.
To close a running program or an open file, we mouse over on its preview and click "X" on the top right.

Similarly, if we want to delete an activity, we right-click on it, and choose "Remove."
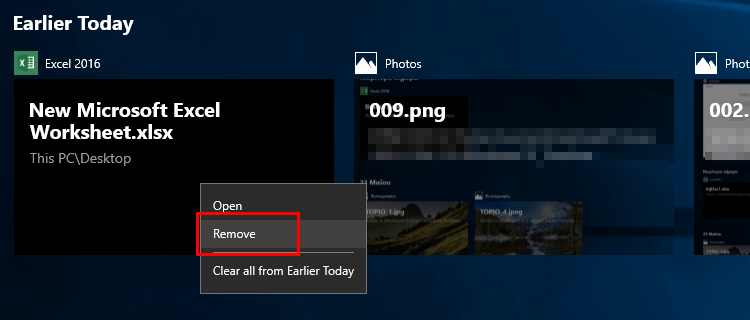
Likewise, we can also delete an entire day's worth of activities. We right-click on one of them, and select "Clear all from X."

Sync between multiple devices
We have already mentioned that the Timeline offers us the ability to sync our activities between different devices. First and foremost, we must have the same Microsoft account connected to all devices.
Then, we need to enable sync; there are two different ways to do so.
We open the Windows 10 Timeline and go to the end. There, we will find the option "See more days in the Timeline," in which we click the "Turn on" button.
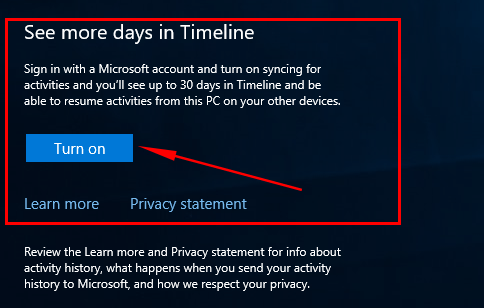
We can also go to "Settings → Privacy → Activity History."
From the options on the right, we have to enable the "Let Windows synchronize my activities from this PC to the cloud."
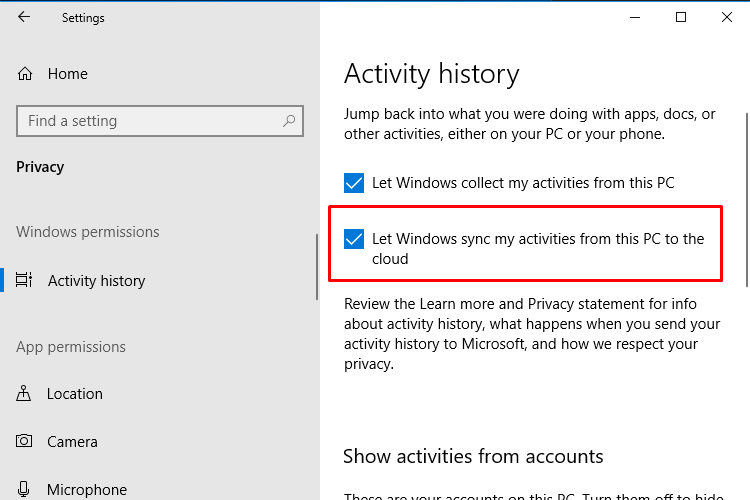
The synchronization allows us to view activities from the last 30 days, and they will also appear on every device that we have our account connected with.
Choose an account for synchronization
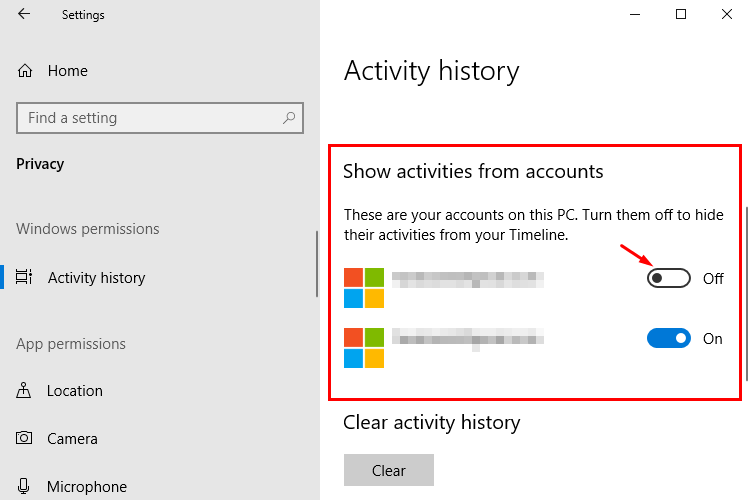
If we use more than one Microsoft Account on the same computer, we can choose which activities to sync.
To do so, we go to "Settings → Privacy → Activity History", and we find the "Show activities from accounts."
There, we turn on the switch of each account that we want to sync.
Clear activity history
We already saw how to delete the activities for a specific day. However, we can also delete the activities on the Windows 10 Timeline for multiple days all at once.
We go to "Settings → Privacy → Activity History," and near the end, we will find the "Clear activity history."

To delete the entire history, we click on "Clear."

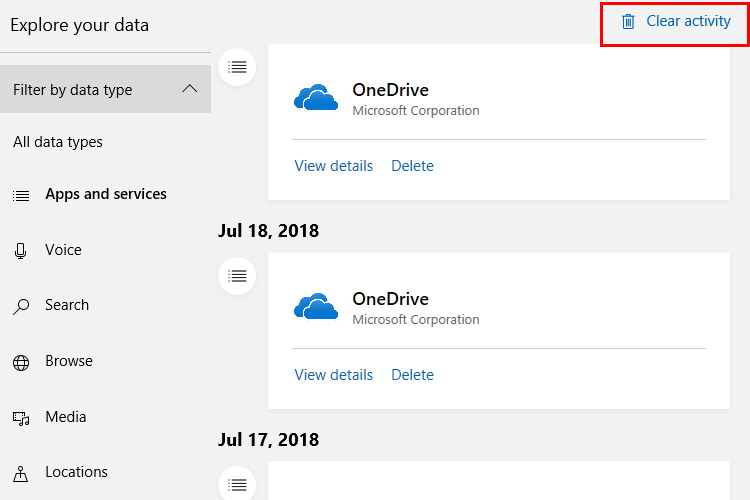
Otherwise, we can click on the "Manage my Microsoft Account activity data" link, which will take us to our Microsoft Account page. Specifically, on "Activity history."
Here, we can see our activity in detail, and we can delete what we want by clicking on the "Delete" button.

To delete multiple activities, we select a category from the left, and click on the "Clear activity."
Pros and Cons
The Windows 10 Timeline is a powerful tool. However, it has its pros and cons, as all things do.
Pros
- Fairly improved compared to the
- old Task View
- Particularly handy
- Simple UI
- Useful for those who handle large amounts of files on a daily basis
- Using sync with OneDrive allows us to continue our work on any other device
- The search ability is one of the best features of the Timeline
Cons
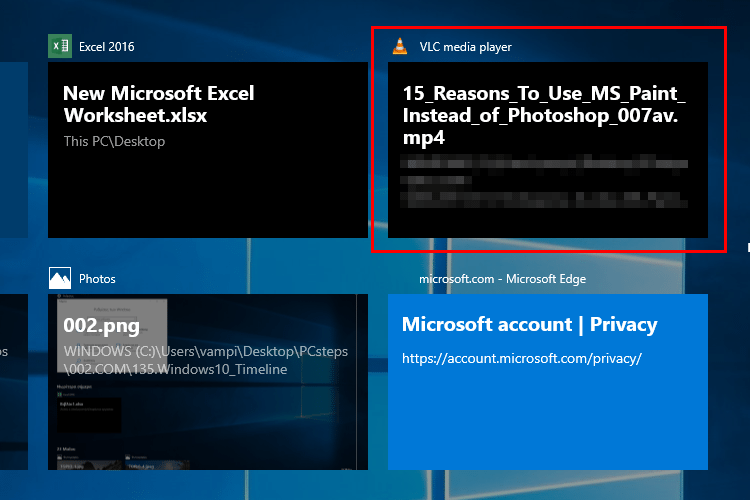
- At this point, it only supports detailed presentation for Microsoft apps. When using other browsers, we can just see the app but not its pages.
Of course, the company has created an API that allows developers to build their Timeline cards.
Some have already started, such as VideoLAN with VLC. However, it will take some time before there is enough variety of cards in our Timeline.
- Perhaps there might be issues with the protection of our data. On one hand, it syncs our activities to the cloud, and on the other, if multiple users use the computer, it may reveal an activity we would rather just not.
Windows 10 Timeline is very promising
Our first impressions when it comes to the Timeline were not bad at all. At first, it feels like a different way to view our recent activities.
Eventually, it proved to be much more, and every indication shows that in the long run, it will become even better.
What do you think of the Windows 10 Timeline? Was it worth the wait? Do you already use it, or are you going to take advantage of it after reading our guide? Let us know in the comments.
Support PCsteps
Do you want to support PCsteps, so we can post high quality articles throughout the week?
You can like our Facebook page, share this post with your friends, and select our affiliate links for your purchases on Amazon.com or Newegg.
If you prefer your purchases from China, we are affiliated with the largest international e-shops:



Leave a Reply