


Original creation is hard. Definitely harder than to download and reuse somebody else's work, be it a photo, a video, some music, or an entire blog post. However, it is simple to watermark photos or add a video watermark. It won't completely stop copyright infringement and intellectual property theft, but it will definitely deter casual copy-pasters. Here are the simplest methods to watermark photos and add a video watermark.
Unblock any international website, browse anonymously, and download movies and Mp3 with complete safety with CyberGhost, just for $2.75 per month:

How to watermark photos
Between photo editing and video editing, the former is arguably the easiest to perform. This is why we will first tackle how to watermark photos before we cover the video watermark.
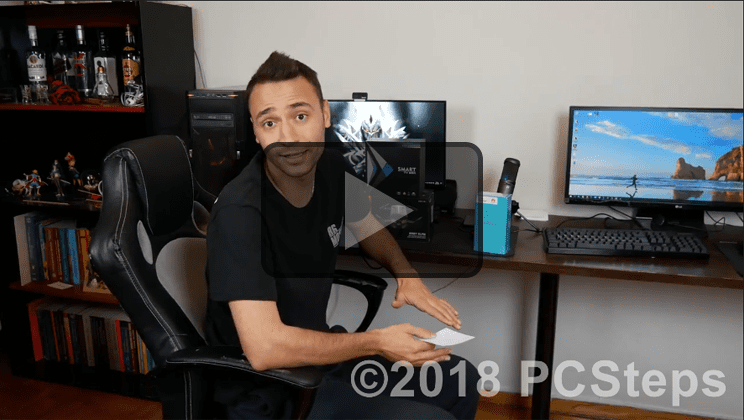
For this guide, we will add a watermark using both the free, open source GIMP and the popular Adobe Photoshop. We will watermark the following image:

Watermark photos with Gimp
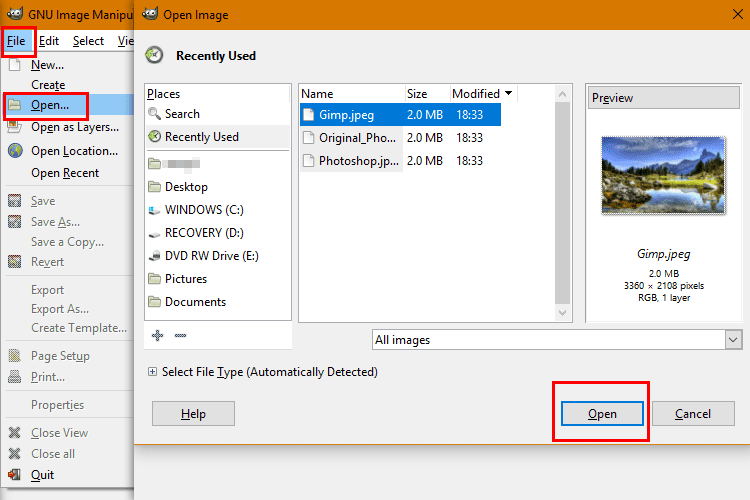
We will start with the free Gimp, which we can download from the official site. The installation is straightforward and won't attempt to add any unwanted third-party software.
We launch Gimp and open the image we want to watermark.
From the toolbar on the left, we select the "Text tool,", click anywhere on the image, and type the text we wish to use as a watermark. We can change the font and adjust the size and the color of the text to fit our needs.
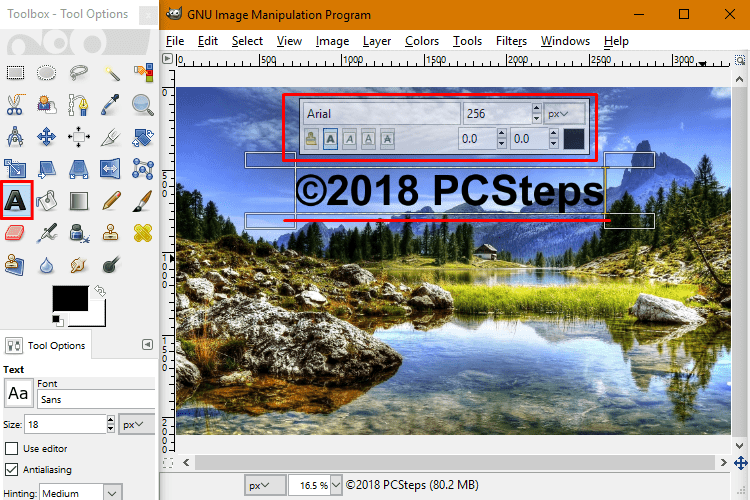 The ideal choice for font and font color is Arial Bold and white. Of course, you can experiment with different fonts and colors, by double-clicking the text layer.

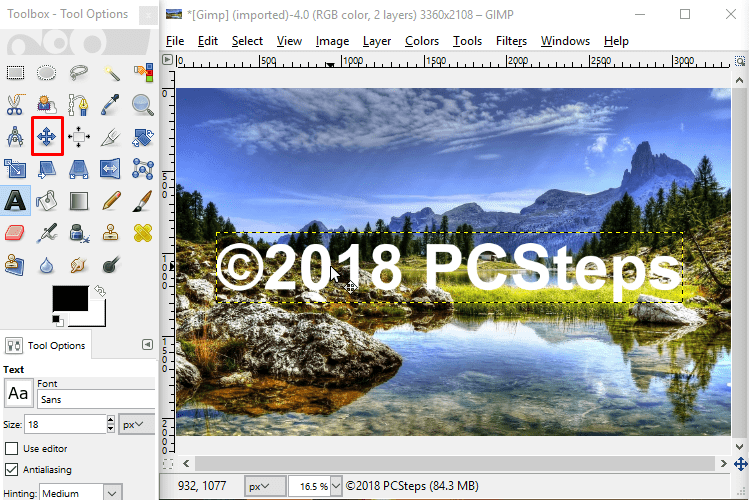
When we watermark photos, the correct positioning of the text is everything. After all, if the watermark is near the edge, a simple crop will get rid of it. Using the moving tool, we can move the text to a central location.
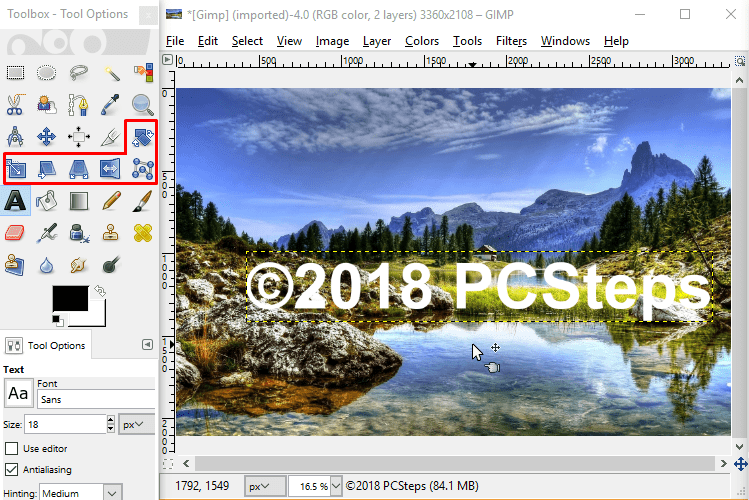
With the transformation tool, we can rotate the text, change its size, and so on. In general, we try to retain the image's aesthetics, while making it difficult for the "thief" to remove the watermark.
Lastly, we select the text layer, and above it, we can see option "Opacity," which we set to "50.0" or whichever number works better with our aesthetics.
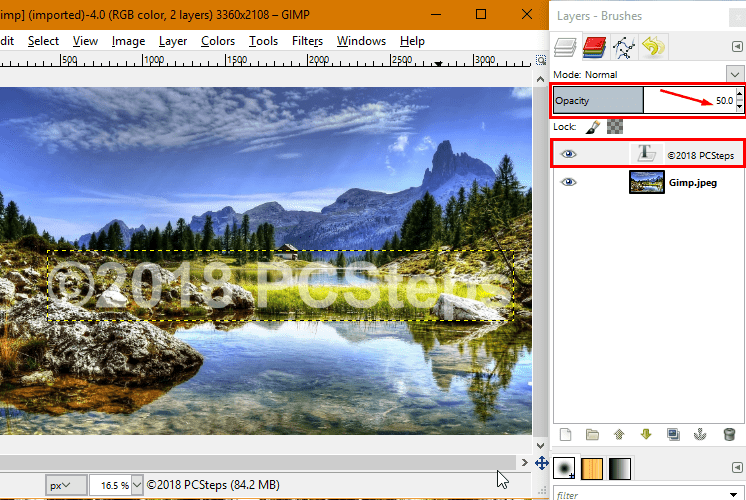
We save our image, which will look like this:

Remember, when we watermark photos, the goal is to protect our work in a discreet way, not to completely destroy the image.
Watermark photos with Adobe Photoshop
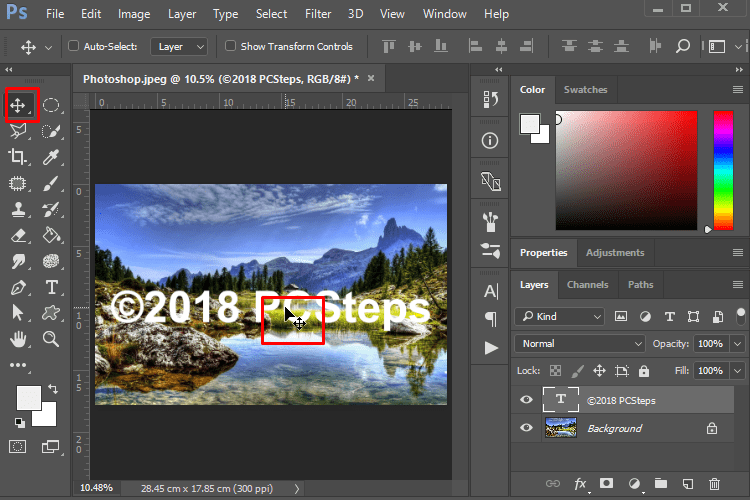
The method to watermark photos is similar in Photoshop. With the image open, we select the "Type Tool," click on the photo and write the text we want.
Using the tool's options, we can customize the font. We recommend Arial Bold again as a font, and white for the color.

By enabling the move tool, we move the text to the optimal position for a watermark.
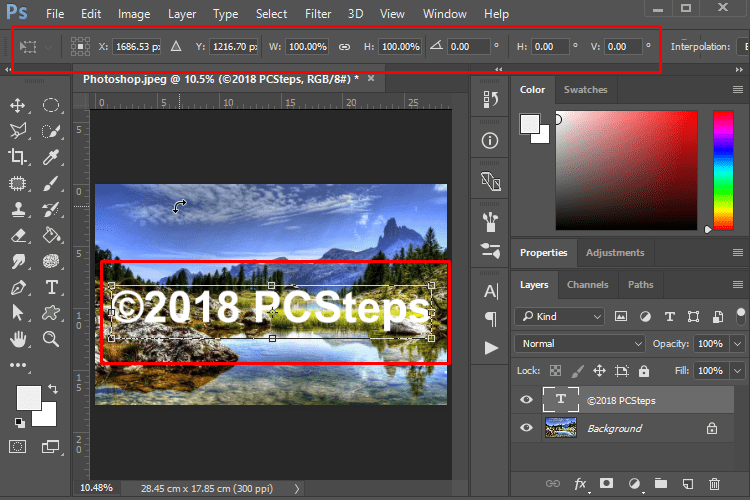
Meanwhile, with the "Ctrl + T" keys, we activate the Transform Tool. This tool allows us to change the size, angle, and other features of our watermark text.
To complete our watermark, we select the text layer and set "Opacity" to "50%."
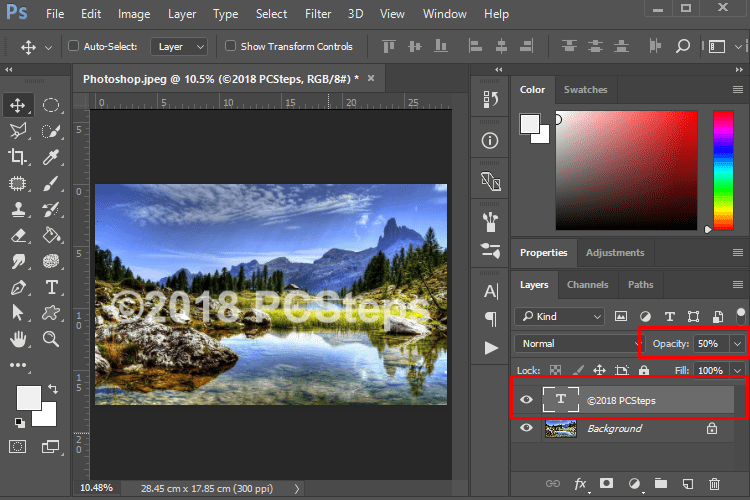
Finally, we can save our image, which now looks like this:

As before, the watermark doesn't destroy the image. Nevertheless, anyone who wants to use it without our permission will have a hard time removing it.
How to add a video watermark
Video editing can be much more complex and demanding than photo manipulation. Even so, adding a video watermark is simple enough.
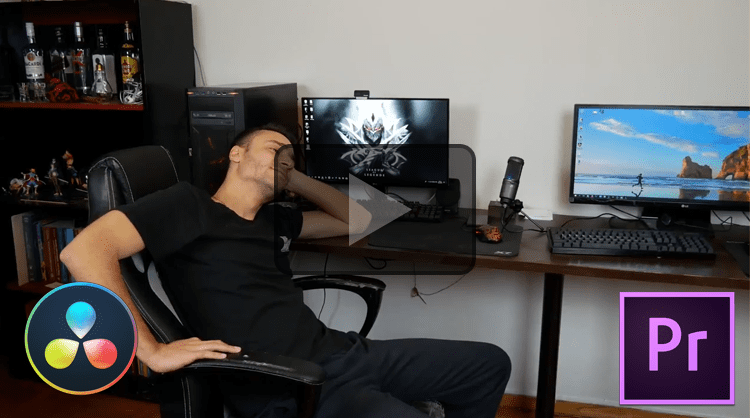
We will use a video that we recently shot, and the video editing programs DaVinci Resolve and Adobe Premiere Pro.
Video watermark with DaVinci Resolve
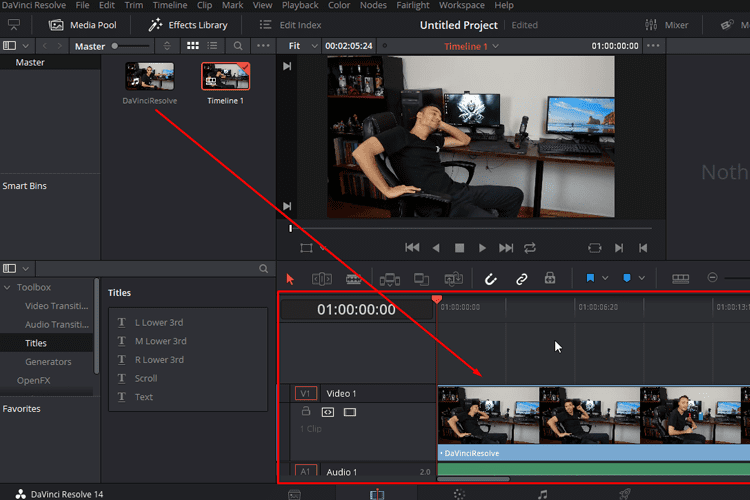
Before we get started, we can download DaVinci Resolve from the official site and install it. Next, we launch the program, create a new project, drag the video to the project' media pool and place the video on the Timeline.
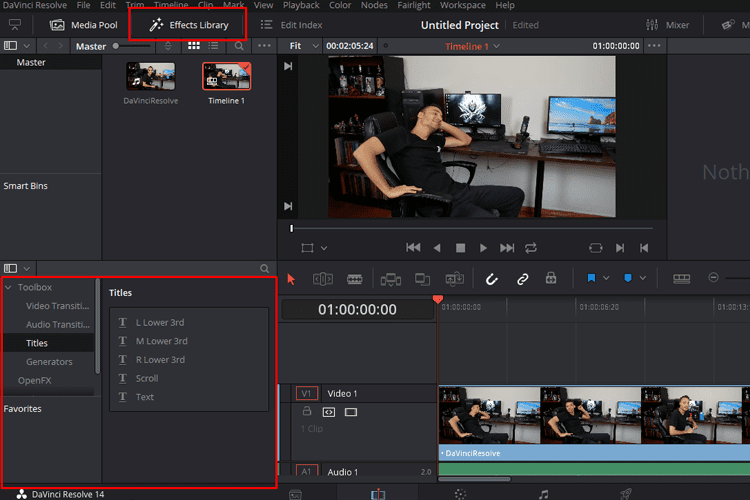
On the bottom left we can see the effects library. If it's not there, then we click on the "Effects Library" button.
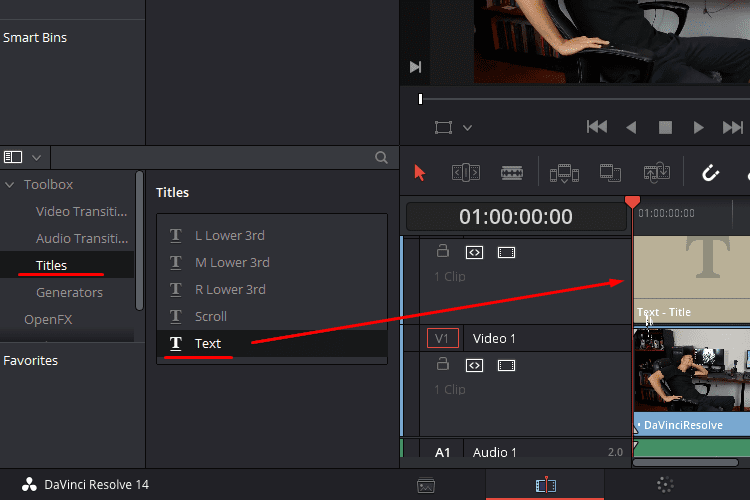
Among the options, we will find the "Title" option. We select it and drag a "Text" element above the video on the Timeline.
Now, we click on the text item, and its settings will appear on the top right. We can also see the text in the video preview. Whatever changes we make will appear there in real time.
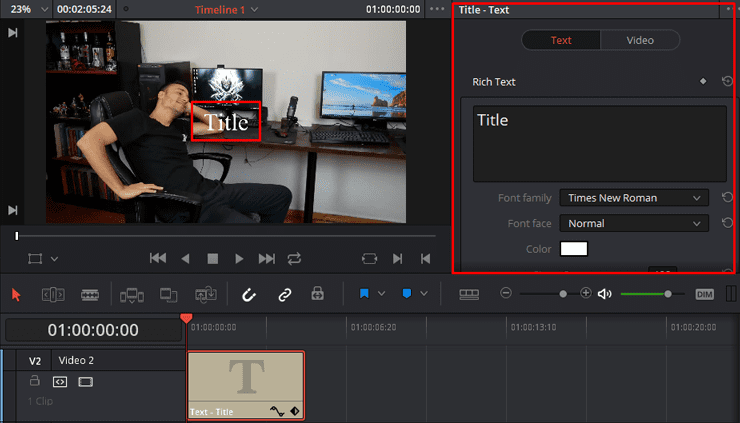
With the "Text" panel selected, we can write the text of the video watermark in the "Rich Text" field. Then, we select the font we want. As usual, we recommend Arial Bold, and white for the font color.
Depending on the video resolution, we set the font size, which can take up as much space as we want.

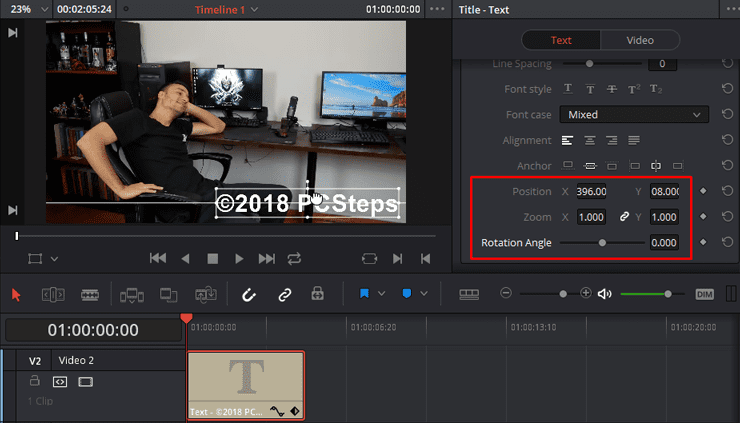
With a left click on the text, we can select the item on the preview. By long-pressing the left mouse button, we can drag the text and place it wherever we want on the video.
If we want to rotate the text, we do so from the "Rotation Angle" option in the text's settings. Meanwhile, with the "Position X / Y," we precisely move the text.
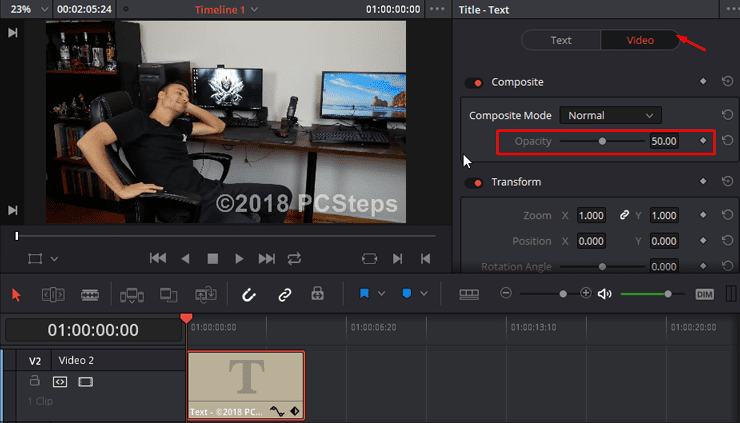
Finally, we go to the text's settings "Video" panel and set the "Opacity" to "50.00."
The last step is to extend the length of the text element to match the length of the video.
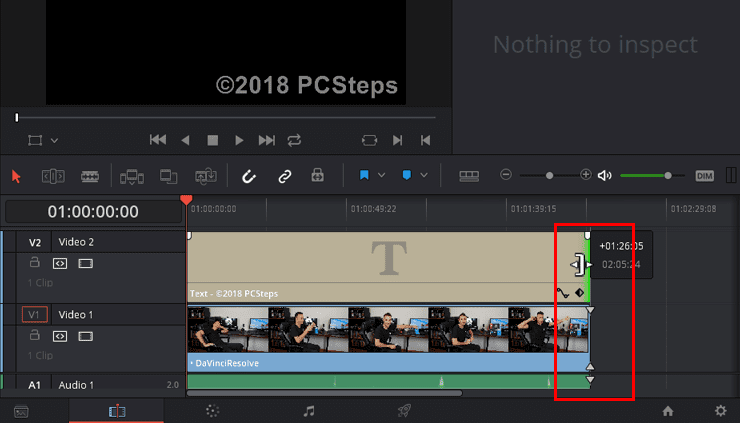
We are now ready. We have added the video watermark, and no one can claim that they "didn't know" it was our video.
Video watermark with Adobe Premiere Pro
Adding a video watermark with Adobe Premiere Pro is somewhat different.
We create a new project and drag the video to the multimedia library.
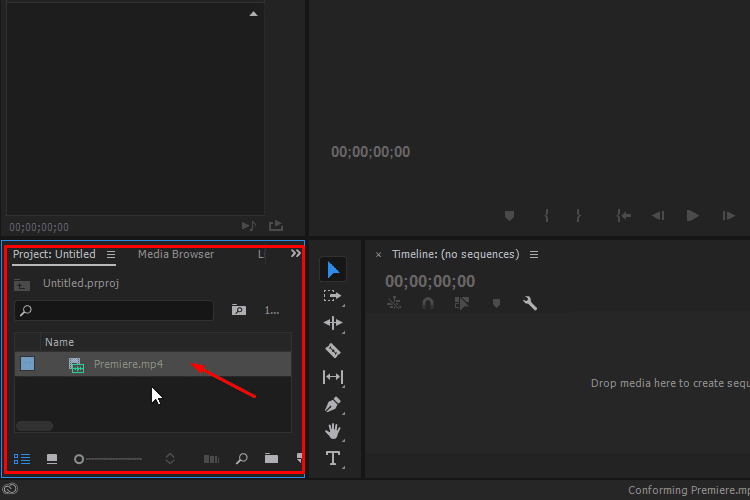
We place the video in the Timeline and press the text input button.
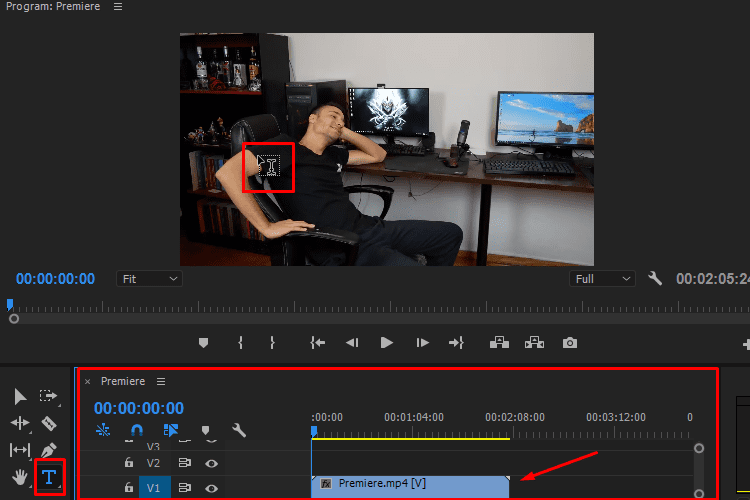
By clicking anywhere in the video preview, we will create a text box. Here we can add our video watermark. Meanwhile, the text element will appear on Timeline.
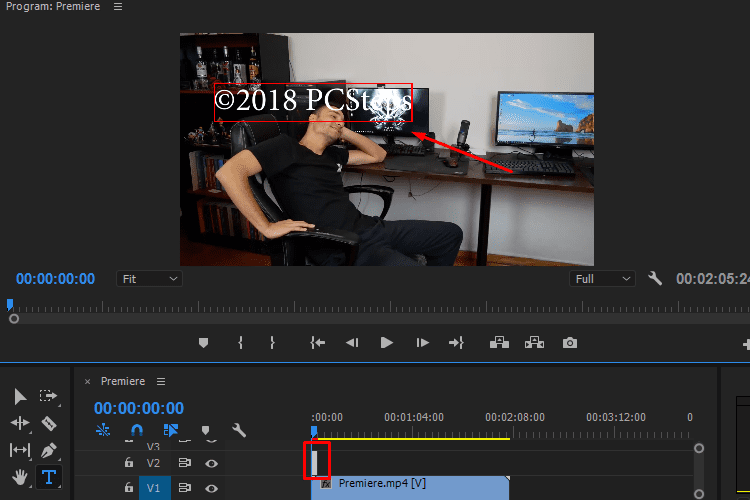
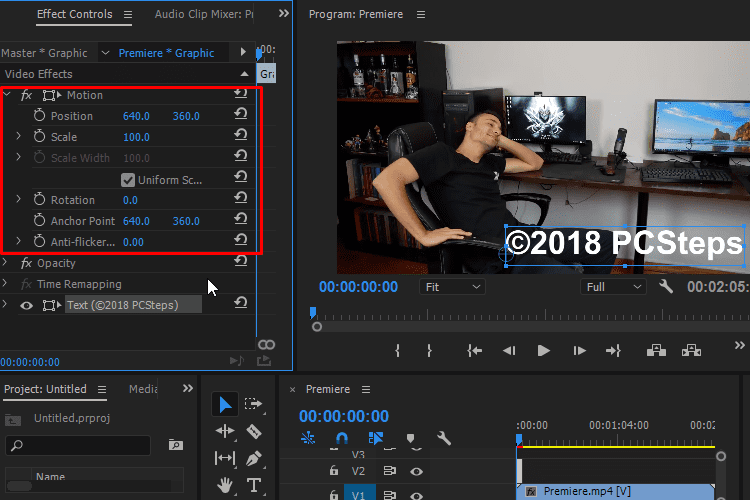
On the left, we can see the "Effects Control." From here, we can change the text element.
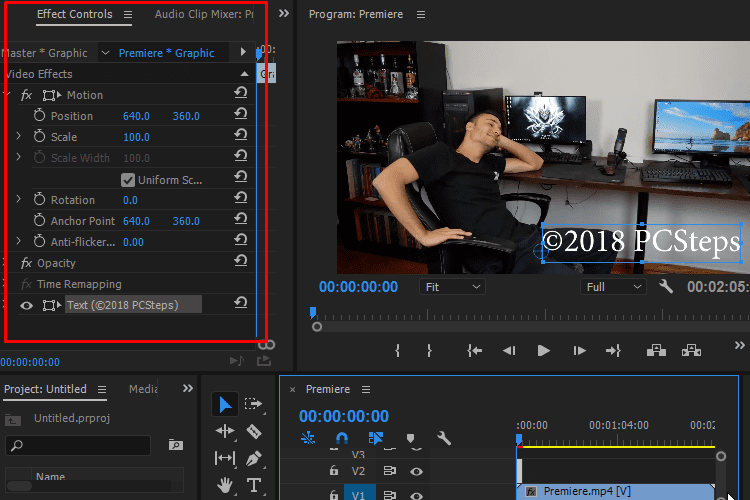
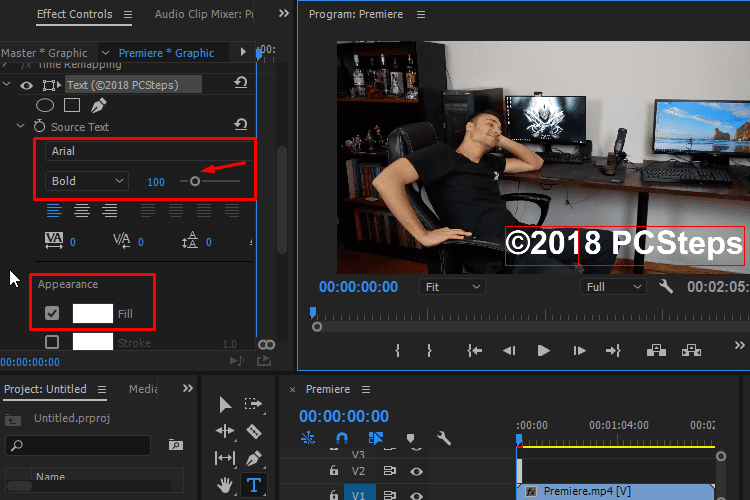
In "Source Text" we set the font, color, size, and much more. As always, we recommend Arial Bold and white color for the font. The size depends on the video resolution.
As soon as we finish the font settings, we activate the "Selection Tool." The outline of the text item will change. By long-clicking, we drag the text wherever we want, and with the help of the points, we can change its size.
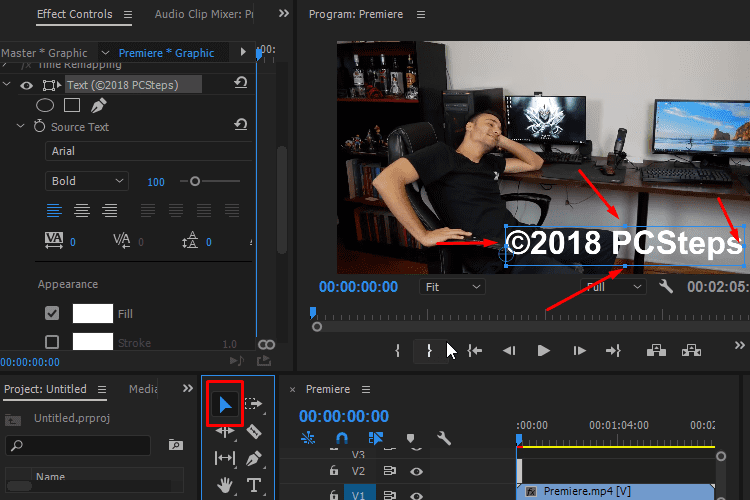
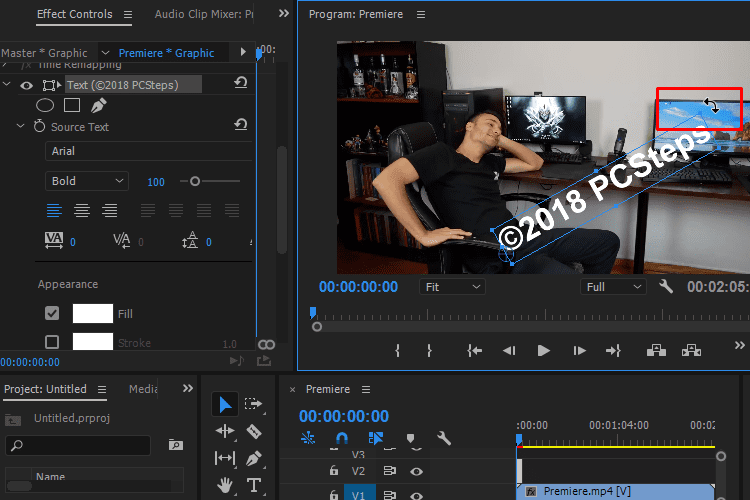
Meanwhile, if we move our mouse to the corner points, the pointer changes to a double arrow. By holding down the left mouse button, we can rotate the text.
Of course, we can precisely adjust the position, rotation, and much more, from "Motion" in the "Effects Control" panel.
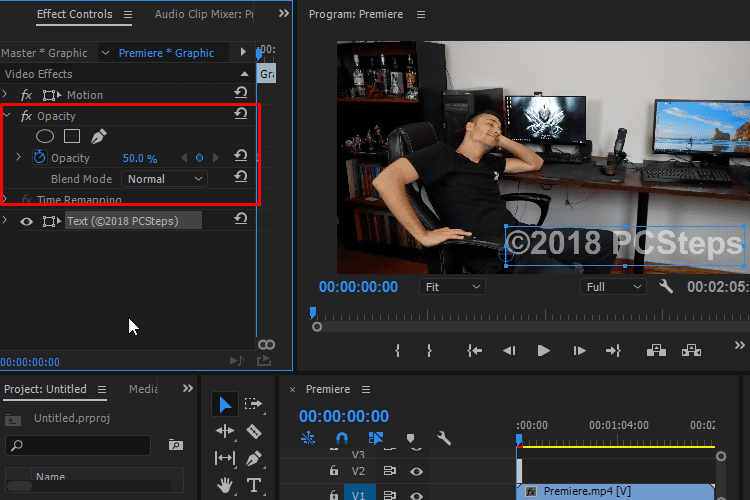
Lastly, we need to make our text semi-transparent. So we go to "Opacity" in the "Effects Control" panel and set it to" 50.0%."
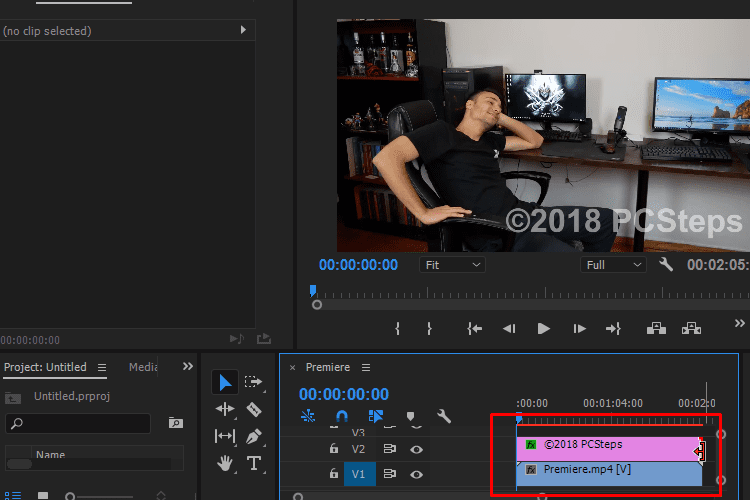
To display the video watermark continuously, we will need to extend the text's element duration. To change its length, we drag its edge until it reaches the end of the video.
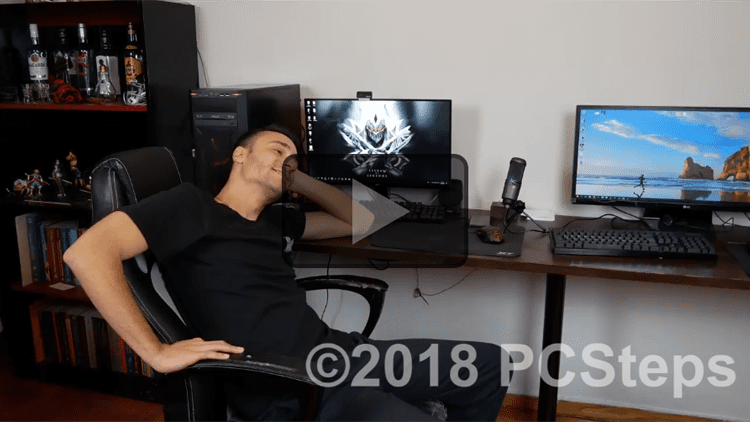
We successfully added the video watermark. Now anybody who wants to "steal" our video has to either ask for permission or spend a lot of time trying to remove it.
Does a watermark protect our work?
Contrary to what you might think, a watermark on an image or a video is not legally binding as a copyright protection method.
The official way to protect our intellectual property is to register the copyright for our work with the U.S. Copyright office.
Unfortunately, the procedure is neither straightforward nor free, as we need to submit every single piece of work and pay a filing fee.
If we want to do it online:
- Firstly, we visit the eCO system and create a digital version of our work.
- Then, we upload our work and fill the application.
- And finally, we pay the filing fee and submit it.
If we choose to mail it:
- Firstly, we print and fill the appropriate form, and create a copy of our work.
- Then, we write a check for the filing fee.
- And finally, we mail the copy of our work and the check.
In either case, it will cost some time and some money. And if we are a creator with a large body of work, it might not be worth the trouble and the cost.
Nevertheless, a watermark can discourage a lot of aspiring "thieves". It is way easier for them to look for some other image or video than to go through the arduous procedure to remove a watermark
Do you watermark photos and videos?
Adding a video watermark or creating watermark photos may not cover us legally, but it is an easy way to discourage unauthorized use of our creations.
It does requires some time and effort, but it is worth it. Do you agree with us, or do you think it makes no sense? Let us know in the comments below.
Support PCsteps
Do you want to support PCsteps, so we can post high quality articles throughout the week?
You can like our Facebook page, share this post with your friends, and select our affiliate links for your purchases on Amazon.com or Newegg.
If you prefer your purchases from China, we are affiliated with the largest international e-shops:

Leave a Reply