

Every system needs regular maintenance to remain functional. Computers are certainly not the exception, both regarding the hardware and the software. In this guide, we analyze the computer maintenance process at the operating system level. Let's see how to optimize and tune-up our PC’s performance with the Glary Utilities Professional Edition toolkit.
Unblock any international website, browse anonymously, and download movies and Mp3 with complete safety with CyberGhost, just for $2.75 per month:

Is computer maintenance with third-party applications worth it?
For a long time, PC users have disagreed on the effectiveness of third-party computer maintenance suites.

In fact, the truth lies somewhere in the middle. There are levels of optimization that have substantial benefits for Windows, and other functions that are objectively useless, or could conceivably harm our installation.
In this guide, we will present only the computer maintenance options which we deem beneficial, and not the unnecessary or potentially dangerous.
How to install of Glary Utilities Pro for free
Glary Utilities is a computer maintenance suite, created by the software developing company Glarysoft LTD.
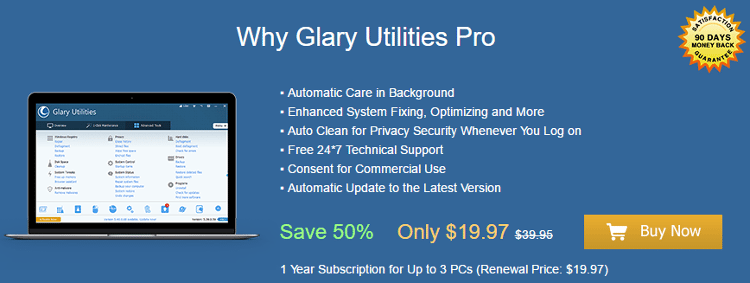
It has a free version, with limited options, and a full edition that costs $19.97.
At the time of this writing, there is an offer from the EaseUs company which allows us to upgrade to Glary Utilities Pro for free. We couldn't find any information about how long this offer will stand, and EaseUS could stop it at any time.
In any case, to activate the Pro edition for free, we first have to install the free version.
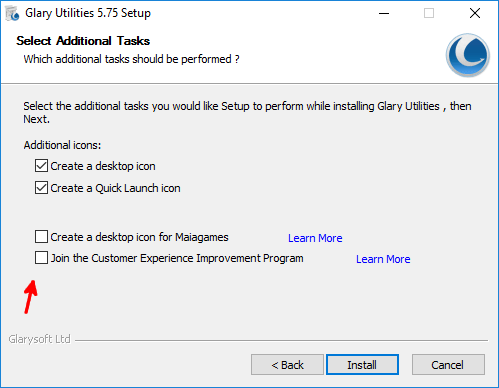
During the installation process, we make sure not to check to install Malware Hunter. After all, we have way better choices for a free antivirus software.
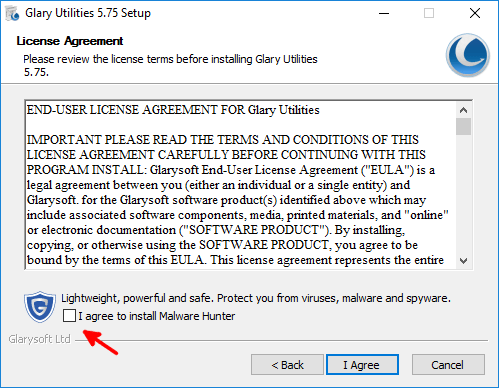
In your case, you might get a different offer than Malware Hunter, but it will almost definitely be equally useless. For a safer installation without unwanted third-party applications, you can use the Unchecky app.
Next, we do not click the "Join the Customer Experience Improvement Program" because it burdens our system with unnecessary processes. We do the same for the Maiagames icon as well.
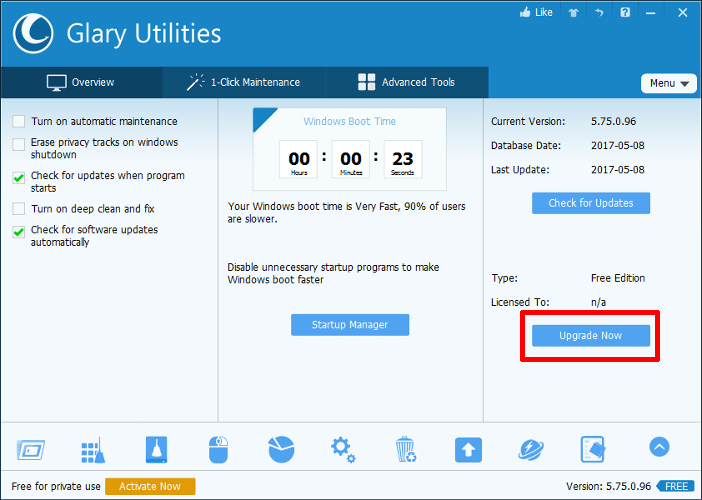
Once we install the free edition, we can activate the Pro version by pressing “Upgrade Now.”
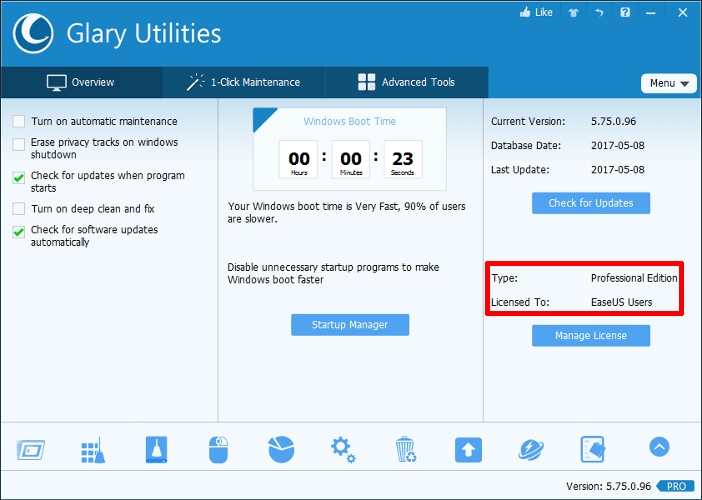
In the “Your name” field, we type “EaseUS Users” and in the “License code” we enter the numbers:
3788-6167-9582-3423-62

When we confirm this action, it will unlock the Pro version.
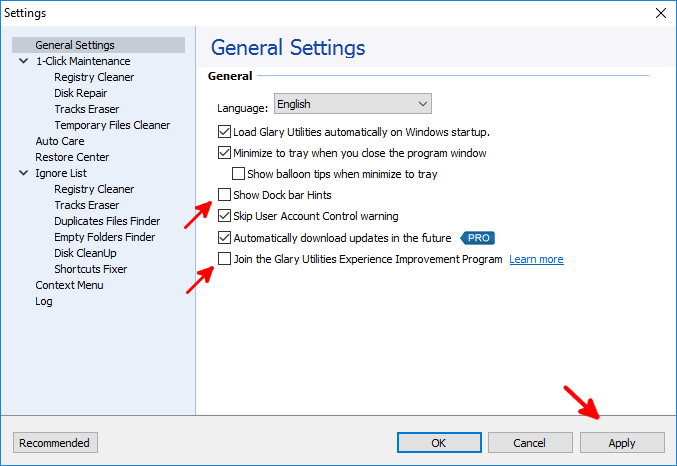
General settings
The next step is to go to "Menu" → "Settings" → "General Settings."
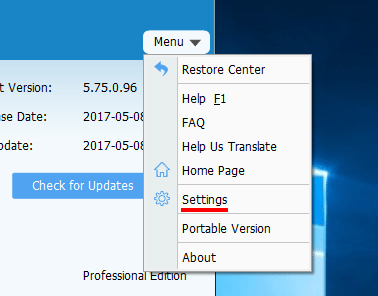
We check "Automatically download updates in the future" to get the application up-to-date, and we disable the "Show Dock bar Hints" option because it is annoying. We leave the rest options as they are and we press “Apply.”
Optimization tools for computer maintenance
Glary Utilities Pro contains a host of computer maintenance applications. On this guide, we will go through the most essential of them.
Startup manager
When we turn on the computer, many applications start along with Windows. Some of them are necessary to run at startup, like the antivirus software. Some of them are not.
We have to deactivate the latter because they slow down the booting process and the computer's total performance, by unnecessarily taking up system resources.
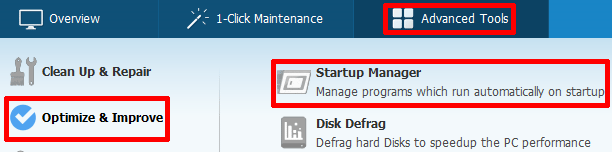
The Glary Utilities "Startup Manager" tool, which we will find at the "Advanced Tools" → "Optimize & Improve" section …
...allows us to remove these programs from startup. Once selected, the startup programs appear on the screen.
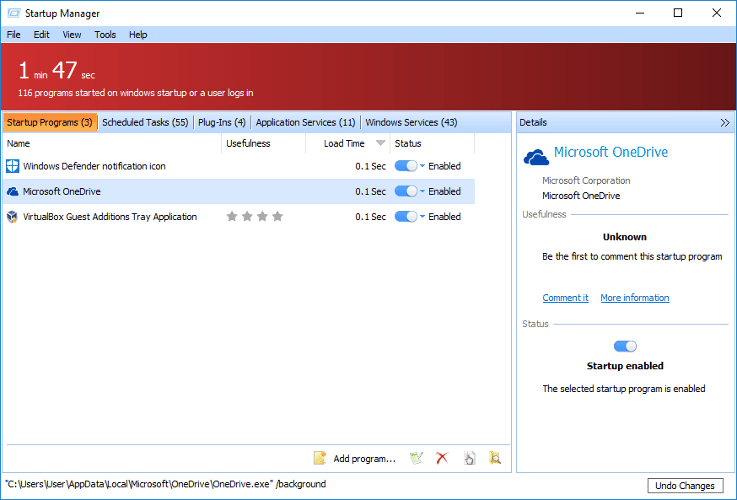
To disable an application, like Microsoft OneDrive for example, we turn the switch button.

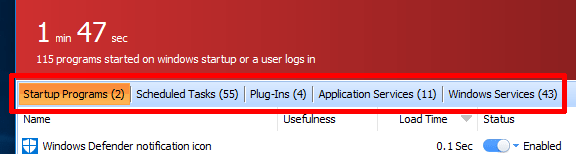
As we can see, we have the option to deactivate scheduled tasks, plug-ins, application services and Windows services as well. However, we should avoid messing with Windows Services, if we don't know exactly what we are doing.
For more ways to manage startup applications, and to find out which programs are useful and which are useless, read our guide.
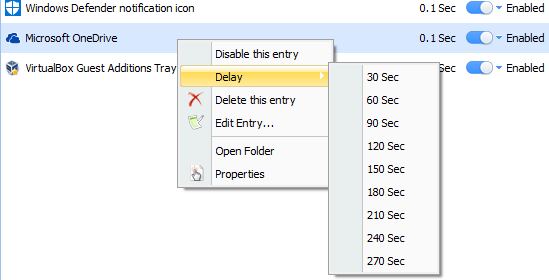
If we need some applications to run on startup, we can optimize this process with time delay. Simply put, we can select how long after Windows boots will the startup programs launch.
We right-click the desired application → "Delay" and a sub-menu appears with a time range of 30 to 270 seconds.
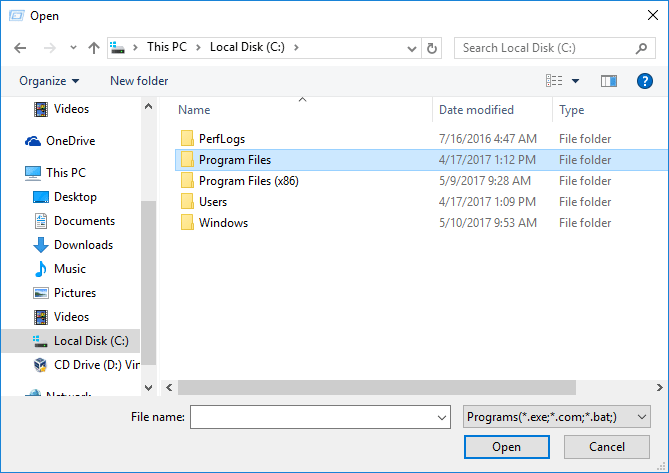
As a startup management tool, apart from disabling a program, we can enable another one as well. We press “Add program” in the bottom right of the window → "Browse"…

...and we choose the executable file of the desired application.
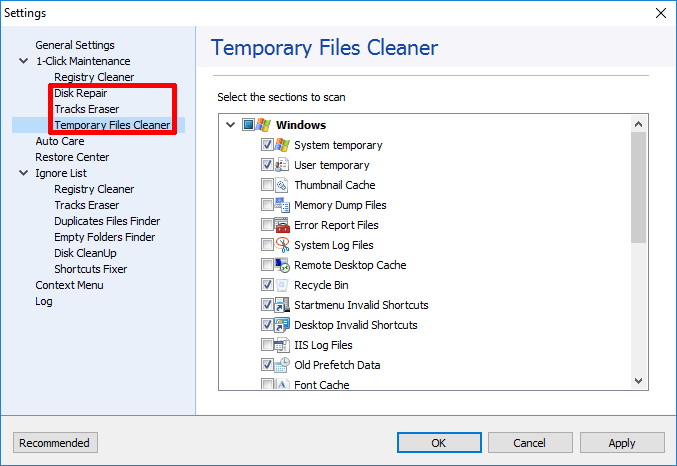
Disk clean up
One of the most useful tasks for computer maintenance is to remove the junk data from our storage discs.
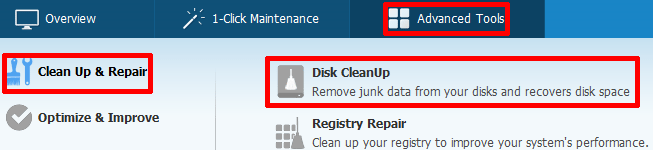
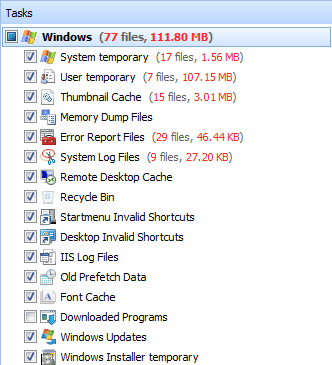
We go to “Advanced Tools” → "Clean Up & Repair" and we click the “Disk CleanUp" option.
As we can see, the program scans our computer with the default settings. However, not all options are beneficial, so we should press "Stop" to select the useful ones.

Below are the recommended settings for the Windows section.

Note that it is not advised to clean the cache files on a daily basis because we do not improve the overall system performance with this action. On the contrary, the creation of new cache files will be a burden on the system
Furthermore, we suggest not to delete the log files because they record the system events and are useful for troubleshooting.

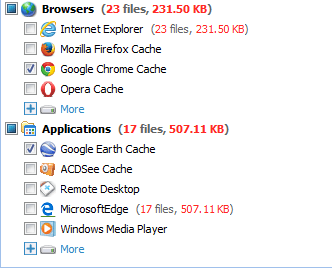
If you have a small hard drive and are struggling for space, you can set the options as follows:
The “Browsers” field contains a list of the most popular browsers to clear their cache memory.
We choose the browser that we use, and we run the cleanup task once a month. The same applies to the "Applications" section.
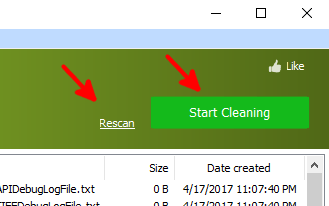
If we want to exclude some files or folders from the process, we can do that by selecting the "Ignore List" on the bottom right. Afterwards, we click on the "Add" button, and we look for the desired file.

Having defined the settings, we “Rescan” and then we “Start Cleaning.”
Disk defrag
The hard drive defragmenter is a standard optimization tool for computer maintenance. This section concerns only the users who have HDDs. SSD drives, due to their different architecture, do not require defragmenting.
This happens because of the way HDDs store files.
The file system tends to lay out the contents of the files non-contiguously. As a result, it creates file fragments. These fragments increase the hard disk’s reading and writing time.
In Glary Utilities, we can find Disk defrag in "Advanced Tools" → "Optimize & Improve."

Once we press "Disk Defrag," we check the HDD of our choice and then the “Analyze” button to view the disk’s condition.

In case it needs defragmentation, the application will inform us, and give us two defrag options.
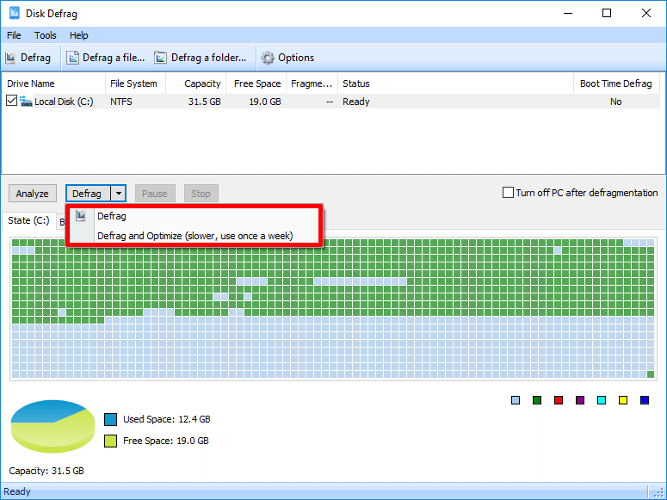
The first one is the default defragmenting process that rearranges the files to occupy contiguous storage locations.
The “Defrag and Optimize” option uses a more sophisticated algorithm that rearranges the files according to their importance for the OS.
If we go through the advanced settings, we will find out that we can defrag files by sorting their features, like their size for example…
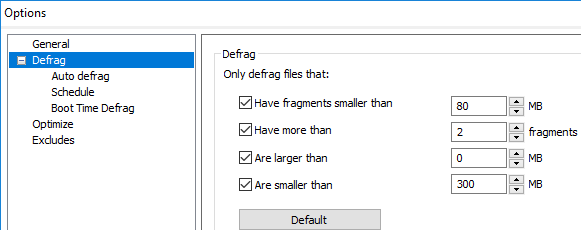
...even their extensions.

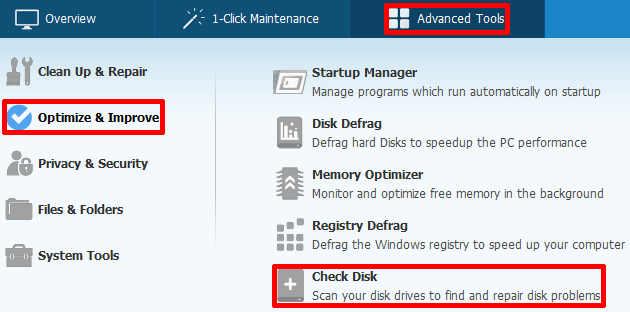
Check disk
If we did not shut down Windows properly, e.g. because of a power failure or a BSOD, disk errors might occur.

In this case, as part of the computer maintenance, we can run the “Check disk” diagnostic and repair process.
Once we open the tool, we select the drive we will find two options.
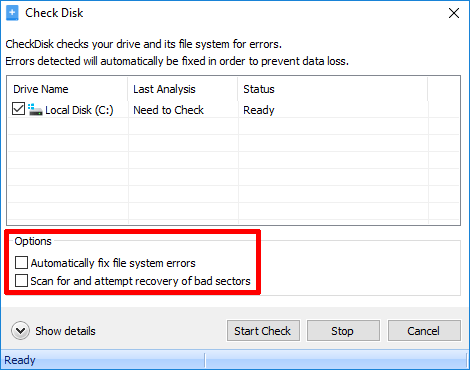
The first one will check and repair the data entries of the drive. The second, which is more time consuming, will scan the entire hard disk for bad sectors.

In other words, it will check for disk spaces that do not respond to write or read requests due to physical damage (irreversible state) or software errors (reversible). On an average 1TB HDD, this can take more than a couple of hours.
The first process is running at system’s booting when we are not using the hard drive.
Finally, if you wish to know the overall health status of your disc, take a look at our guide:
Predict if Hard Disk Failure is Imminent with CrystalDiskInfo
Repair system files
This tool scans the Windows system files for corruption and restores them to their original state. We can use this process when the operating system lags and we find it in "Advanced Tools" → "System Tools."
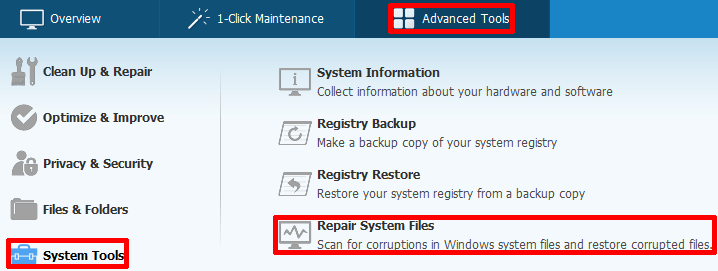
When executed, it runs from the command-line without displaying a report.
Duplicate files & empty folders finder
Two simple tools for computer maintenance do exactly what their name says; they clean up duplicate files and empty folders. We will find them in the “Clean Up & Repair” section.
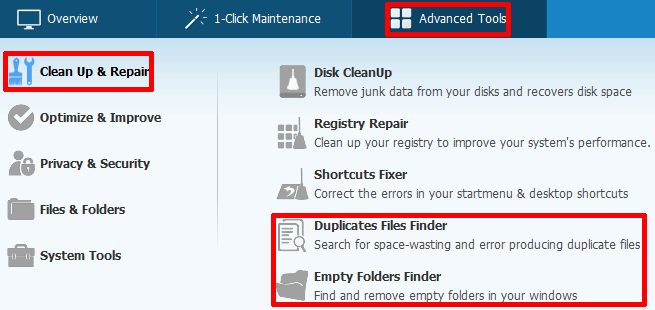
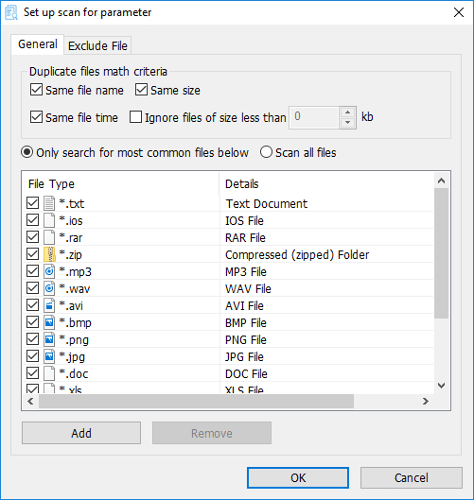
Both applications perform a scan on the computer and in the duplicate file tool, we can filter the data according to different criteria.
1-Click Maintenance
Most computer maintenance suites have an automated process for the most important optimization tools. The same applies for Glary Utilities, but only for the professional edition.
For setting up the 1-Click Maintenance, we press the “Options” button.
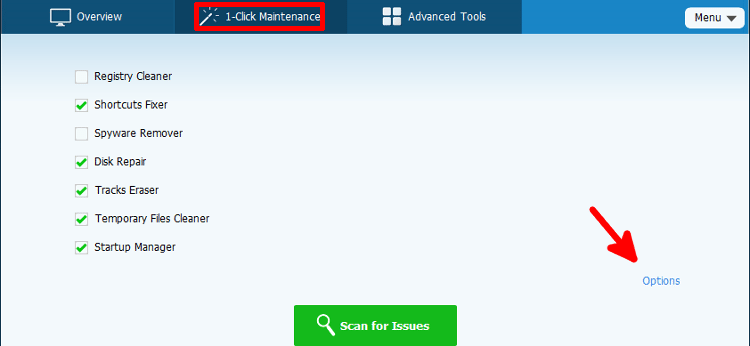
The next step is to define the settings for each field we described above.
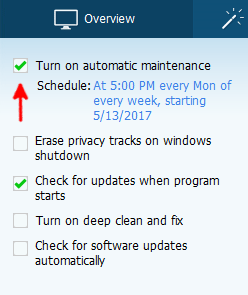
Then, we choose the "Auto Care" category to check the "Automatic 1-Click Maintenance" box.
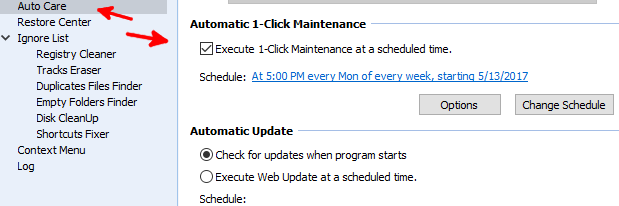
With the “Change Schedule” option, we can change the scheduled date and time of the process. The last thing to do is to go to the main window and turn on the automatic computer maintenance.
File management tools
Besides optimization services for computer maintenance, Glary Utilities also has a variety of data management tools. We have picked out two of them to present you.
File Undelete
It can happen to everyone, to delete accidentally a file that we need.

When we delete a file from the recycle bin, this does not remove the data on a physical level on HDD disks. The file remains on the disk, but the system marks it as free to be overwritten. This is the so-called high-level formatting that is retrievable.
However, we need three conditions:
- The storage disk must be functional
- The file system should be either Fat or NTFS
- Finally, the disk must be HDD.
Modern SSDs, due to the TRIM function, wipe out files at a physical level and data recovery is impossible.
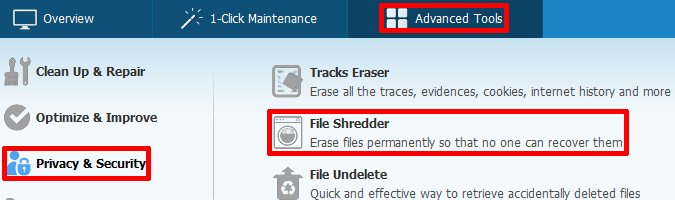
Once we run the File Undelete option that we will find in the “Advanced Tools” → "Privacy & Security," we choose from the browser the location where the file was stored. For a more efficient search, we can also use the “Filter.”
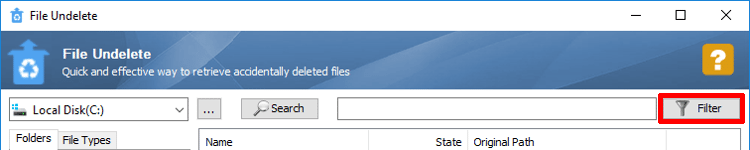
As we can see, we can enter the features of the file that interest us...

...and then we restore the selected file.
Note that the file recovery from the same disk that Windows run only applies to files of moderate importance.
For essential files, we must execute the data recovery process outside the operating system, ideally by connecting the hard drive to another PC.
File Shredder
In this section, we will not describe a computer maintenance tool but a destructive process.

As we saw in the previous section, we can restore deleted files. What happens, however, when we want to permanently remove a file, and make sure it can never be restored?
One solution is to take a hammer to the HDD. But destroying the whole drive for a single document or folder is probably overkill, and definitely wasteful.

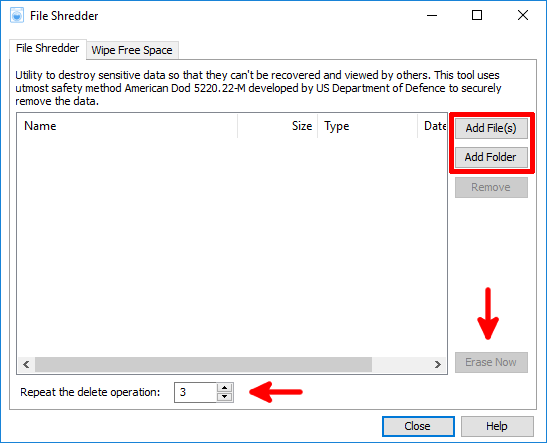
The secure erase procedure of Glary Utilities applies the magnetic data erasure standard DoD 5220.22-M that was developed by the United States Department of Defense.
Simply put, the file shredder deletes the files repeatedly by replacing their contents with junk data. The strongest form of the process is with ten repetitions.
To erase a file or a folder, we open the tool…
...we add the desired file or folder and before we press “Erase Now”, we set the number of the repetitions.
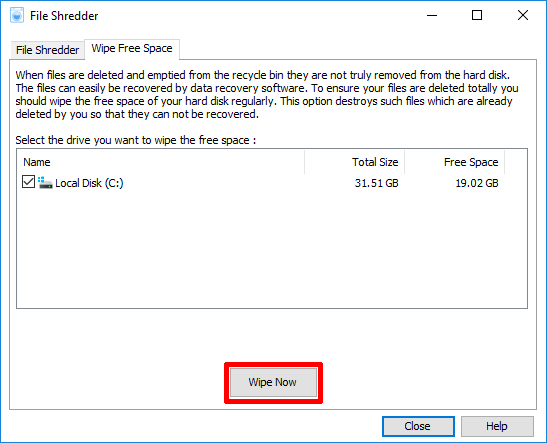
On the "Wipe Free Space" tab, we can run the process for the disk’s free space to remove its traces.
Which computer maintenance suite you are using?
Leave a comment to tell us which computer maintenance software is your favorite and which optimization tool you are using more often.
Support PCsteps
Do you want to support PCsteps, so we can post high quality articles throughout the week?
You can like our Facebook page, share this post with your friends, and select our affiliate links for your purchases on Amazon.com or Newegg.
If you prefer your purchases from China, we are affiliated with the largest international e-shops:
