

More often than not we face the challenge of editing images to our liking, whether it is with photo editing software or an online tool. Most of us have experienced the disappointment of image scaling, especially when we try to enlarge photos and end up with a blurry disaster. It is an undeniable fact that picture upscale equals to loss of quality, but some methods could minimize this loss.
Unblock any international website, browse anonymously, and download movies and Mp3 with complete safety with CyberGhost, just for $2.75 per month:

Digital graphics
The advancement of technology has introduced affordable, high-quality cameras to our daily life, even in our mobile devices. Thus, it is more likely that we will need to downscale our images, rather than enlarge them.
That said, there are a few cases that we may need to enlarge photos, and we can get away with good results. Before we describe the tips and tricks for a better photo enlargement, we need to understand the basics of digital graphics and the two main types of image files.
For those not interested in technical details, you can skip directly to the part on how to enlarge photos.
Bitmap graphics
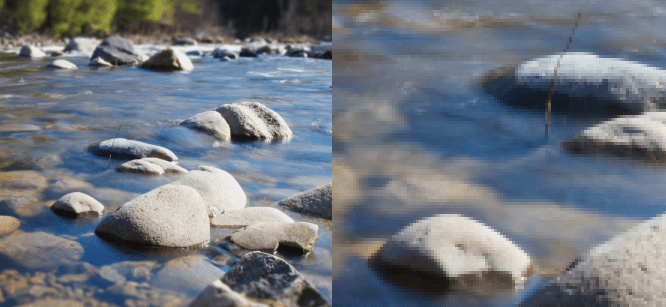
Bitmap or raster graphics consist of small dots, the well-known pixels. Pixels are the smallest single elements of information in a display device.
When we take a picture or when we save our photos in standard formats, such as jpeg and png, we create a raster image. If we enlarge a raster graphic and take a closer look, we will be able to distinguish the pixels in the photo.
Vector graphics
In the case of vector graphics, things are very different. This kind of images are not described by pixels but are rather defined by vector lines, polygons, and mathematical operations.
In simple words, every shape in a vector image is represented by points and coordinates. We can see an example of raster vs. vector graphics in the following picture.
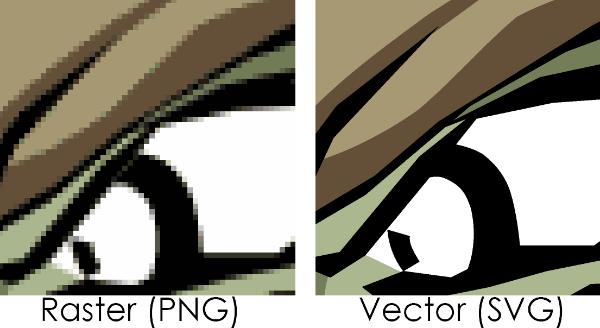
In vector graphics, when we enlarge photos, our computer recalculates the image's new size, according to the points and coordinates, rendering the same visual graphic.
As a result, no matter how much we upscale (or downscale) a vector image, we will have no loss of quality whatsoever.
A typical example of vector graphics are the fonts we use in our computers and portable devices in general. As we all know, we can change the font size to as big as we want on our office suite, and there will be no blurring or aliasing on the letters.
Why raster images tend to "pixelate" when we enlarge photos
First of all, we need to understand that when we resize raster images, it's impossible to prevent the quality loss entirely. Any resizing, either if you enlarge photos or try to reduce their size, will result in quality loss and further artifacts.
However, when we downsample an image, the loss is less noticeable than in photo enlargement.
We will try to explain this in detail with the following raster images.
Let's start with a very simple shape.

If we try to reduce the size of this image, the result will look like this.

As we can see, we can't tell the difference, since we can't notice any artifacts with the naked eye.
If we do the math though, the first picture consists of 400x400 pixels, which is equal to 160.000 pixels. The reduced image's dimensions are 200x200 pixels or 40.000 pixels in total.
At this point, it is clear that the smaller image has lost 120.000 pixels, which accounts for 75% of the original's pixels. That's quite a lot of information.
Now let's try to enlarge the original photo.

This time we notice a visible artifact: blurring edges. The new image size is 600x600, or 360.000 pixels.
During the size reduction, our computer had to "get rid" of the excess 120.000 pixels, deciding which ones to keep from the original photo. On the contrary, when we asked for an upscale, it had to create 200.000 new pixels and "guess" their color, depending on neighboring pixels.
Several algorithms calculate this kind of addition in different ways, but none of them can create a picture with no artifacts that will be as good as the original image.
Resizing algorithms
To enlarge photos, we will need some editing software. This could be as simple as Windows' Paint, or any other alternative program with more capabilities.
But let's see how this program would double the size of a 5x5 pixel image.
At first, the program would retain the original pixels and create the necessary space for the new pixels. Then it needs to find a way to calculate the color of those pixels.
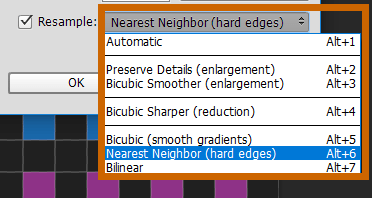
As we already mentioned, there have been created several algorithms for this purpose. Most advanced photo editors, like Photoshop and GIMP, include multiple algorithms to enlarge photos or reduce their size. That way, we can pick the best one, depending on the image we are trying to upscale.
That way, we can pick the best one, depending on the image we are trying to upscale. The most common algorithms are the following:
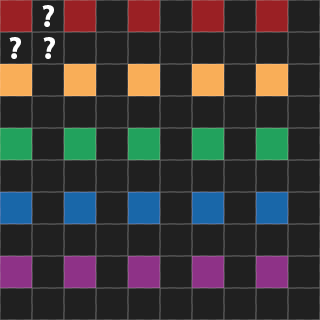
- Nearest Neighbor: This is one of the simplest methods. The algorithm uses the nearest neighbor pixel to define the color of a new one. That way though, the picture gets a very noticeable aliasing artifact. The lines tend to look like "stairs, " and we usually say that the picture is "pixelated."
- Bilinear: This algorithm takes into account the four nearest pixel values and uses bilinear interpolation to calculate the color of the new pixels. The most common artifact of this method is the blurring of the final image.
- Bicubic: It is very similar to the Bilinear method, but depending on the photo, it can retain more details. In very bright areas it can produce some clipping, where pixels turn into white. Nevertheless, this phenomenon may make the picture sharper, and thus it is desirable in some cases.
Photoshop and most of the advanced photo editors offer all of the above options.
Other programs may implement even more algorithms, such as Lanczos, B-spline, and Mitchell.
For a detailed comparison between all those algorithms, you can visit this website.
Rules and tips on how to enlarge photos
Most of the times, the image we want to enlarge is a bitmap rather than a vector image. We already saw that, in theory, there is no way to achieve a 100% same quality as the original.
However, the human eye is not advanced enough and can't always tell the difference. As a result, there are some techniques we can use to make artifacts less noticeable and get away with the least quality loss.
Never go beyond 300%
When it comes to medium and large photos, a 200% enlargement is usually not noticeable. At this point, we can get a good result.
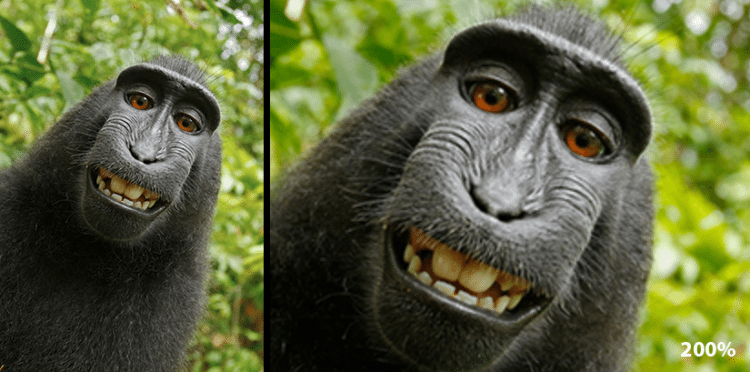
Depending on the photograph, we could try to go as high as 300%
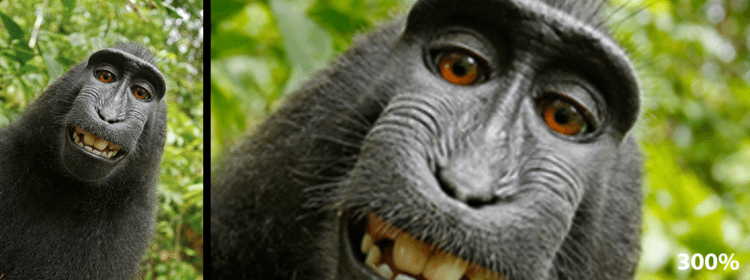
Here we start to notice some blurriness that will only get worse if we go above 300%.
In any case, however, we should experiment with different scalings and end up with the one that looks less bad, at least in our eyes.
The biggest the original image, the better
One of the most important things we should take into consideration is the starting image size. If our picture is small, then even the slightest enlargement will produce artifacts.
Conversely, if the original image is big enough - we would say above 1000x1000 pixels - the quality loss won't be so noticeable.
This rule goes hand in hand with the previous one. For instance, we can't enlarge a 200x200 image by 300% and expect it to look good.
Sharpening
If the editing program we use applies some sharpening when we enlarge photos, then it will have better results.
All the advanced photo editors come with a variety of sharpening filters, that might come in handy in picture upscaling.
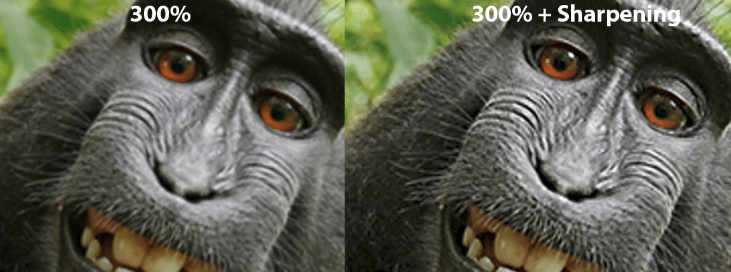
Trial and error is our best bet once again.
A Sharper Scaling
There are plenty of programs out there that promise to enlarge our photos in a few clicks, with no quality loss.
These programs use one of the algorithms mentioned above, along with a set of filters (sharpening, noise reductions, etc. ), so as to trick the human eye and make the photo "better."
An experienced Photoshop user will be able to apply these filters manually and probably end up with an even "better" result.
However, not all of us use Photoshop, let alone being professionals. Wouldn't it be better if we had a more simple program with some automated presets, to do all the hard work for us?
It seems that with A Sharper Scaling, we do. The program is free of charge, and it comes with a scaling preset that looks more than satisfying.
Install and first use
First, we need to download the executable file from this website.
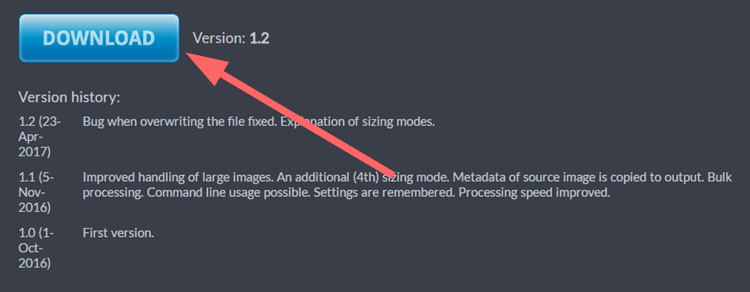
The installation is simple, and it won't try to sneak in any weird browser extension or any unwanted third-party apps.
In our first interaction with the program's interface, we will notice that it is pretty straight-forward.
- We can paste any clipboard image...
- ...or choose one from our drives.
- Alternatively, we can select entire folders for batch image resizing.
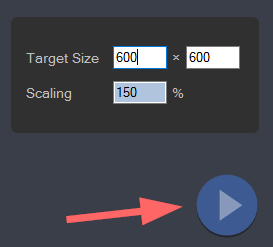
The next step is to choose the desired scaling and press the blue play button on the right.
At this point, we can preview our image...
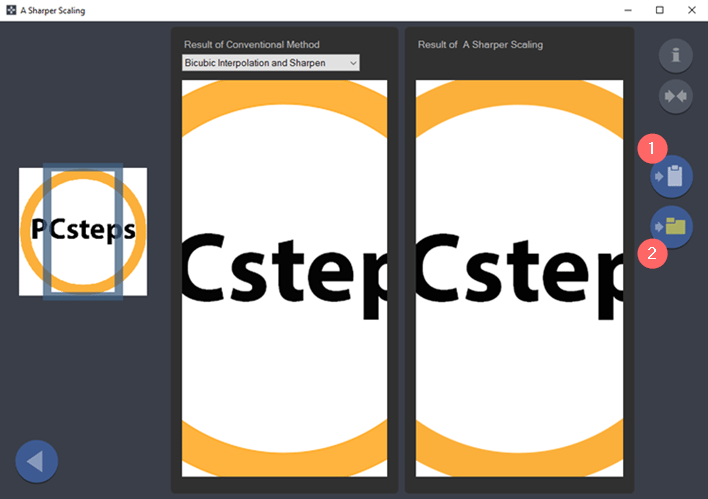
- ...and copy it to our clipboard...
- ...or save it to a local folder.
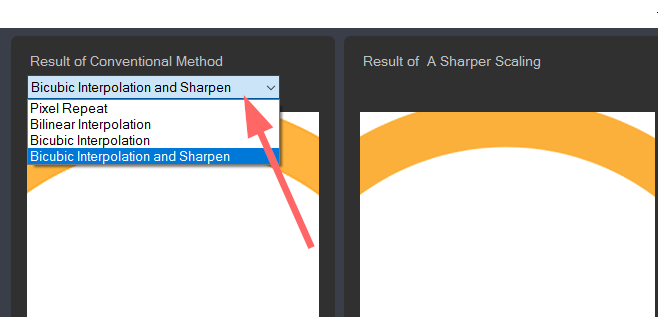
The left preview panel shows a comparison of the most common resizing algorithms.
In our tests, we made a comparison with the image we used in the beginning. The upper part of the picture shows a typical Photoshop scaling, while for the lower size we used A Sharper Scaling.
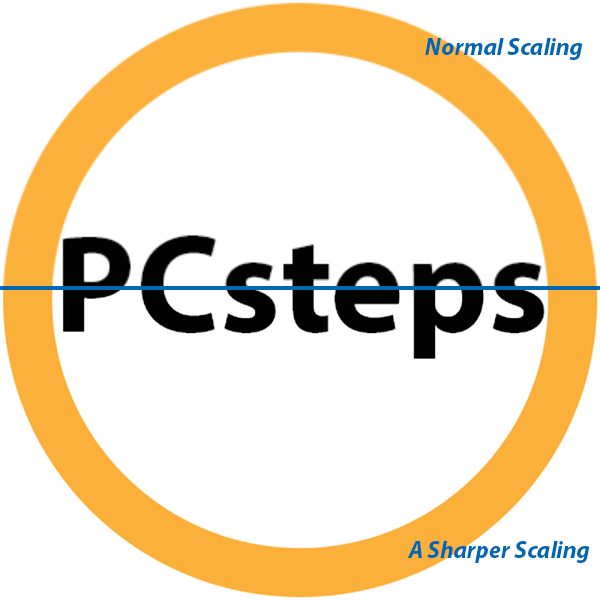
Not bad for a program with automated presets!
Of course, the challenge will be bigger with a more complicated photo, but it is worth a try.
How often do you enlarge photos?
Did you achieve a better quality - or rather less quality loss - with the methods mentioned above?
If you know any other tips for a better photo enlargement or if you have any questions regarding this guide, let us know in the comments below.
Support PCsteps
Do you want to support PCsteps, so we can post high quality articles throughout the week?
You can like our Facebook page, share this post with your friends, and select our affiliate links for your purchases on Amazon.com or Newegg.
If you prefer your purchases from China, we are affiliated with the largest international e-shops:

smallest being images the how largest dimension makes able we?
The 200% to 300% rule applies to all images.