


Creating a website offline is free, and it allows us experimentation without compromising a live website. If we run Linux Mint or Ubuntu, the best way to create a website offline is to install a LAMP (Linux, Apache, MySQL, PHP) server. We can have an offline website up and running in minutes.
Unblock any international website, browse anonymously, and download movies and Mp3 with complete safety with CyberGhost, just for $2.75 per month:

We have created this guide on Ubuntu 17.04 and Linux Mint 18.3. It should work for any distribution based on Ubuntu 13.10 and above.
Install LAMP on Linux Mint / Ubuntu
Do a full update
Before we install LAMP on our Linux distribution, it's best to do a full update. We just open a terminal with Ctrl+Alt+T and type:
sudo apt-get update && sudo apt-get dist-upgrade -y
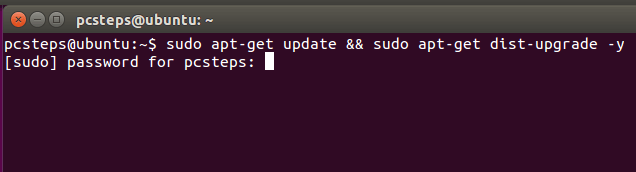
Just a reminder for Linux beginners, when using the "sudo" command, nothing will show as we enter our account's password, nor stars or dots or anything. We just type the password and press Enter.
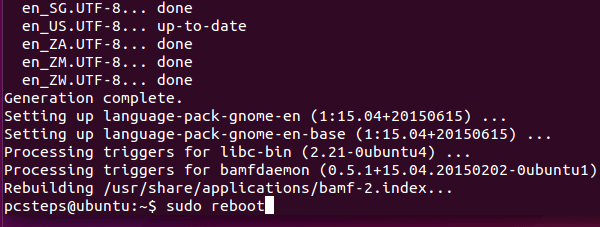
After the update is done successfully and with no error messages, it's best to reboot our PC with:
sudo reboot
Install LAMP on Linux with a single command
After the reboot, we open a new terminal, and type:
sudo apt-get install lamp-server^ -y

Make sure you type the "^" with Shift+6.
This single command will install pretty much everything essential for a LAMP server: Apache2, MySQL, and PHP5, as well as the necessary libraries.

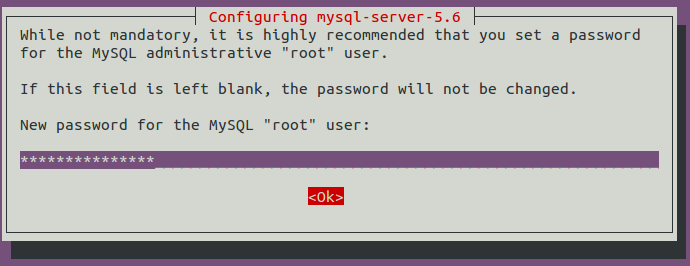
During the installation, MySQL will ask us for a root user password. Since we will be creating a local website, we could consider leaving this field empty, but it is good form to create a strong password.
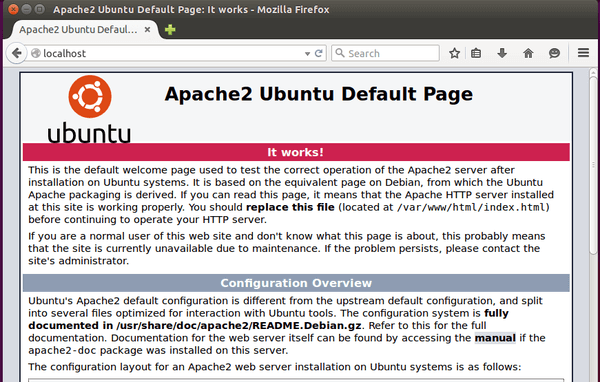
After the successful installation, without any error messages...

...we can try the LAMP bundle by opening a browser and navigating to http://localhost. It should show the Apache 2 Ubuntu Default Page.
Create a local website on LAMP
Setup Apache
After we install LAMP, it's a good idea to copy the default apache configuration, so we can create multiple local websites.
We just type on the terminal:
sudo cp /etc/apache2/sites-available/000-default.conf /etc/apache2/sites-available/mysite.conf
For this command, and some of the commands that follow, you should ignore the line-break on the website and the screenshots, these are single-line commands.

Of course, we can replace "mysite.conf" with a name particular to the local website we want to create, eg. newproject.conf or localsite.conf.
The successful copy won't give any confirmation message. We just enter the following command to edit the new configuration file.
sudo gedit /etc/apache2/sites-available/mysite.conf

This will open the gedit text editor with administrative rights. There, we look for the line...
DocumentRoot /var/home/114656.cloudwaysapps.com/mensbrnuyd/public_html/html

...delete the /var/home/114656.cloudwaysapps.com/mensbrnuyd/public_html/html part and type the path to the folder where we will install the local website. A good choise is /home/(our username)/public_html , to save the folder within our home folder.

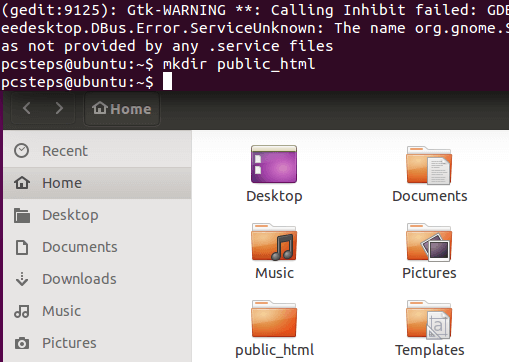
We then save the file and close gedit. If we haven't created the public_html folder yet, we can do it with:
mkdir public_html
Finally, we need to edit the apache2.conf with
sudo gedit /etc/apache2/apache2.conf

Near the end of the file we will find the line:
<Directory /var/home/114656.cloudwaysapps.com/mensbrnuyd/public_html/>
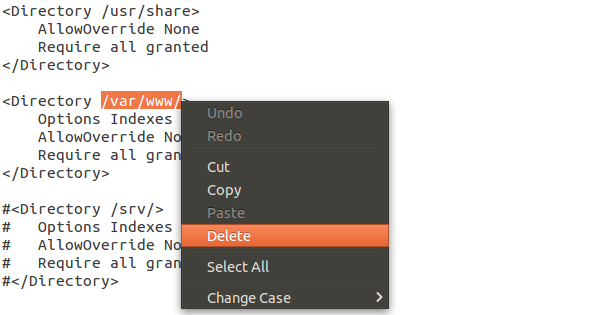
We remove the /var/www part (but not the trailing ">") and type the folder that contains our public_html folder, in the example /home/pcsteps/
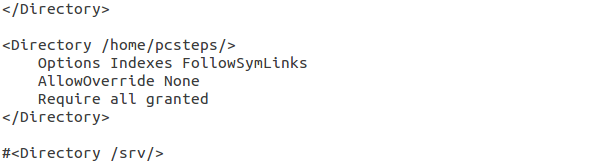
This tells Apache that all the local websites we will create will be in separate folders within our home folder.
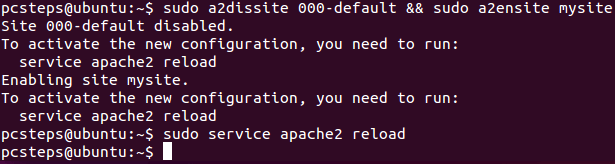
After that, we type the following command, to disable the default website from apache and enable our new local website.
sudo a2dissite 000-default && sudo a2ensite mysite

In case you were curious, a2dissite is short for apache2disablesite and a2ensite stands for apache2enablesite.
We need to restart Apache2 to recognize all the changes, typing:
sudo service apache2 reload
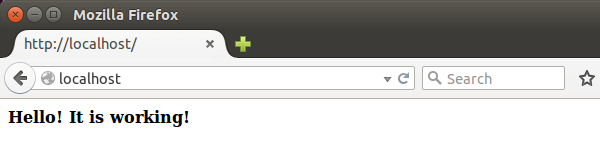
Finally, to test that everything is working, we need to create a simple index.html file within our public_html folder. We can do it with an echo command:
echo '<b>Hello! It is working!</b>' > /home/pcsteps/public_html/index.html

Now, going to http://localhost will show the above message.
Install phpmyadmin
Phpmyadmin is probably the best GUI tool to manage MySQL databases. It is not part of the bundle when we install LAMP, but we can install it separately, with:
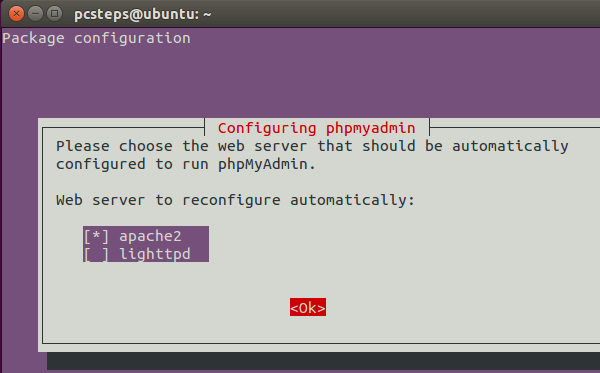
sudo apt-get install phpmyadmin -y
![]()
We select the automatic configuration for apache2 with the space bar, and press Tab to select Ok.
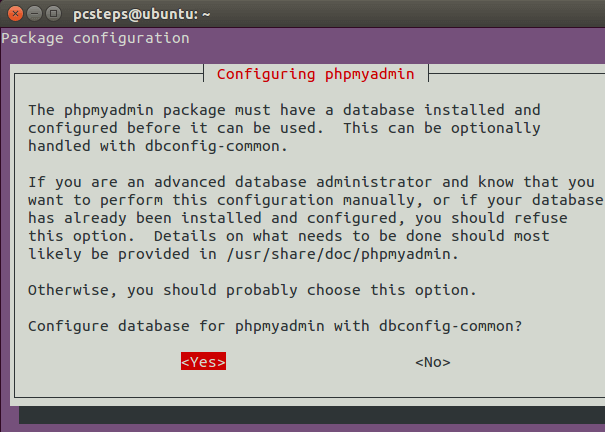
We also select to create a database for phpmyadmin with dbconfig-common.
First, we need to enter the MySQL root password we created while we installed LAMP.
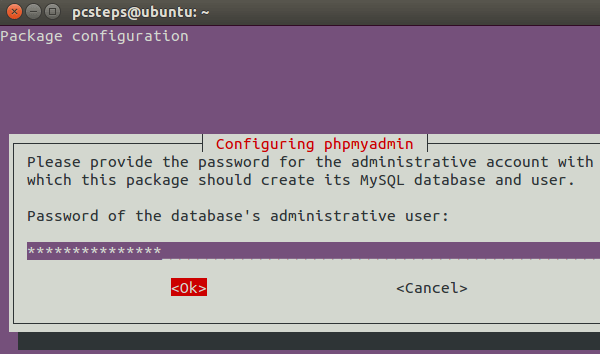
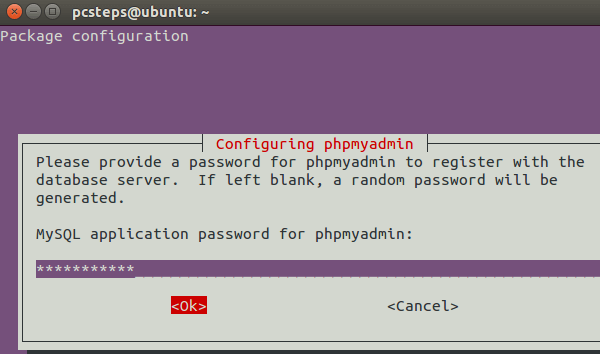
Then, we should create a separate password, to connect phpmyadmin with MySQL.
We will find the phpmyadmin interface by typing http://localhost/phpmyadmin.
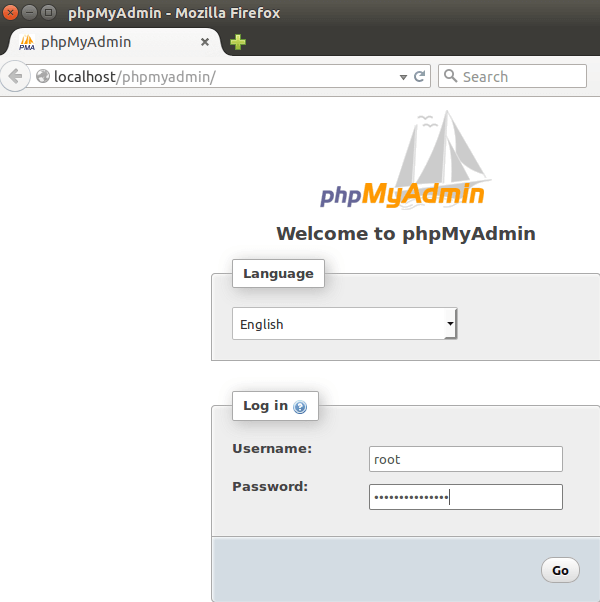
We log in with root and the first password we created while we installed LAMP.
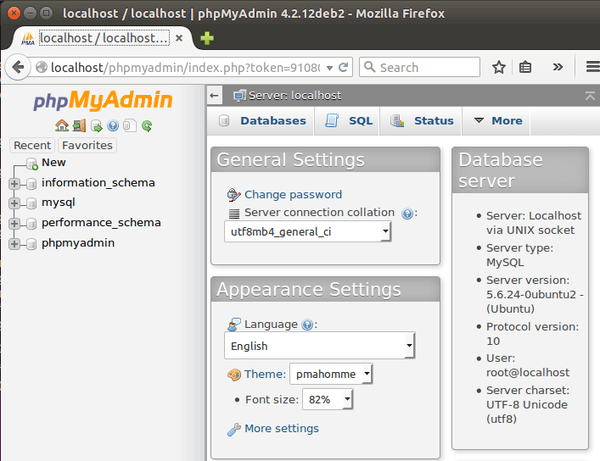
Now, we can create as many databases as we want, and setup every CMS: WordPress, Joomla, Drupal etc.
Will the local website I have created be accessible through the internet?
By default, after we install LAMP we can only access a local website locally.
There are methods to have our personal PC work as a full web server, but it isn't a good idea, both performance and security wise.
Did you have any trouble to install LAMP?
If anything didn't work as described while you attempted to install LAMP, leave us a comment.
Support PCsteps
Do you want to support PCsteps, so we can post high quality articles throughout the week?
You can like our Facebook page, share this post with your friends, and select our affiliate links for your purchases on Amazon.com or Newegg.
If you prefer your purchases from China, we are affiliated with the largest international e-shops:
