

Push notifications are an incredible tool for promoting our website's content and staying connected with our readers. At first, this type of notification was only available for mobile devices, but now all the major browsers support desktop notifications for Windows, Mac, and Linux. Let's see how to add push notifications on a WordPress site.
Unblock any international website, browse anonymously, and download movies and Mp3 with complete safety with CyberGhost, just for $2.75 per month:

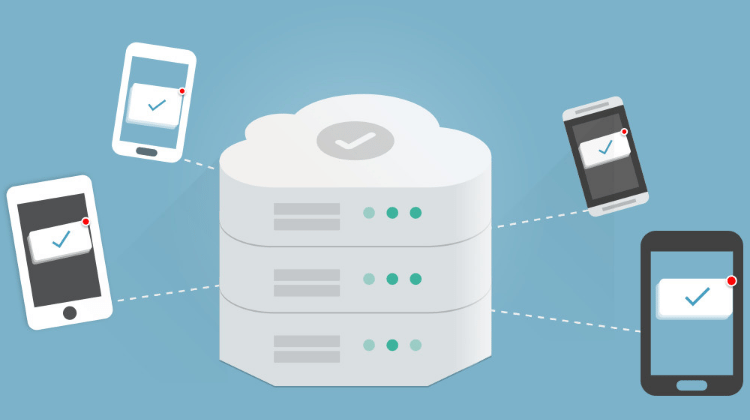
Free, Unlimited push notifications on WordPress with OneSignal
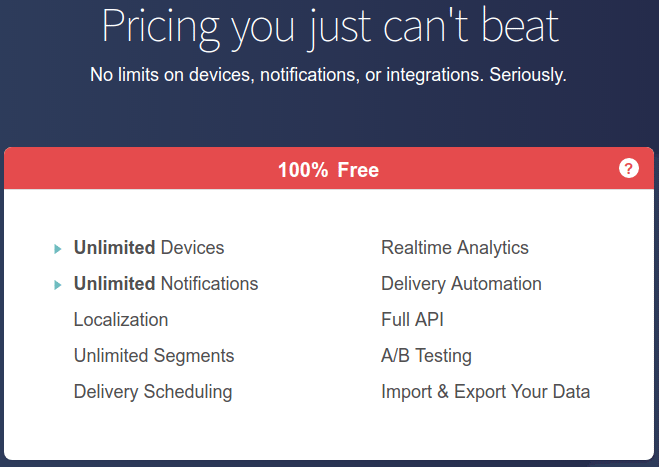
There are a lot of platforms that will allow us to integrate push notifications on our website. However, many of them have limitations on their free-tier programs or only feature a limited free trial.
OneSignal is one of the few push notification platforms that is both free and unlimited, regardless if we have a hundred, a thousand, or a million subscribers.
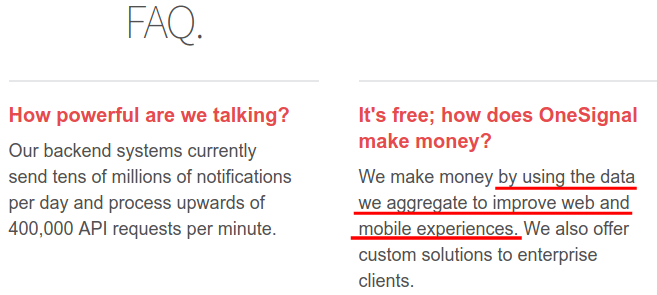
Of course, as the old saying goes, "If you are not paying for it, you're not the customer; you're the product being sold."
As per the company FAQ, OneSignal makes money "by using the data we aggregate to improve web and mobile experiences." Which is a roundabout way to say that they are selling the information they gather from our website's push notification subscribers.
If this is a dealbreaker for you, you should choose a push notification service other than OneSignal. After all, there are more than one hundred to select from. If you are okay with OneSignal's terms, keep reading.
Sign up with OneSignal
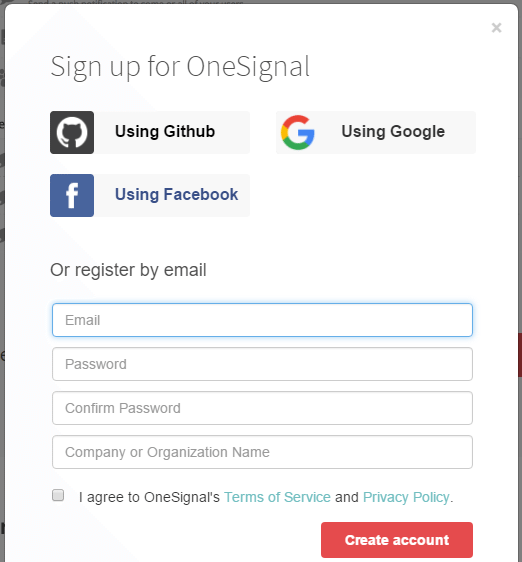
The first step is creating a free account at the OneSignal website. We will find the sign-up button at the bottom of the homepage.
We can sign up with our email or with our Facebook / Google / Github account.
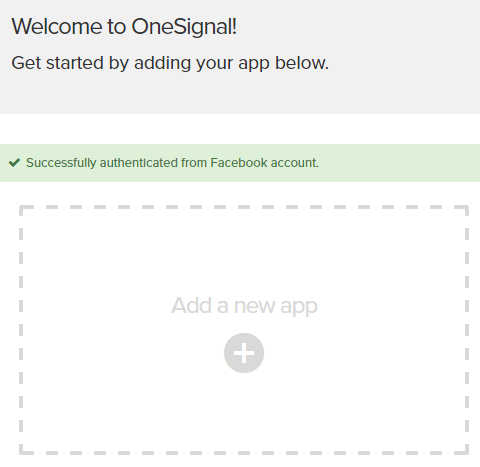
On our first login, we will get a "Welcome to OneSignal" screen, which we can close.

Set up our OneSignal account
To get started, we click on "Add a new app." Every app is for one particular website, so if we have more than one sites, we need to add a separate app for each.
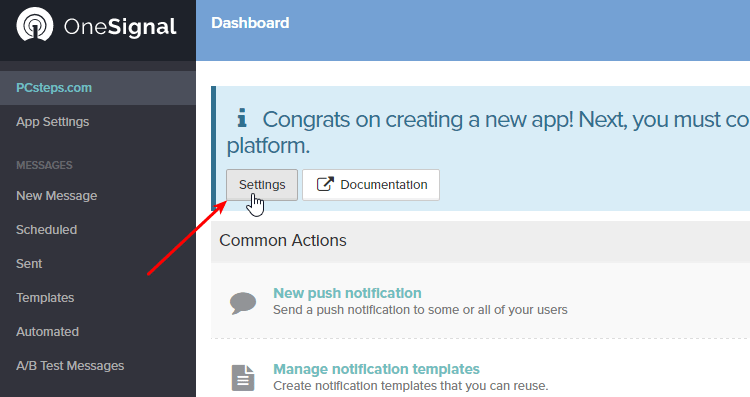
Firstly, we name our app. This name won't show anywhere; it's for our personal use.

Then, on the next screen, we click on the Settings button.
Set up push notifications for Chrome / Firefox
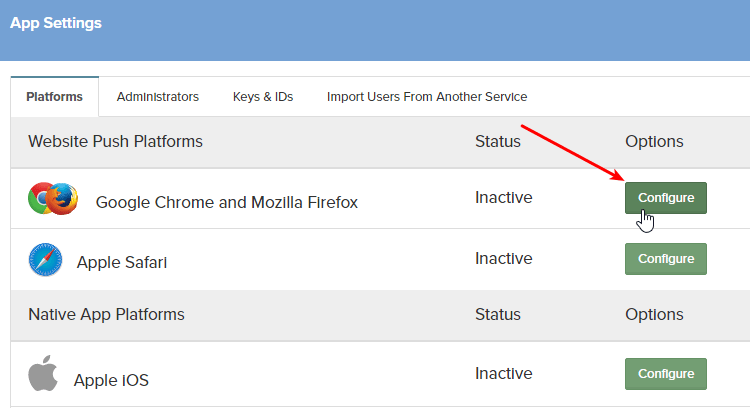
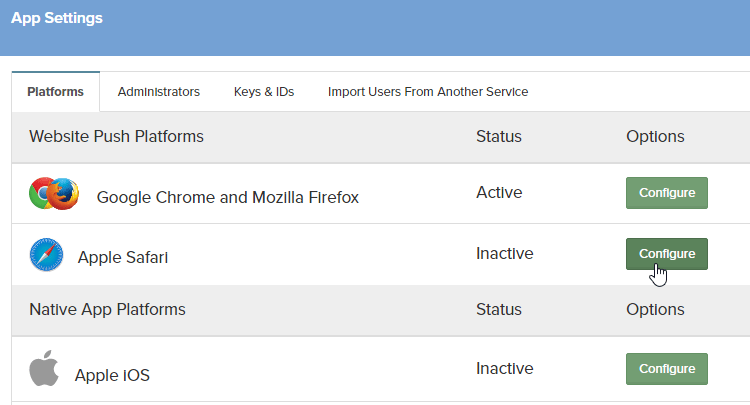
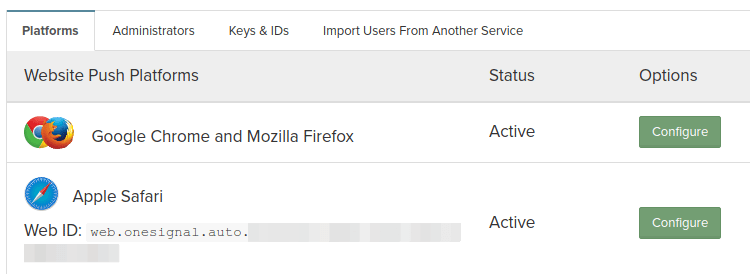
We will find separate settings for Chrome / Firefox and Apple Safari, because of the way Safari handles push notifications. On this guide, we will cover both of the different methods.
For starters, we click the Configure button for Chrome and Firefox.
We enter our site URL and the path to default icon we want to use for the push notifications. Of course, when we send a push notification for a post, the post's featured image will replace this default icon. But it's good to have a default for other notifications.
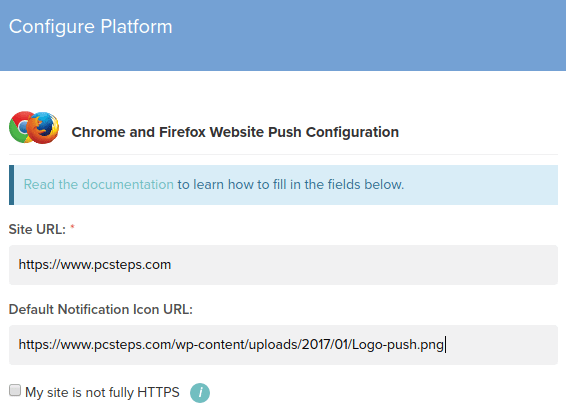
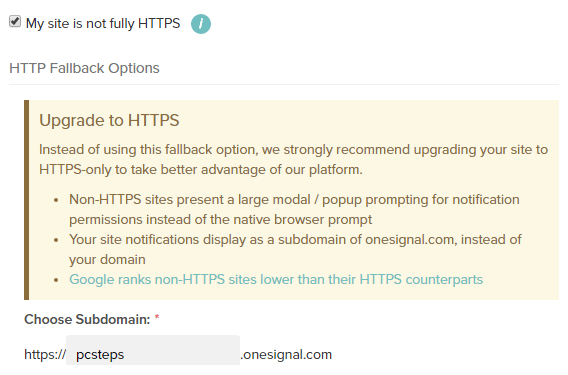
If we haven't implemented SSL on our website, which means we are using http:// instead of https://, we must check the "My site is not fully HTTPS" checkbox.
OneSignal makes a good point that we should upgrade to HTTPS. But not every website owner is ready to make this step. If that is the case for you, just choose a subdomain within the OneSignal website.
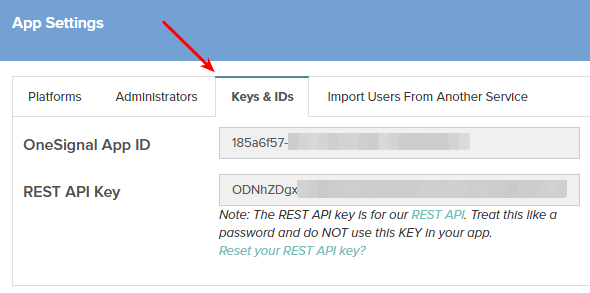
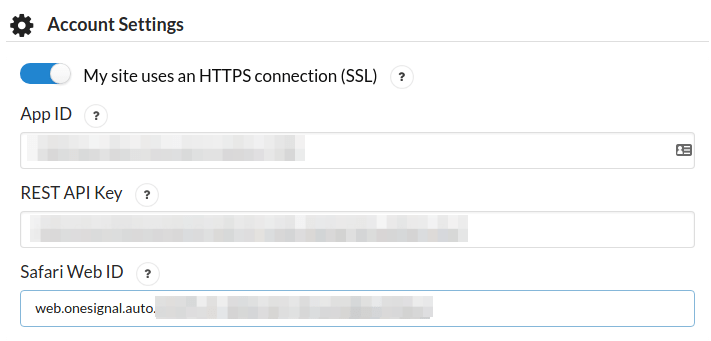
After we save, we click on the Keys & IDs tab. There, we will find the information to add to the OneSignal WordPress Plugin later on.
Set up push notifications for Safari
Back at the Platforms tab, we click "Configure" for Safari.
To set up push notifications for Safari, we just need to add our site name and Site URL.
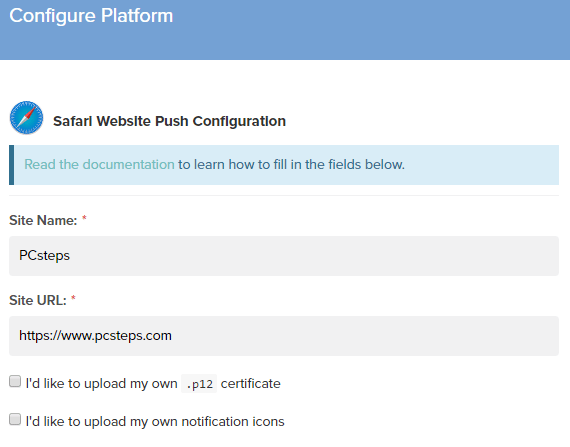
We don't need to upload a .p12 certificate or notification icons; it's optional to do either.
It is a somewhat complicated process to produce a .p12 certificate, which requires terminal access to our web server. But even if we have an https:// site, we don't need to upload our own certificate by hand.
After we click on save, we will get a unique Web ID for Safari.
We can leave this tab open, and go to our WordPress site's back office to install the OneSignal plugin.
Install OneSignal on WordPress
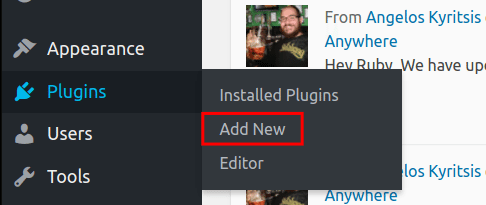
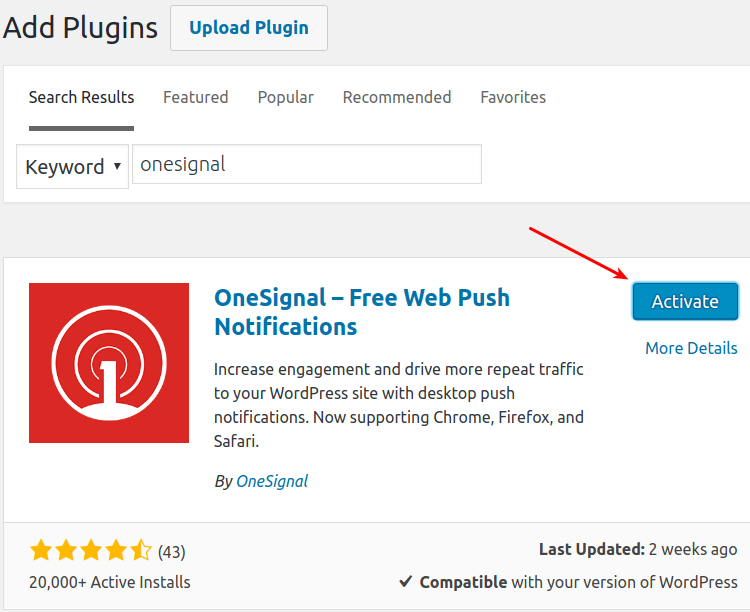
We will find and install the OneSignal plugin through the WordPress repository, like any other plugin. Namely, we log into our website's dashboard and click on Plugins -> Add new.
Then we search for OneSignal and click "Install Now."
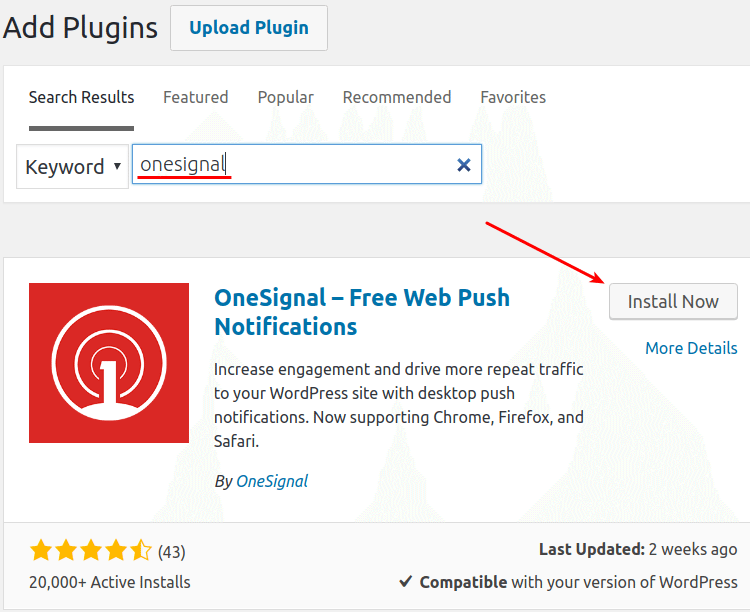
The installation will be over in a few seconds, and we click to activate the plugin.
Connecting our website to the OneSignal account
We are now almost ready to start gathering push notification subscribers and begin sending notifications with every new post. We just need to get the Key, ID, and Web ID information from the OneSignal account and add them to the plugin.
Firstly, we click on the OneSignal Push item on our dashboard menu.

There, we click on the configuration tab, where the first few fields are where we must add the info from the OneSignal account.
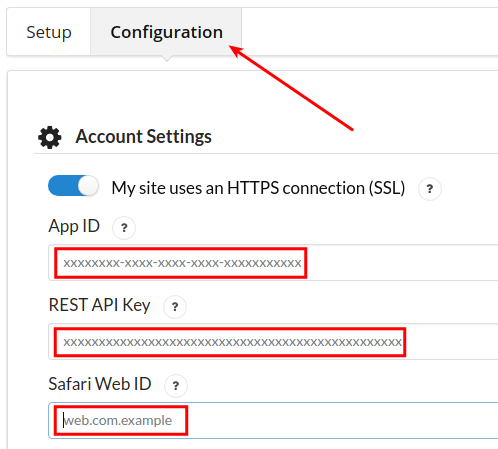
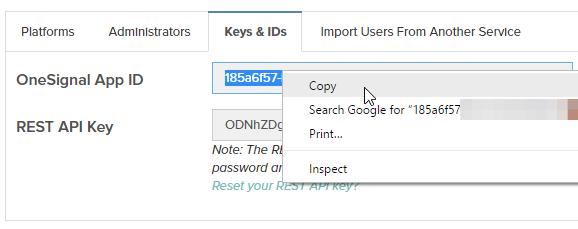
There is a weird thing going on with the App ID and REST API key fields on the OneSignal website. The cursor turns into a "forbidden" sign when going over them.

Despite that, we can select the App ID and REST API key text, right-click and copy them to paste them to the plugin.
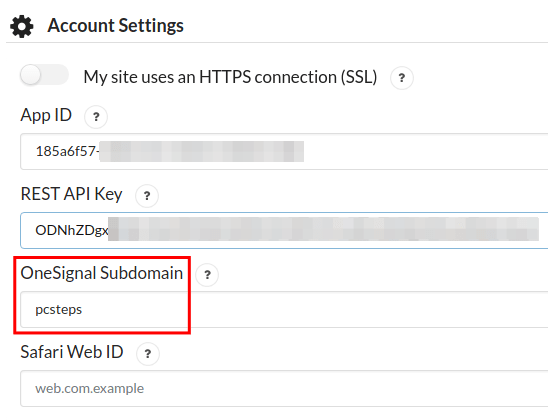
If we haven't encrypted our website with https://, we have to turn off the switch and add the subdomain we created on the OneSignal website.
Finally, we add the Safari Web ID.
Push notification options in OneSignal
The OneSignal plugin has an impressive range of choices for the notifications. Arguably the most important are at the Prompt Settings & Notify Button section.
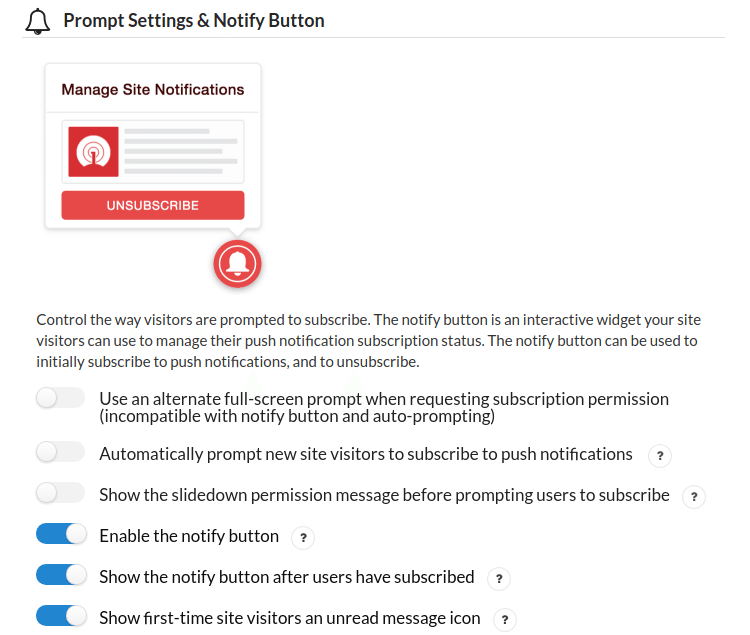
Of course, you can decide which options you want for your website. Our suggestions for these options are as follows:
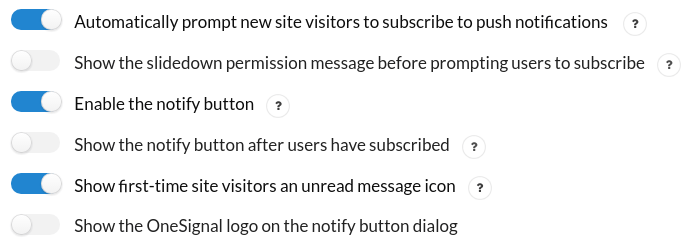
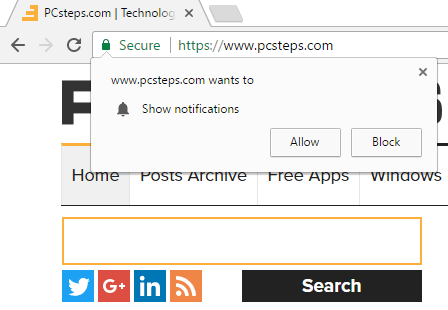
These options will automatically show the notification prompt on new visitors...
...and also provide a button for anyone wanting to subscribe manually.

There are more options to select specific colors for the button and text for the notifications. You can take your time to make sure everything is ready, before enabling the push notifications system.
Finally, at the bottom of the page, we will find the save button that will save all our customization and enable the push notifications.
How do I send push notifications with OneSignal
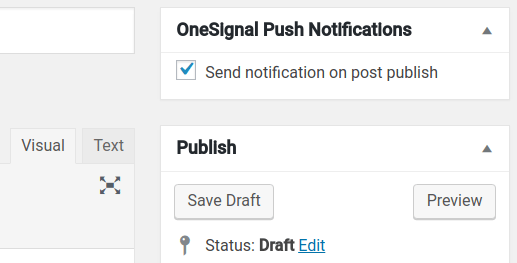
With the successful install for the OneSignal plugin, we will get a new box in our WordPress Editor, and choose whether we want to send a notification on the post's publish automatically.
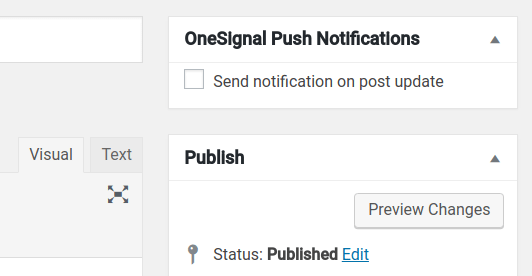
On earlier, published posts, this box will allow us to send a notification on a post update, which is unchecked by default.
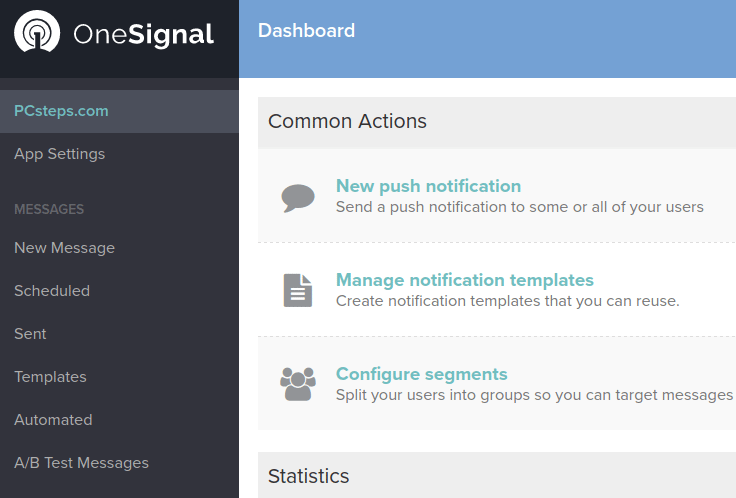
Apart from push notifications for posts, we can also create our custom notifications through our OneSignal account, create templates, do A/B tests, and view our statistics.
Apart from the somewhat complicated initial setup, the whole system is easy to use ever for inexperienced website owners.
Did you have any trouble with OneSignal and push notifications?
If you had any trouble installing OneSignal and enabling push notifications, or if everything worked as it should, leave us a comment.
Support PCsteps
Do you want to support PCsteps, so we can post high quality articles throughout the week?
You can like our Facebook page, share this post with your friends, and select our affiliate links for your purchases on Amazon.com or Newegg.
If you prefer your purchases from China, we are affiliated with the largest international e-shops:

Leave a Reply