


Google AdSense allows everyone with an approved website to show Google ads and earn the 68% of the click revenue. It is one of the easiest ways to make money through a site or blog. Let's see how to sign up for Google AdSense and create income.
Unblock any international website, browse anonymously, and download movies and Mp3 with complete safety with CyberGhost, just for $2.75 per month:

Do you have a website?
Google AdSense is available only for people over 18 years old that have a functional website. If you don't have a website yet, you can't sign up with Google AdSense - unless you become a YouTube partner, but that's a subject for a different guide.
So, we need to have a website, and we need to have it on a platform that allows us to make changes to the HTML files of the site, or that explicitly supports AdSense.
For instance, if we have a (website).wordpress.com blog, their policy doesn't support Google AdSense and other similar networks. The same might be true for other blogging platforms.

If we have created a website on a CMS, such as WordPress.org, Joomla, Drupal, etc., we can sign up with Google AdSense.
If we prefer a blogging platform, Google's own Blogger is one of the most reasonable choices, since it naturally supports full AdSense integration. Webnode is another excellent platform that fully supports Google AdSense.

How to get your website approved
Having a website that can support Google AdSense and it being approved to run Google Ads are two different things.
First of all, the site must be fully operational. Web sites under construction, with no posts, with dead links and problems loading will not be approved.
Google mentions that the site needs to "contain enough textual content for our specialists to evaluate". They don't provide a hard number on how many posts or pages our website must have, but it should have more than two, or three, or ten. And they should be high-quality, original posts, not posts copied from elsewhere on the web.
Also, the website's content must comply with the Adsense Content Policies. Web sites with adult content, illegal content, copyrighted material, hacking and cracking content, etc. will not be approved. Google AdSense is a "family friendly" ad network, and they have very low tolerance for websites that don't fit in that image.

Gambling sites are an unusual situation because they can show AdSense ads only on particular countries, notably not the United States.

It's essential to familiarize ourselves with the full AdSense Program Policies, before applying. The policies contain critical information not only for the website's content but for the Ad placement, the ad behaviors, the webmaster guidelines and all the "dos and dont's" we need to know.
Even after being approved for Google AdSense, violating those policies can result to us having our AdSense account banned.
So, if you checked out the above resources, and are positive that your website is up to code, this is how to proceed.
How to sign up for Google AdSense
Signing up for Google AdSense is simple. First we visit http://adsense.google.com and click on "Get started now".

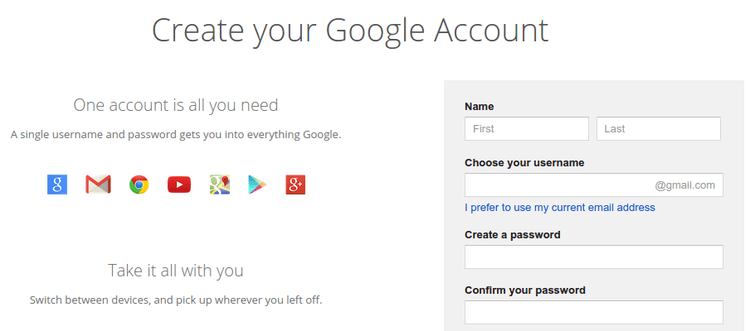
On the next screen, we can select an existing Google Account to sign in to AdSense, or create a new one.

If we are already using Gmail or have an account on any of Google's products (YouTube, Google+, Google Drive, Google Play, Blogger, etc.), we already have an account that can sign up to Google Adsense. So, we can click on the "Yes, proceed to Google Account sign in".
If we don't have a Google account of any kind or want to have Google AdSense on a separate account, we can create one with the second button.
After we have signed in, we need to enter our website URL and select our content language. Not all languages are available for Google AdSense.
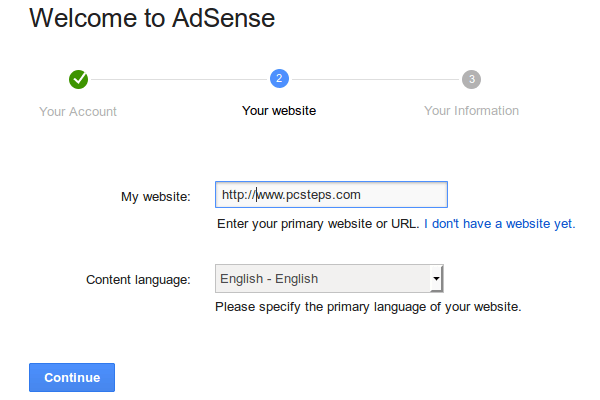
Even if we intend to run Google AdSense on two or more websites, we can enter only one for the creation of the account. Once this web site is approved, we can create ad units for multiple sites, provided they too follow the Google AdSense policies.
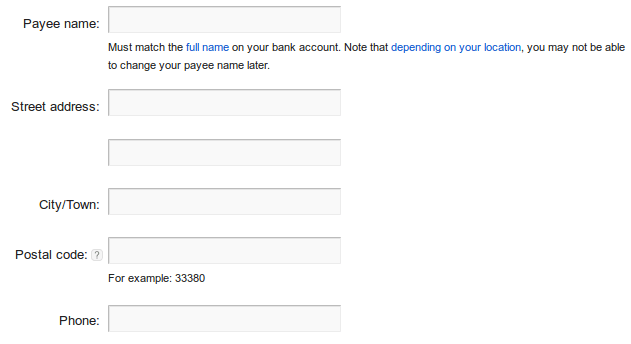
On the third step of the procedure, we enter our contact information. It is important that we select the country we currently live in, not the country our website targets. In the example, PCsteps.com isn't a French website, but since I live in France, this is the country I must select.
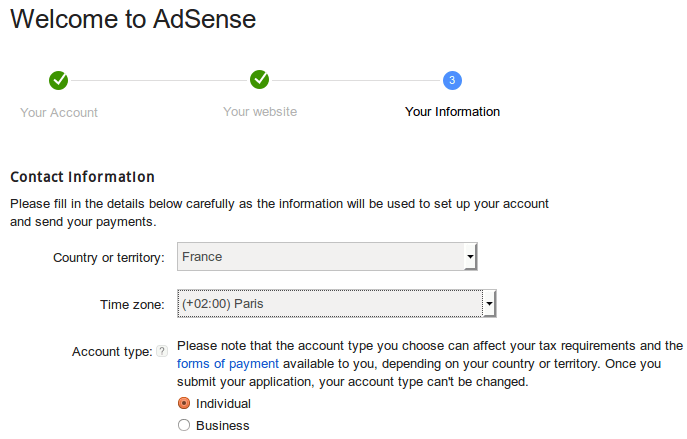
We need to make sure we fill in all the fields correctly because it will help with the approval of our website.
Also, we must make a choice for the Email preferences, even if it is "No" for every one of them.

Then, we submit our application and wait to receive the first confirmation email on the email connected to our Google Account.

After the first confirmation
Provided our website is up to code, we will receive the first confirmation in about 6-8 hours. Since I live in France and had declared so on the Google AdSense application, the email was in French.

This message means that our website has passed a preliminary check, but the full confirmation, which will allow us to earn ad revenue, is yet to come.
We now need to create a new ad unit and place the ad code on our website.

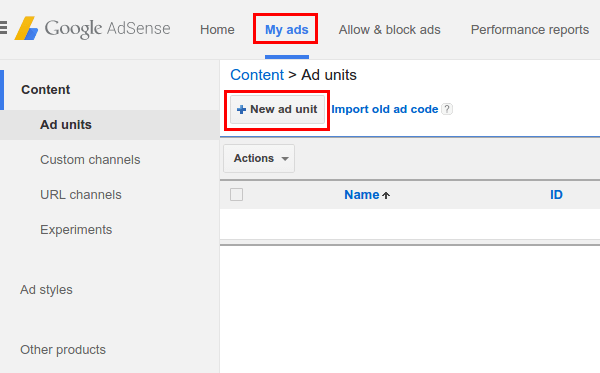
We just click on "My Ads" on the top menu, and select "+New ad unit".
The ad sizes we create, and their positioning on our website can make an enormous difference for our revenue. For the time being, though, it is more important to have our website approved, than to do a full ad optimization.
For the example, we will create a 336x280 Large Rectangle, which is one of the highest performing ad units in Google AdSense. We give a name of our choice to this ad unit, and leave the default 'Text & display ads" ad type.
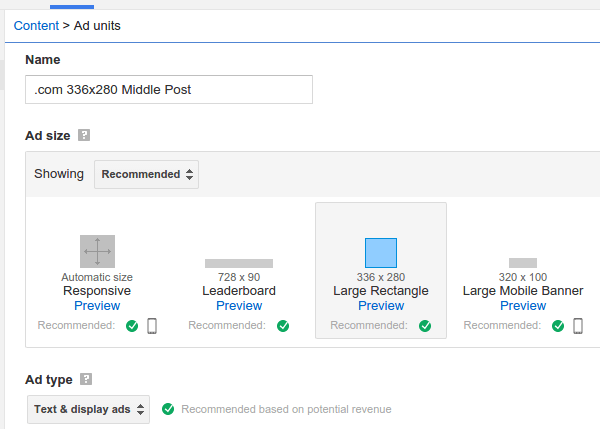
It's not important right now for the approval, but it is a good idea to select a Text ad style other than the default. On a future guide, we will show how to set-up Google AdSense experiments, to find the perfect ad coloring scheme for our website.

Creating a custom channel is optional. It is used to group ad units however we like, e.g. by size, by location, etc., so we can better monitor our website's ad performance. We can also use custom channels to check which ad placements give us the best results on our website, but we will cover this in a separate optimization guide.
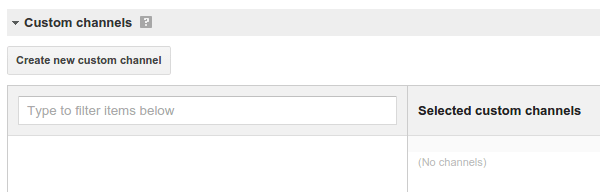
Since we are right now creating our first ad unit, when we create a custom channel there are no units to add, but after the creation, the current ad unit will be added to the channel automatically.

We can also enable "Targeting" for the custom channel. This way, it will be shown to advertisers as a targetable ad placement.

Finally, we can select what will happen if there isn't an ad for the particular ad unit. We can select blank space or a solid color, or select to show other ads from another URL. Again, this can be useful, but not for the website's approval.

To create the ad unit, we click "Save and get code".

This will show the ad's code, which we must copy and add to our website.

For the Code type, "Asynchronous" is the best option, because the ad will wait for the rest of the website to load before it loads itself. This is essential for our website's loading speed, and a fast loading website is an excellent website for its visitors.
How to add the ad code on WordPress
The method to add the ad code on our website depends on the website's content management system (CMS).
In the example, we will show how to add the code on WordPress, which is one of the most popular and easy to use content management systems.
It is a simple as going to Appearance -> Widgets...
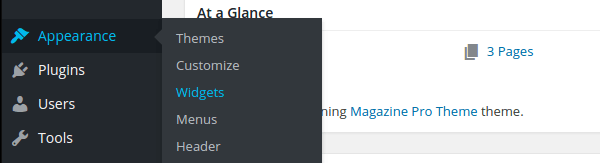
...and drag a text widget on our Theme's placeholders. The sidebar, if our theme has one, is a prime location for an ad unit.

Inside the text widget, we paste the Google AdSense code for our ad unit and click on Save.

After that, we can only wait for our website to be approved. While we are waiting for the approval, no ads will be shown on the ad unit, it will only show as blank space.

The final approval
How long it will take for the website to be approved depends on our traffic. If we only have a few visits per day, it could take up to 2-3 days. With higher traffic, at about 2500-3000 daily visitors, the approval could come within a few hours.
In any case, we will receive a new email with our status - again in French, in my case.

Now, our ads are up and running, and we can create more ad units to put on the website.
If you read the Adsense Policy carefully, you should remember that no more than three AdSense ads can be on the same page. Adding more units is a violation of the Policy, and in most cases only three of them will load.
How much money can I make with Google AdSense?
As we mentioned earlier, for each click our ads receive, we earn the 68% of the revenue, and the 32% goes to Google.
The Cost Per Click (CPC) depends both on the country of the person that clicked on the ad, and the ad itself. Usually, developed countries have highest CPCs. The following numbers are our full earnings per click, with the 68% already calculated.
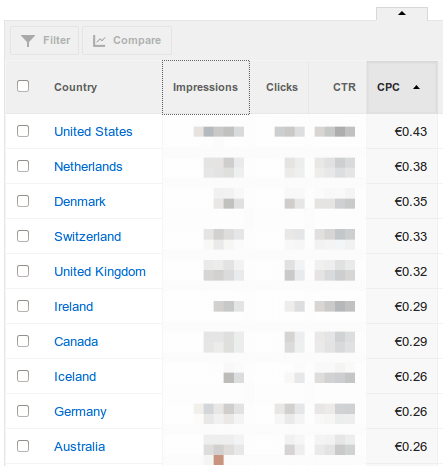
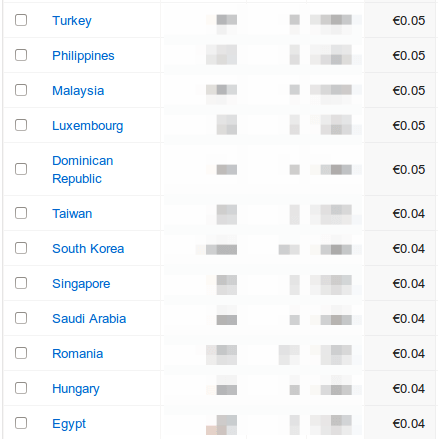
The difference with less developed countries can be quite significant.
Apart from that, there is no limit whatsoever on how much money we can make with Google AdSense. With an international audience and high enough traffic, some websites earn $400,000 every month just from Google AdSense. Of course, they have 100,000,000 unique visitors each month, so there's that.
When will I get paid from Google AdSense?
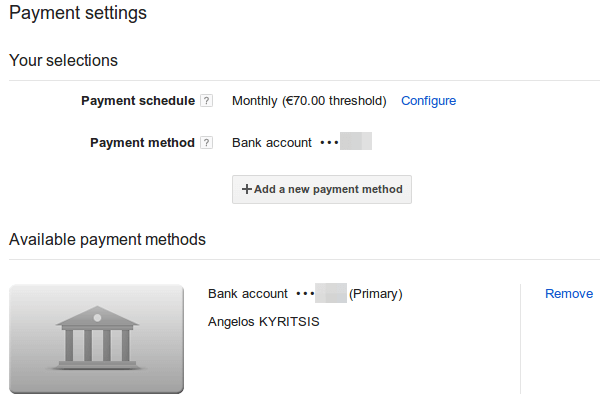
To get paid, we need to have crossed the earning threshold for one month. The threshold depends on the currency we have selected. For US Dollars it is $100, for Euro it is €70, for British Pounds it is £60, etc.
For the thresholds of all the different currencies supported in Google Adsense, check out this page.

If we have earned less money within a month, the sum will roll over to the next month, until we reach the threshold.
How will I get paid?
After we have earned the "Form of Payment Entry" threshold in one month - which is 10 US dollars, 10 Euros or 10 British Pounds - Google will send a snail mail with a personal PIN. This is to verify our home or business address.

Once we receive the letter with the PIN, within 2-4 weeks, we insert the pin on this page, and then we can add our bank account on this page.
We will receive the earnings of the month at the 21st of the next month. So, January's earnings are paid on the 21st of February, etc.
For some countries, Google supports payments by check, but for most of the countries, payments are possible only by bank wire. Adsense doesn't support any other form of payment (e.g. PayPal).
What about taxes?
Residents of the US, Canada, and Mexico, need to fill in their tax information inside Google Adsense, on the Payee Profile page.
For the rest of the countries that support Google AdSense, adding our tax information isn't available. We just need to declare the AdSense income according to our country's tax code and pay the proper taxes.
Remember, each and every form of income needs to be declared to our country's economic authorities for it to be legal. If you don't know how to declare Internet income in your country, you should consult an accountant.
Tax evasion can have serious repercussions, from fines to actual prison sentences, depending on the severity.
To be continued... ad optimization, experiments, etc
Having our website approved by Google AdSense is only the first step in making money from our website/blog. Experimenting with ad sizes, ad placement, and even text ad coloring can make an enormous difference in our earnings. We will cover those subjects in future guides.
Stay tuned!
Go you have any questions on Google AdSense?
If you have any trouble signing up with Google AdSense, or any other questions, leave us a comment.
Support PCsteps
Do you want to support PCsteps, so we can post high quality articles throughout the week?
You can like our Facebook page, share this post with your friends, and select our affiliate links for your purchases on Amazon.com or Newegg.
If you prefer your purchases from China, we are affiliated with the largest international e-shops:

Leave a Reply