

Playing our cards right when it comes to saving space on Android can be quite a difficult thing to pull off. The operating system takes up most of the space, and as a result, even devices with plenty of saving space can run out in the blink of an eye. Thankfully, Google found a solution, and its name is Google Files Go. However, what exactly is this app, and how can it help us save space on our device?
Unblock any international website, browse anonymously, and download movies and Mp3 with complete safety with CyberGhost, just for $2.75 per month:

What is Google Files Go
Google has been working on a lighter version of Android for quite a while, and when they finally released it, they named it Android Go.
Android Go was built to run seamlessly on entry-level smartphones. Specifically, it requires a device with only 512 MB of RAM, and its requirements when it comes to storage space are very low.
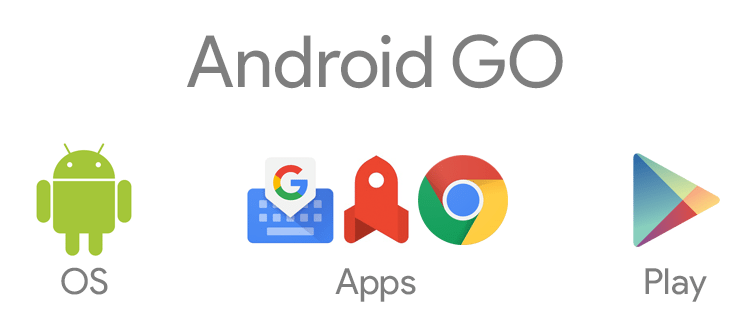
Meanwhile, the company started to design and publish lighter versions of its apps, in which it adds the word "Go."
These versions have a small size, have low requirements, but have fewer features, in most cases. Also, we can download them only if our device runs on Android GO.
One of these apps is the new file manager named Files Go, and contrary to the rest of the Go apps, this one is available on all Android devices.
Since these apps might have fewer features compared to the bigger versions, what makes Google Files Go different?
Why should we choose Google's file manager, instead of any other on Google Play?
The time has come to check out Google Files Go, and see what makes it even better than giants such as Solid Explorer.
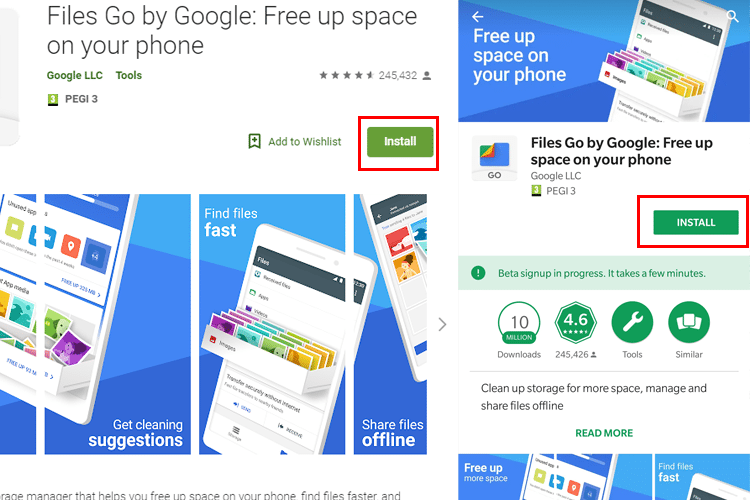
Installing Google Files Go
To install Google Files Go, all we need to do is visit this link. Once we click on it, we will be transferred to its Google Play page.
We hit the "Install" button. Since its size is less than 4MB, the download won't take long.
The first time we open the app, it will let us know about the Terms and Conditions, so we press "NEXT."
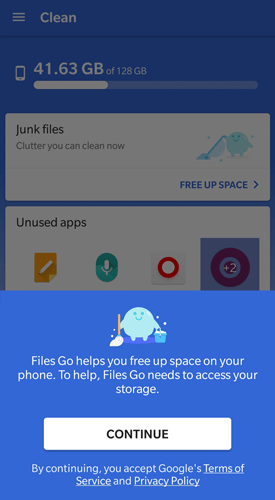
Then, it will request access to the content of our device. We select "ALLOW" before we can start using it.
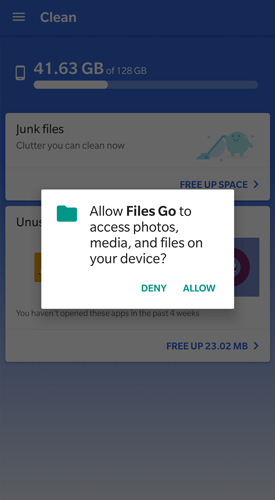
That's it. We are in, and we can start cleaning our device.
How to use Google Files Go
Google Files Go is much more than just a simple file manager.
- It helps us manage files like every other file manager.
- Also, it allows us to clean our storage space.
- Google Files Go checks how often we use our installed apps, and lets us know which are the ones we rarely use so that we can uninstall them.
- It tracks useless files, such as ad residues, photos from chat applications, duplicate files, and so on.
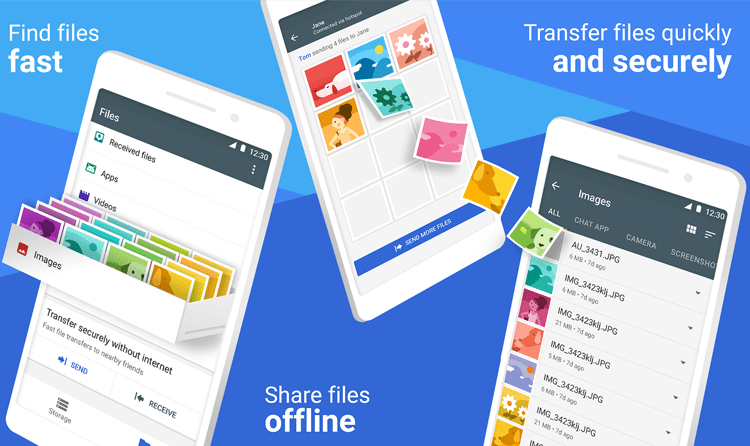
- Moreover, it helps us find important images, videos, music files, and documents, way faster.
- Finally, we can transfer our files offline, quickly and securely.
Let's see what these features do and how to use them, one by one.
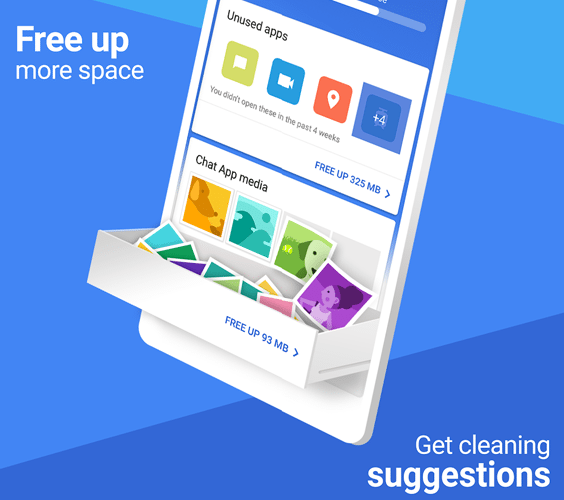
Clean
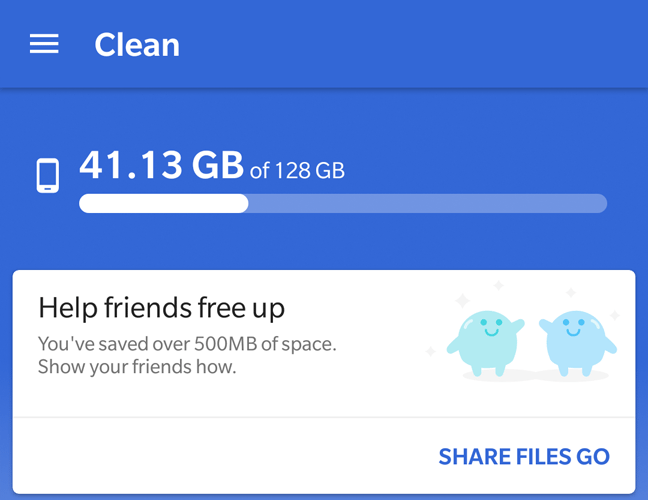
The first image we see is a screen with the classic three-dot menu on the top right, a bar, a few cards, and two tabs.
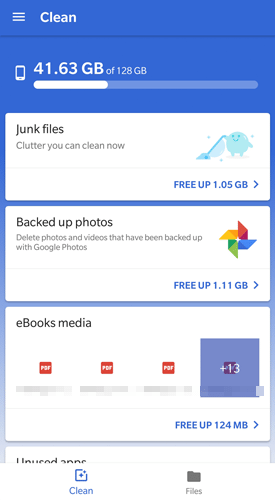
We will start with "clean", which is the default tab.
Here, on the top, we see a bar that represents the entire storage space and used space on our device.
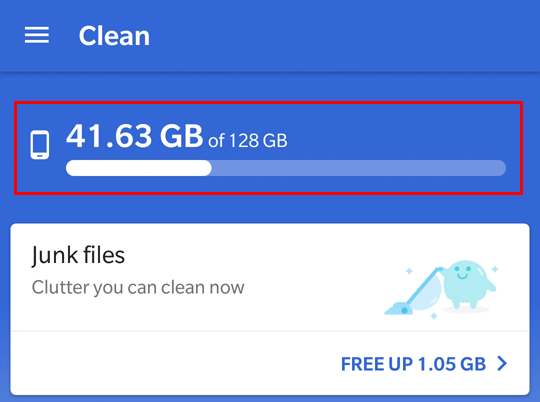
Underneath, there are various tabs. Google Files Go examines our phone and analyzes its content.
Thus, it separates it into different categories. For example, Google Photos backups, unused apps, junk files, and more. But what do we do with these tabs?
Each tab has a “FREE UP X GB/MB” button. When we click on it, it gives us instructions based on what each card does.

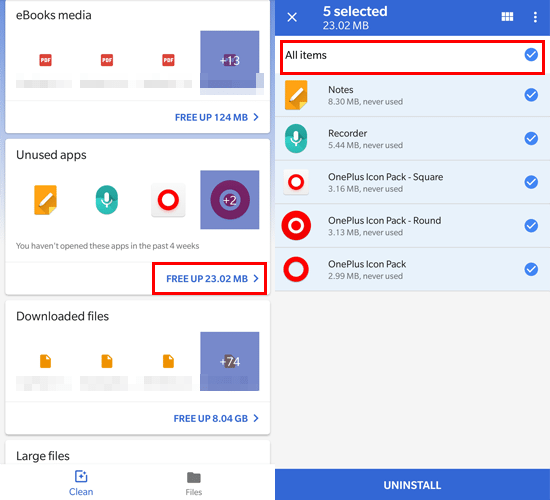
For example, if we press on the unused apps, we will be presented with a list. Here we can tick the checkbox “All items,” or choose the ones we want to uninstall one by one.
Then, when we hit "UNINSTALL," Google Files Go uninstalls the apps we chose.
Another example is junk files, which is the usual suspect when we run low on storage.
When we press “FREE UP X GB/MB," we'll be able to see the leftover files we have on our system.
We can select the ones we want to delete one by one.
After we do so, we press "CLEAR." Then Google Files Go will ask us if we really want to do this, so we press "CLEAR" again.
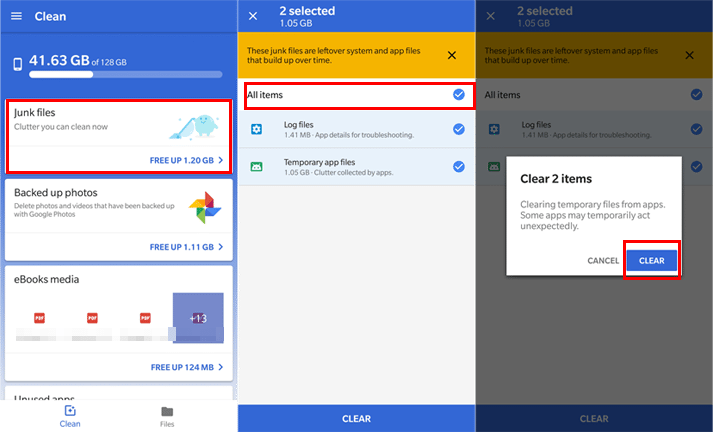
Google Files Go starts the cleanup, and when it finishes, it takes us back to the main screen.
Likewise, by following the steps the app suggests, we can free up a lot of space.
Finally, when we finish cleaning, Google Files Go will give us the following message: “You've saved over X GB/MB of space." We can choose to share our achievement if we're so inclined.
Although, we don't know why any of our friends would care about how much space we freed up.
App management
The second tab on the app is "Files." From here, we can organize our files and more. For now, let's check out the file organization.
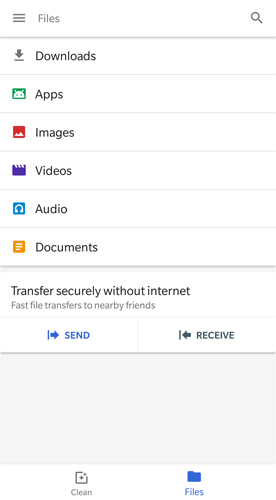
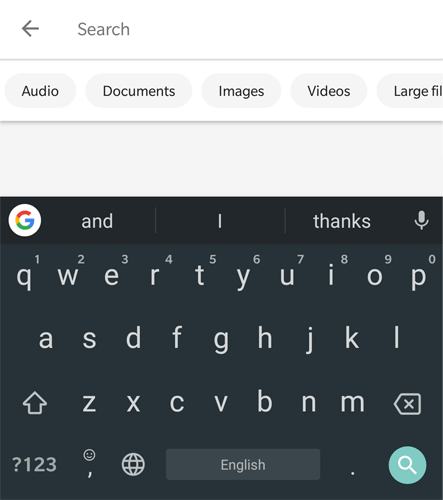
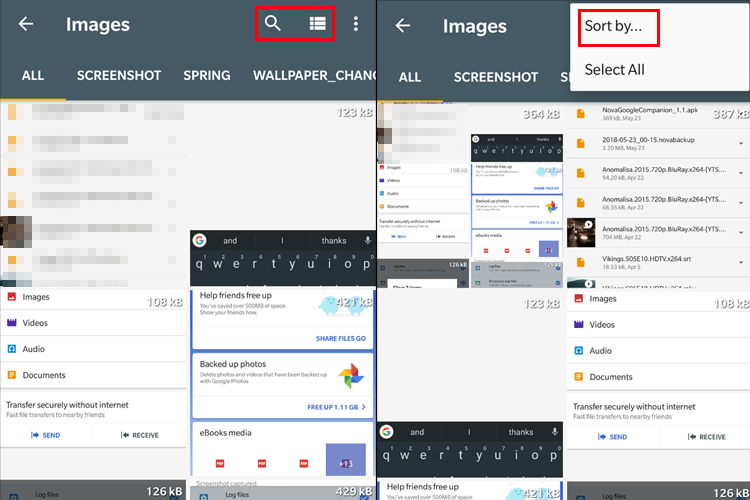
On the top, there is a search bar, and we can use it to track specific files. Also, it has filters for various file types.
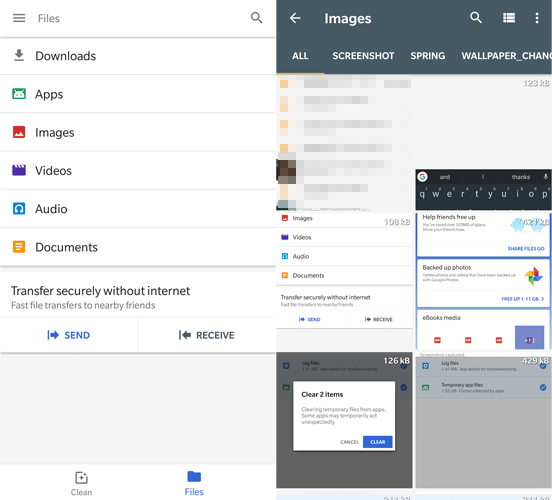
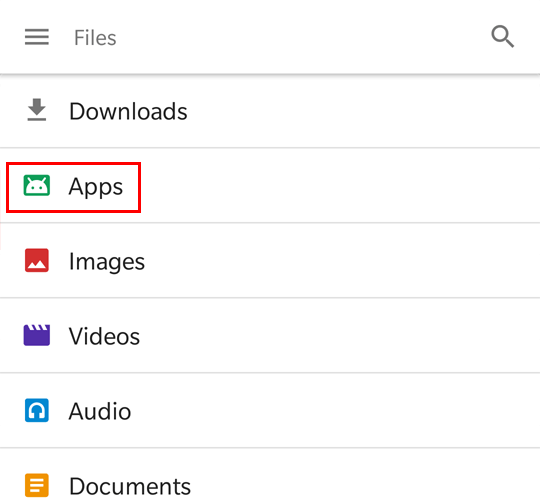
Right underneath it, we can find the following premade folders: "Images," "Videos," "Audio," and "Documents."
By choosing each file separately, Google Files Go will show us its content.
Now, each folder has a few options. On the top, we have the search, and next to it, the change view button. Then, the menu that allows us to change the sorting mode.
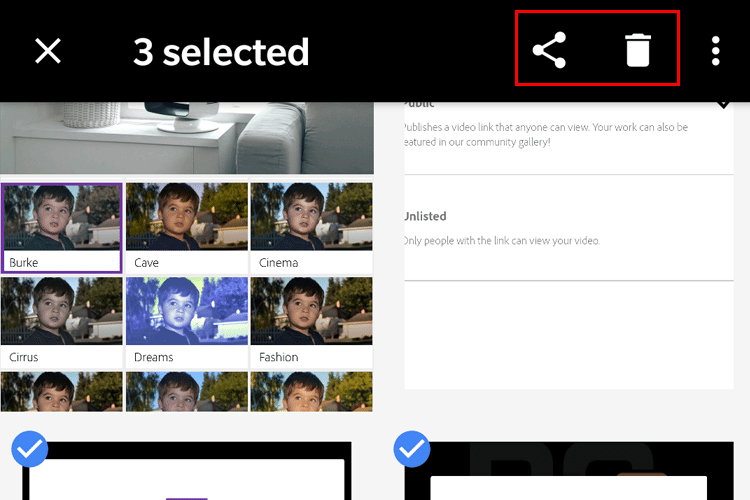
Meanwhile, when we long-press on an image, it will enable the multi-selection option.
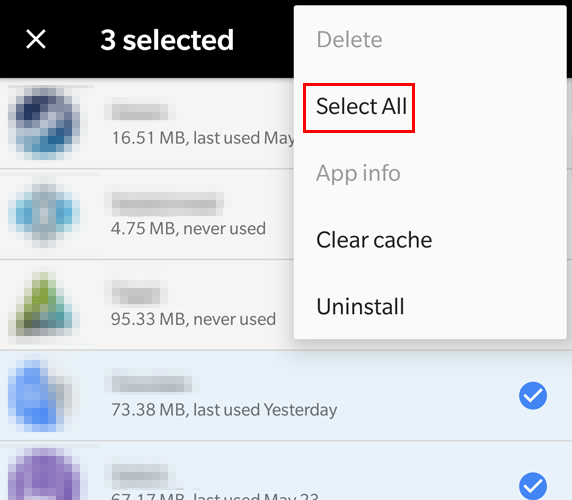
We can choose the files we want, or press on the three dots and then on "Select All.”
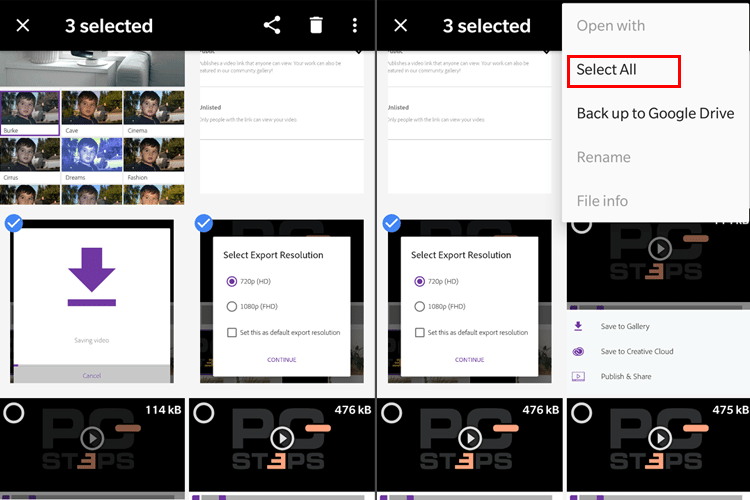
After choosing the desired files, we can either share them or delete them.
Also, we can create backup copies of the selected files on our Google Drive.

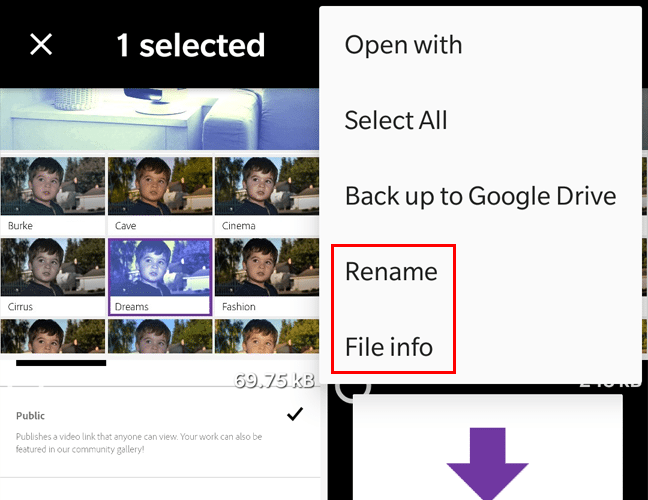
Finally, when we have a file selected, we can rename it, or see various information about it.
File managing
On the top of the folder list, there is an option called "Apps," and this is a pretty good file manager.
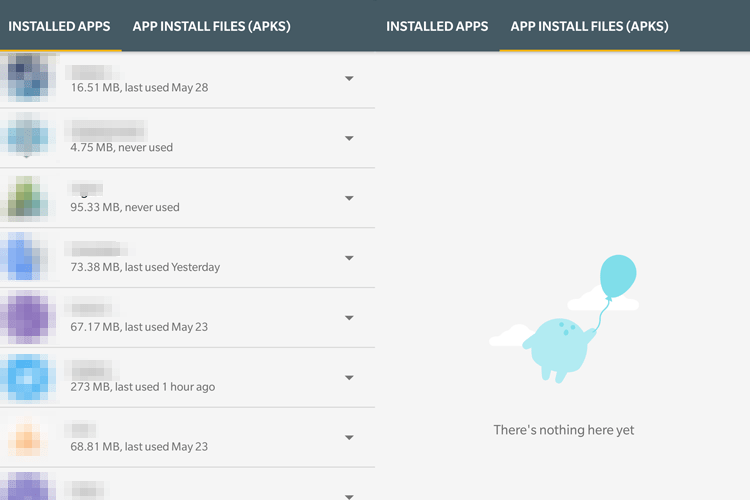
When we press on that option, we will see a list of all installed apps. Meanwhile, there is a tab that shows us the app install files (APK) we have on our phone.
When we tap on one of them, we visit its information, and when we press the arrow on the right, we will see a few more options.
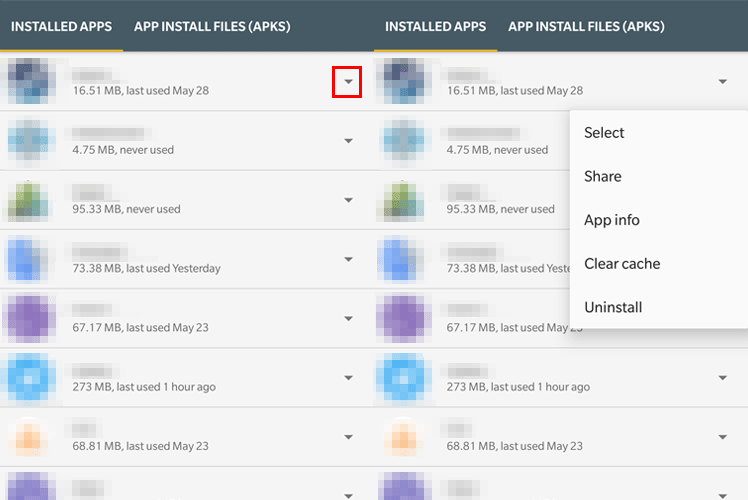
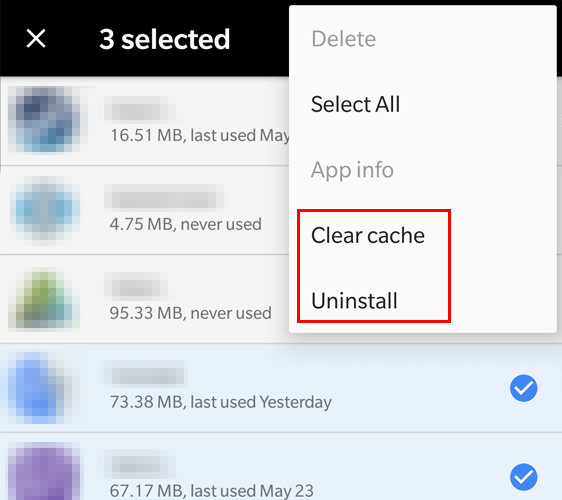
By long-pressing, we can enable the multi-selection, as we did on the files.
So, we can choose the apps we want one by one, or all at once from the dots.
Furthermore, from the dots on the top right, we can find additional features.
Among others, we can delete cache memory or uninstall apps.
Sending and receiving files
This is the second best feature of Google Files Go, right behind saving storage space.
With this feature, we can share files, even without a connection.
On the bottom part of our screen we can see two options, "SEND," and "RECEIVE."
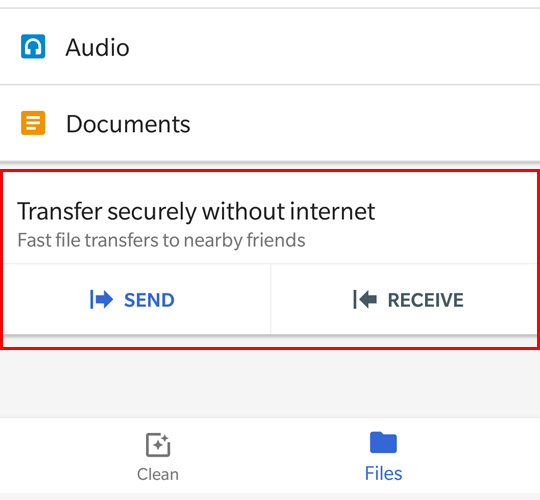
With its help, we can send files to other users by using a Bluetooth connection.
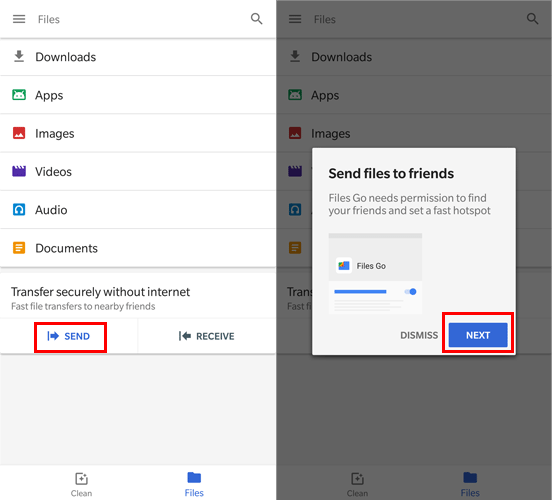
To use this feature, we need to modify some settings.
That's why we press "SEND." It will ask us to enable our Bluetooth if it is disabled. We tap "NEXT."
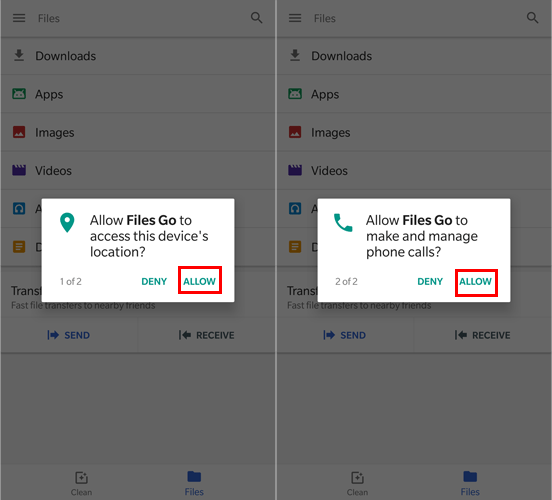
It continues with the permissions of our device's location and the management of our phone calls. We select "ALLOW" on both and move on.
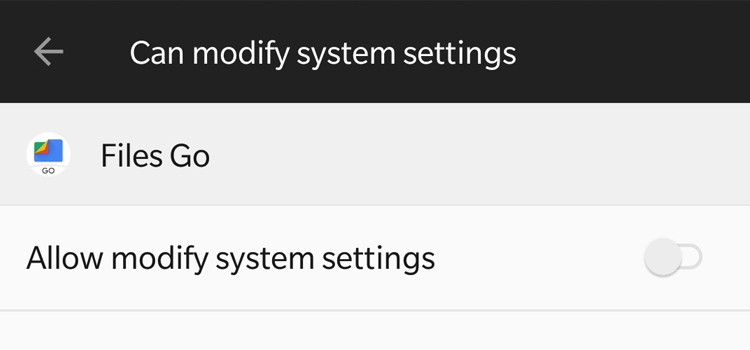
The last permission we have to give is the one that allows Google Files Go to change our device's settings.
The app automatically transfers us to that setting, so all we have to do is enable it.
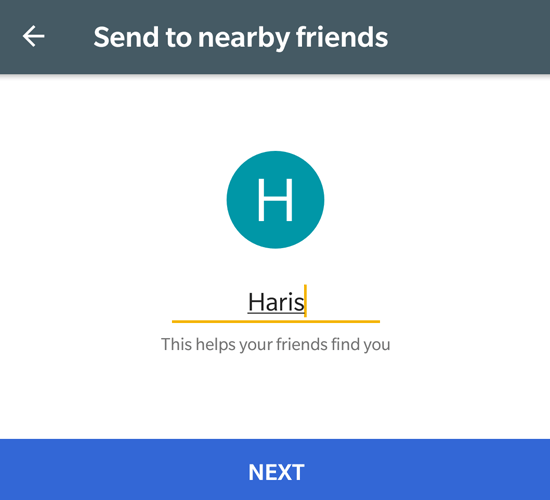
One last step and we are all done. We will be asked what the name of our device is. That would be the name we want people to see when detecting our device.
We type the name we want, and press "NEXT." The app will start searching for other devices, so we press the arrow on the top left to cancel it.
We are now good to go. Let's see how we can send and receive files.
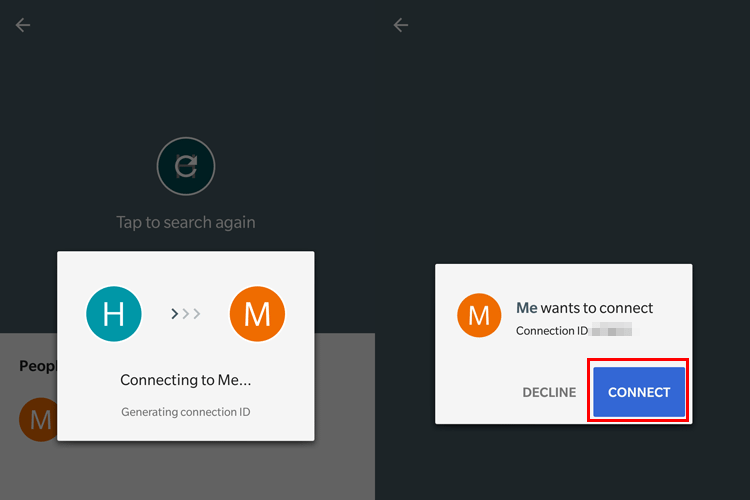
For sending files, we press "SEND," and the app will scan for other devices nearby.
We must note that it doesn't search for any device, but only smartphones with Google Files Go installed and the option "RECEIVE" for files enabled.
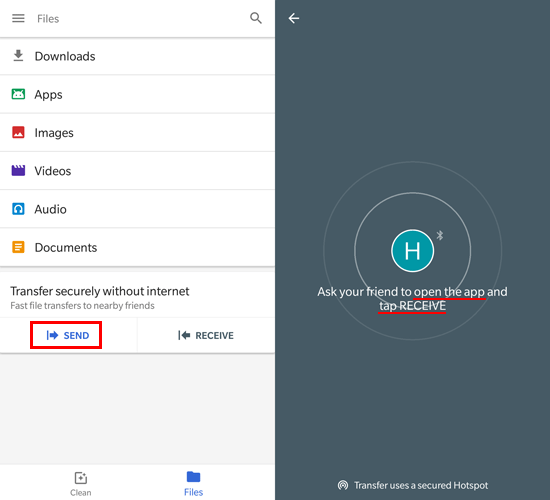
So we ask for the file receiver to press "RECEIVE" on the app from his phone.
When Google Files Go finds another device, we can see its name, so we choose it.
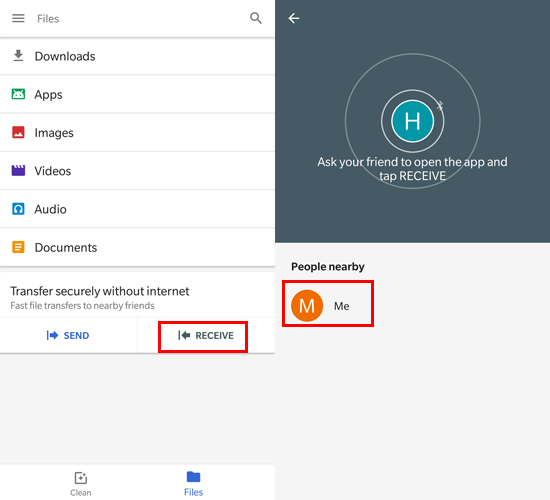
We will see that the app is trying to connect with the other device, and shows a connection ID.
Here, the receiver has to press "CONNECT" on the window he or she sees.
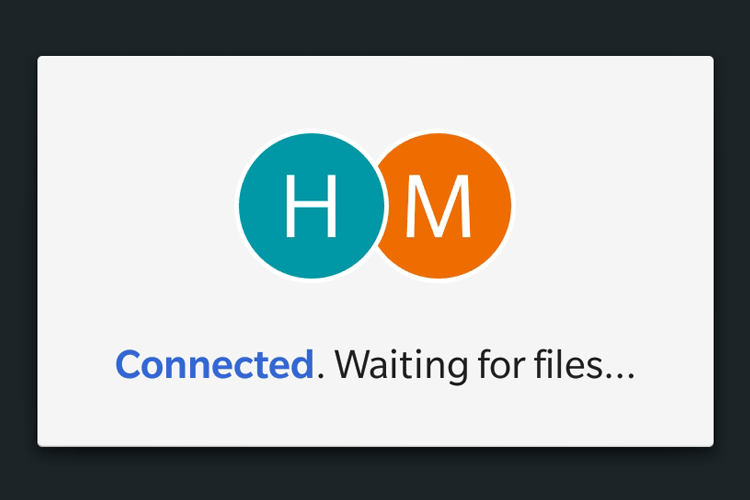
After a while, the two phones will be connected, and on the receiver's device, we will see an indicator that we are waiting for the files.
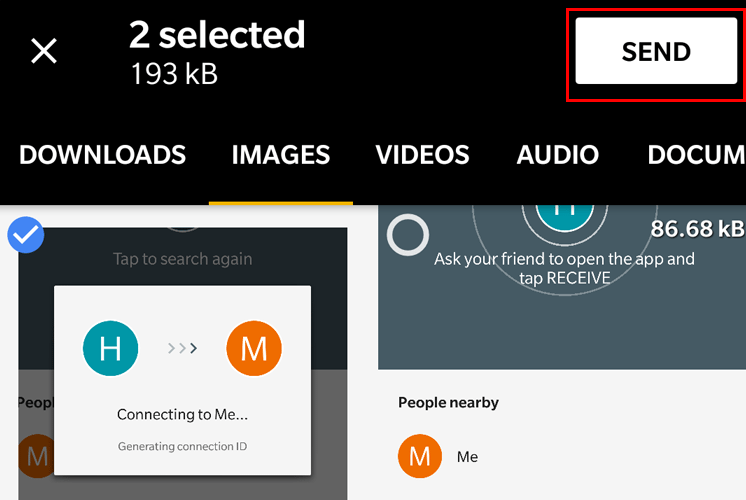
Meanwhile, on the sender's phone, we have the file manager, and through it, we can choose what we want to send.
To send a file, we tap on it to select it, and then we press "SEND."
The required time to finish the procedure depends on the distance between the two phones, the send/receive speed, and of course, the file size.
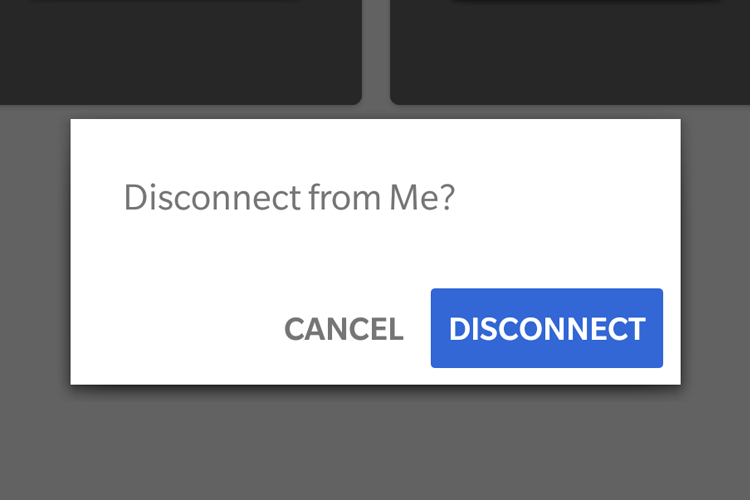
Next, we can go back with the arrow, or choose to send more files.
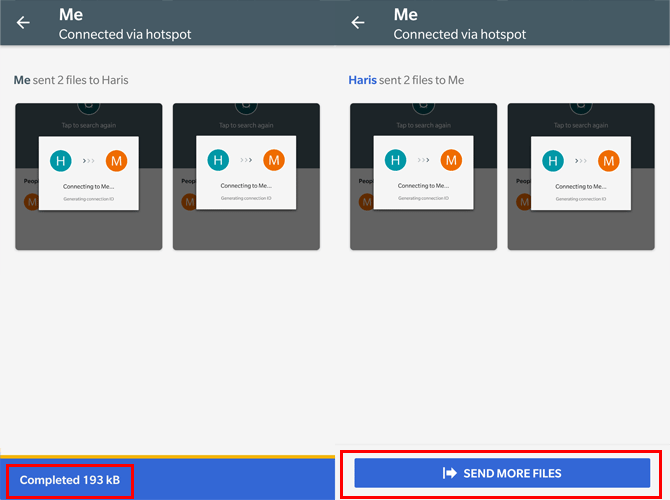
If we choose to go back, Google Files Go will ask to disconnect our device, so we select "DISCONNECT."
We must admit that the while using the service for the first time, going through the permissions can get a bit dull. In the end, however, the process has compensated us, since sending/receiving files with Google Files Go can be unbelievably fast.
Settings
We saw all the features of Google Files Go, and they are plenty. Now we can dive a bit deeper, and check its settings.
To access the settings, we tap on the burger menu on the top left.

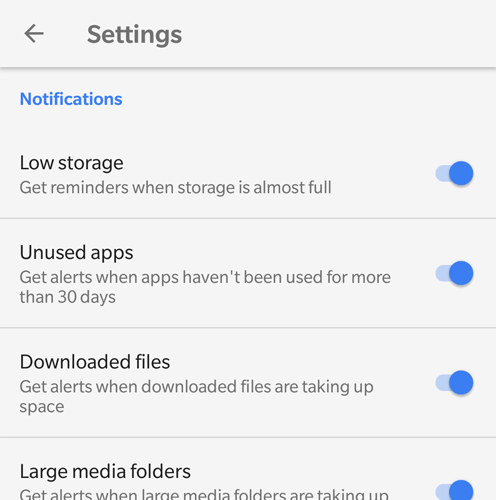
We don't have a lot to see here since the main part of the settings is what notifications we want to receive.
According to our preferences, we enable and disable the switches.
On the bottom part, we will find a few more settings, like the ability to change the name of our device.
Moreover, we can give access to Google Files Go to show the hidden files on our device.
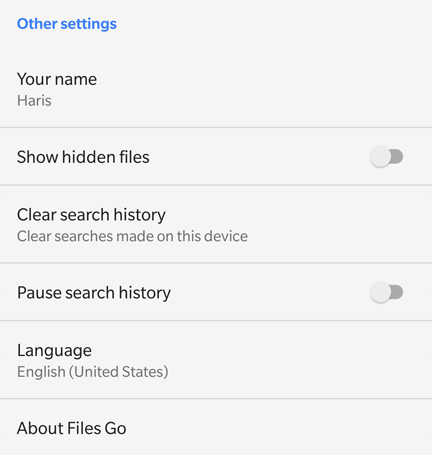
Finally, we can change the language of the app, delete the search history, or prevent it from recording our searches.
Once again, Google did everything right
Google is a giant company that has an insane amount of projects. So it makes sense not to know what to expect, even though we are usually pleasantly surprised.
We have been using Google Files Go since its first steps. It hasn't disappointed us at all, and it even assists us with devices with large storage space.
Did you know about Google Files Go? Do you use it? What do you think of the app? Share your thoughts with us in the comments.
Support PCsteps
Do you want to support PCsteps, so we can post high quality articles throughout the week?
You can like our Facebook page, share this post with your friends, and select our affiliate links for your purchases on Amazon.com or Newegg.
If you prefer your purchases from China, we are affiliated with the largest international e-shops:

Leave a Reply