

We can shoot videos with any modern smartphone. However, we can take a photo and instantly upload it, but this isn't always true for videos. Most videos will look way better after we edit them. A computer would be the best video editing device, but for when we are on the go, our best option is the free Adobe Premiere Clip app. Not only it allows us to edit videos on iPhone and Android, but we can also do it easily and fast.
Unblock any international website, browse anonymously, and download movies and Mp3 with complete safety with CyberGhost, just for $2.75 per month:

Check out our guide for the best computer video editing software:
What is Adobe Premiere Clip
Adobe Premiere Clip is the simplified version of Adobe Premiere Pro, specifically designed for portable devices. It is currently available for Android and iOS.
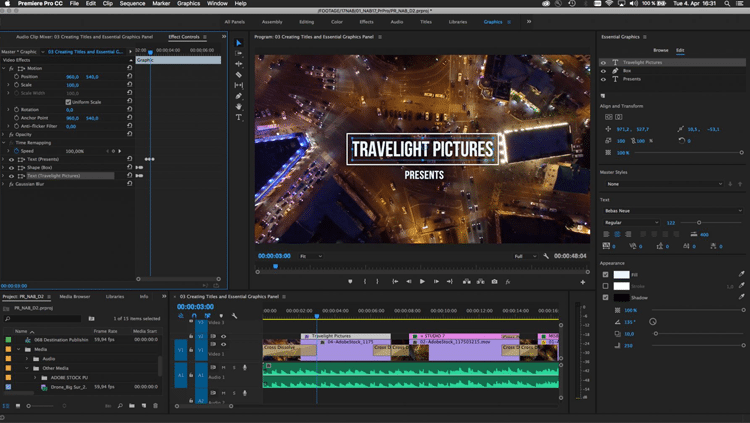
As average users, it's better to edit videos on iPhone or Android using the Clip app rather than the Pro version. Adobe removed all the complicated tools, and only kept the basic features in the mobile app.
On Adobe Premiere Clip we can do a range of things. Here are a few of them:
- Import Multimedia
- Rearrange project items
- Add music
- Cut and split clips
To import videos, images, and music, we can either import media files from the device's storage space, or from Adobe Creative Cloud, or from numerous cloud services that the app supports.
In any case, it's better to download the multimedia we want to use and then import them to the project from our device, as it will significantly speed up the whole process.
How to edit videos on iPhone and Android
Now that we have all the files we need on our phone let's start by creating our video with Adobe Premiere Clip.
Create a new project
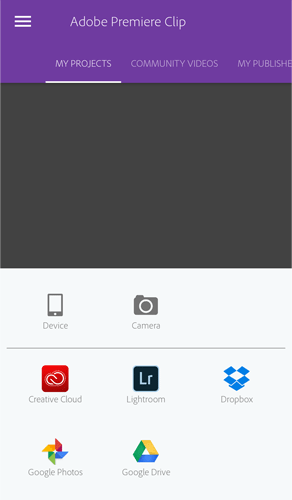
As in Premiere Pro, Clip uses projects to create videos on iPhone or Android. So, we tap the "+" button at the bottom right to create a new project.
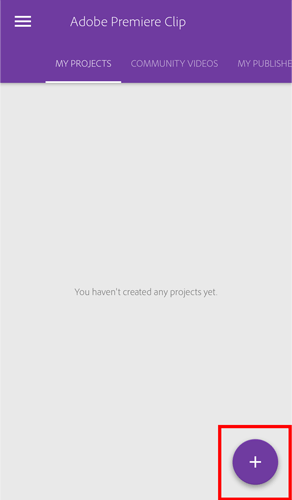
We will instantly see a menu, and from there we can choose the files' location.
The first option is to choose files from our device's storage space, the second is to record a clip, and the last is to download the files from an online source.
We press the first one to locate the pictures and videos on our device.
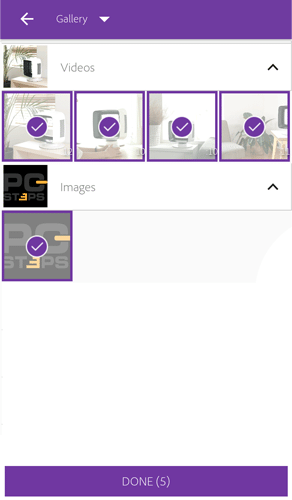
The next page will remind us a file manager, but in a more straightforward format. In each folder, we tap the arrow in the right to reveal its contents. Then, we choose the files that we want, and press "DONE."
Bear in mind that we can only select videos and pictures. We will add and edit the sound later.
Then, we see the project type selection screen. Here are two options, "Automatic" and "Freeform."
With "Automatic," Adobe Premiere Clip creates a project automatically, adds the clip we chose and puts random background music. We can also configure various project settings.
Unlike "Automatic," with "Freeform" we have full control, with a variety of settings, and obviously better results. So, if we want to control how we edit videos on iPhone and Android, "Freeform" is the only choice.

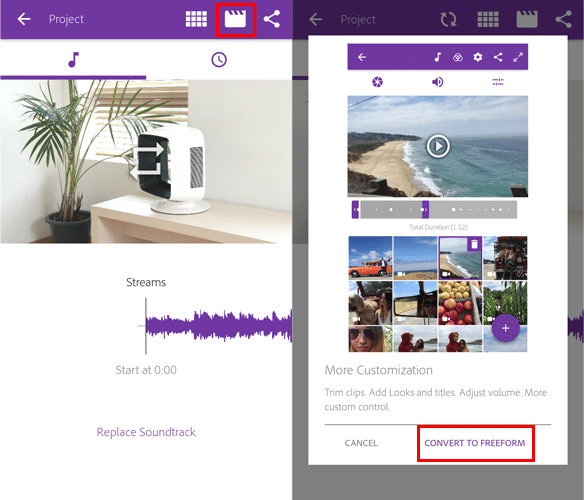
Of course, even if we select "Automatic," we can use the relevant button on the top right to go into "Freeform" mode.
When we press it, we will see the confirmation window. Once we tap "CONVERT TO FREEFORM," the project changes, and we have all the options available.
Now that the project is ready, let's see how to edit videos on iPhone or Android.
Rearrange the project data
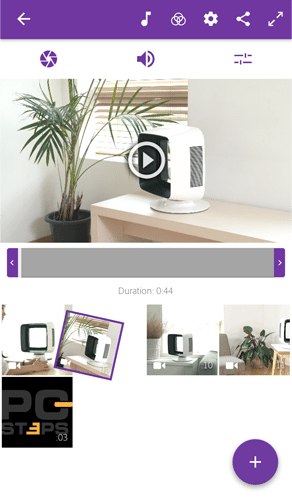
With the Freeform mode selected, we can see the editing screen and various editing tools that we will see below.
For now, we can see the preview at the top of the Adobe Premiere Clip screen, the cut line right below, and the multimedia we have added.
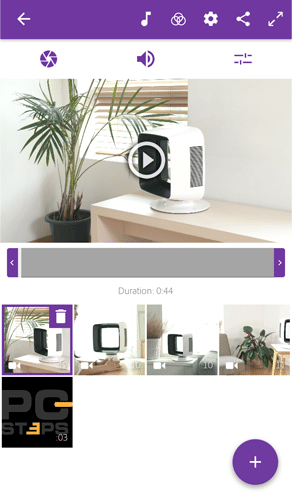
Adobe Premiere Clip imports the data in the order we chose them, so we might want to rearrange them in the playback bar.
We can easily rearrange data by long tapping on the media we want and dragging it to the desired position.
Cut clips
The most important feature when we edit videos on iPhone, Android, or anywhere else, is to cut a section of a clip that we don't want. It's the most crucial part of editing.
To do this we select the video we want in Adobe Premiere Clip, and under the preview, we see the cut line. There, we see a trim handler at each end and a white line, the playhead.
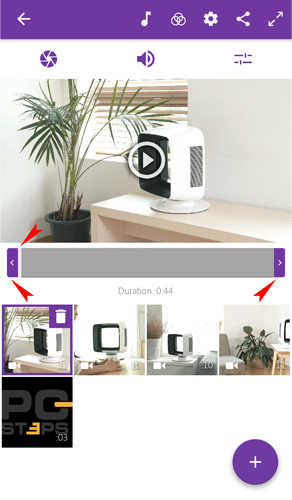
By moving the playhead, we see the current frame of the clip in the preview. With its help, we choose where we want our clip to start, and then we move the left trim handler there.
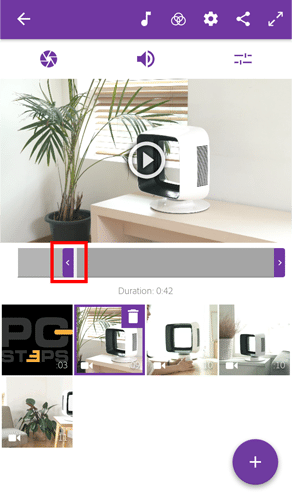
Correspondingly, we choose where we want the clip to end.
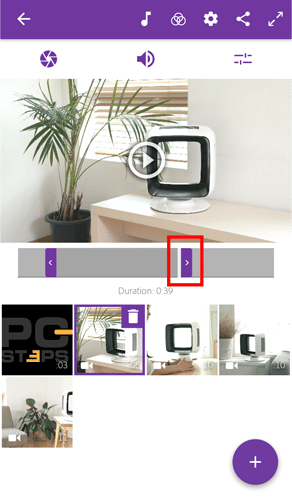
Adobe Premiere Clip automatically save all changes, so we don't have to do anything else. Also, we don't edit the original clip. It just sets the new beginning and end of the clip.
Split clips
Sometimes, we might want to include the entire clip, but we need different sections of it in different parts of the video. In such cases, we can use Adobe Premiere Clip's split tool.
We select the clip we want and click on the settings icon on the top right.
On this screen, we can make a lot of changes, but for now, we want the "Split at Playhead."
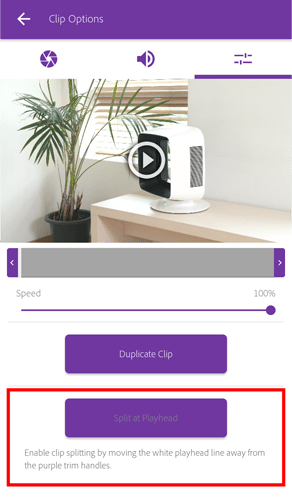
To enable this option, the playhead must be away from the trim handlers.
So we move the playhead to where we want to split the clip, and the "Split at Playhead" is now available.
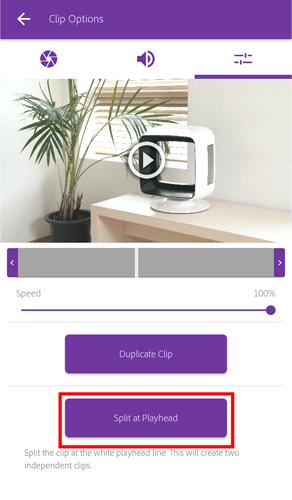
Once we hit the button, we will transfer to the editing page, and now we have an extra clip.
The original clip divided into two, and we can see its two separate parts.
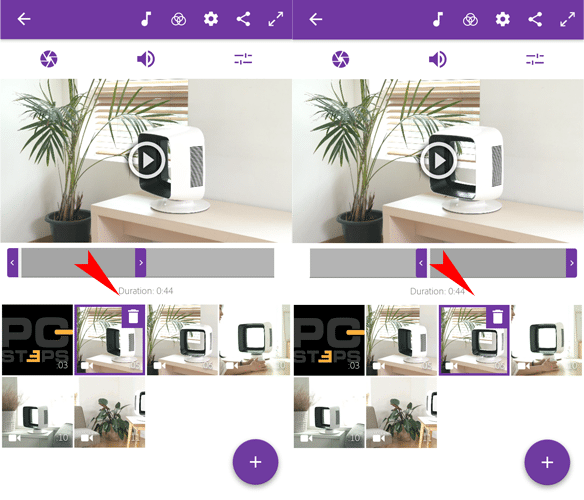
Adobe Premiere Clip allows us to divide and cut a clip as many times as we need.
The spit tool doesn't cut the clip in two. It just creates a virtual duplicate of it. Then, it sets the end of the first clip as the start of the second.
Change clip speed and create duplicates
As we saw in the clip editing screen, there are a few more tools. The first is the speed percentage. With this, we can change the playback speed of that clip.
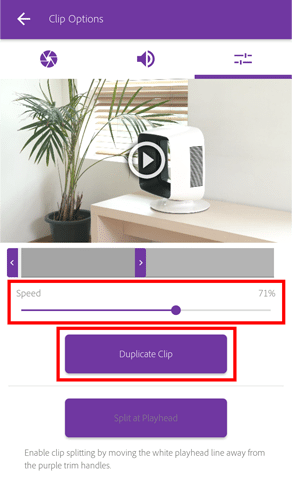
Right below we have the "Duplicate Clip" button, which, when we press it creates a copy of the selected clip.
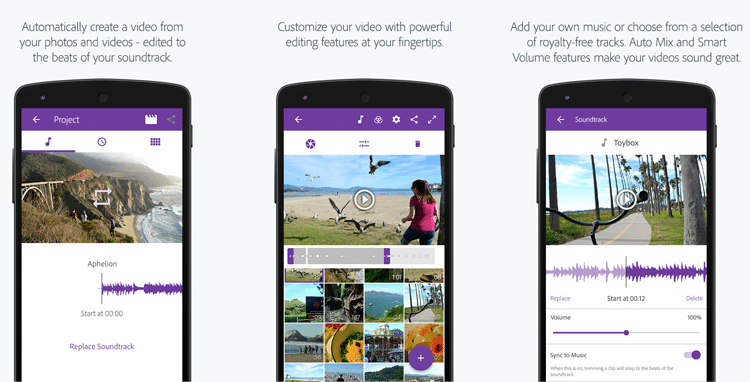
Add background sound
When we edit videos on iPhone, apart from images and videos, we can also use sound to make them more interesting. Which is why Adobe Premiere Clip is the perfect option since it allows us to add music or sound effects.
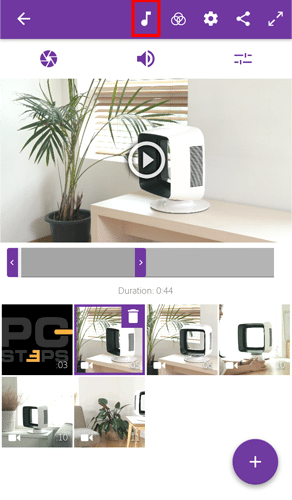
We tap the note on the top menu to enter the background music selection mode.
Adobe Premiere Clip comes with a small collection of sounds, but we can use any music tracks we want.
Once we find the music track we want, we press "ADD," and we automatically transfer to the background music editing screen.

The app provides a few options, such as replacing the track, removing it, and adjusting the volume.
Unfortunately, we can only have a music track in each video which has to start at the beginning of our project.
Nevertheless, our music can start later in the track and not in the beginning. We simply need to move the waveform of the sound.
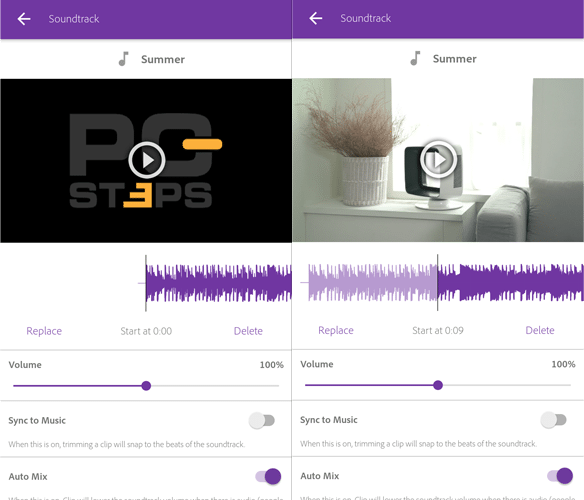
We won't hear the transparent section; the purple part is the music that we will hear, and the black line marks the starting point of the video.
Additional audio options
In Adobe Premiere Clip we will find various audio-related settings.
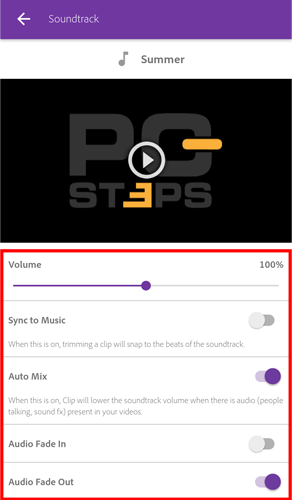
With Auto Mix active, the app reduces the music volume in the parts where we can hear other sounds.
The "Audio Fade In" and the "Audio Fade Out" ensures that the music volume will gradually increase at the beginning of the video, and will gradually decrease when the video ends.
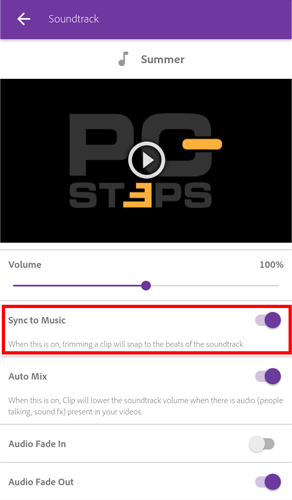
Finally, we have "Sync to Music," which trims the clips based on the beat of the background music. Sometimes this will work correctly, and sometimes it won't. Nevertheless, it's worth experimenting with it.
Finalizing the Project
At this point, our video should look great, but there are a few tools that can make our project even better.
Adjust colors and sound
We can edit the image and sound of each clip separately. First, we select the clip we want, then we either press the shutter button or the loudspeaker.
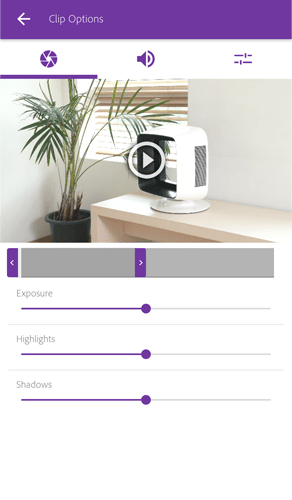
We can also modify our clip's exposure, highlights, and shadows.
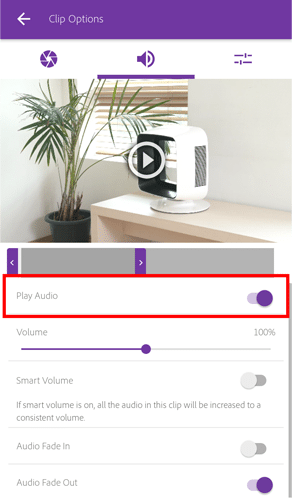
As for the audio, we can hear a playback by turning on the "Play Audio" switch, adjust its volume, activate "Audio Fade In / Out."
We will also find the "Smart Volume" option, which, if enabled, will increase the audio of the clip to a consistent volume.
These settings are for the current clip, and not the entire project.
Add color effects
In Adobe Premiere Clip we will find numerous filters that change the color, contrast, and overall tone of the video.
These features are very handy when we edit videos on iPhone, especially since we won't be able to find them in other editing apps.
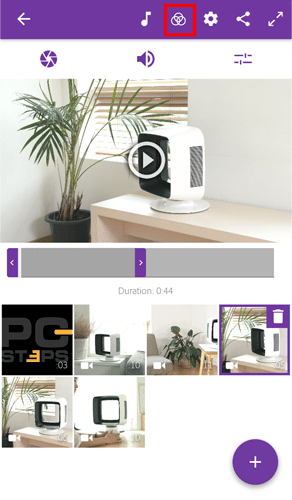
We can access these filters by taping the three-circle button on the top right, and there are 30 in total.
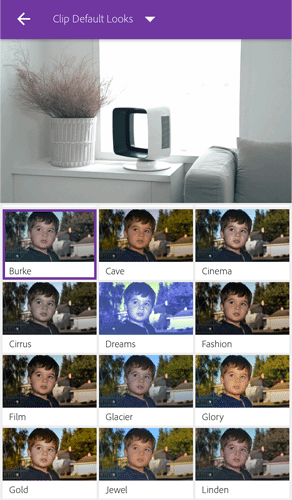
We can see how each filter affects our video from the preview at the top of the screen.
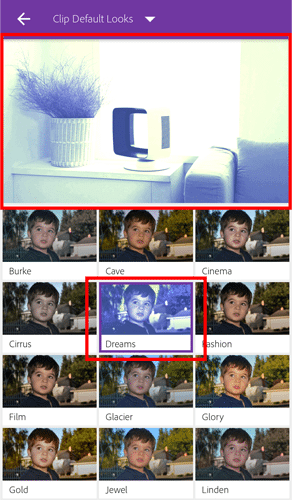
These filters are applied to the entire video, not to individual clips.
Transitions and video settings
Meanwhile, we can set various details about the video. How it will start or end, transitions between clips, and more.
We tap on the gear in the menu, and we go to video settings. We have a few limited but exciting choices.
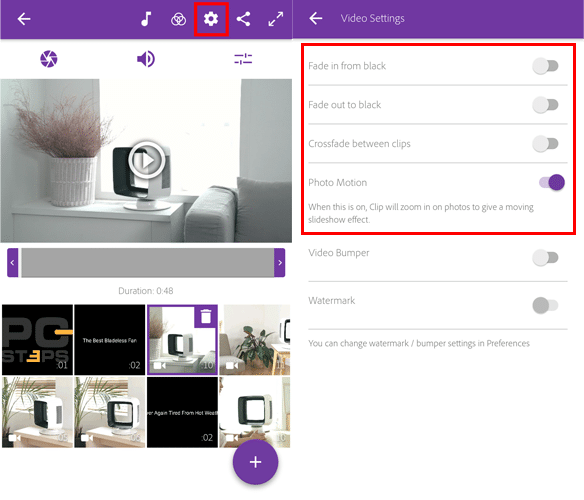
With "Fade in from black," the video will start with a black background, from which it will gradually transition to the video. Similarly, with "Fade out from black," it will fade to black end screen.
The "Crossfade between clips" adds a smooth transition between clips.
Meanwhile, if we have "Photo Motion" on, it will zoom in on photos to create the illusion of a slideshow effect.
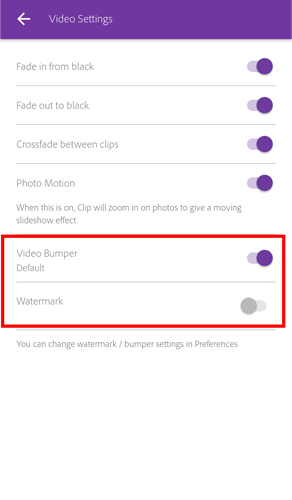
Finally, we have the "Video Bumper" and "Watermark." The first one adds our info to the end of the video, and the second adds a watermark throughout the project.
To use these two features, we have to customize them through Adobe Premiere Clip's settings.
Add titles and additional multimedia
The last thing to do when we edit videos on iPhone is adding titles and other additional multimedia.
From the main editing page, we press the cross button at the bottom right. With "Text Title" we insert a title in the project.
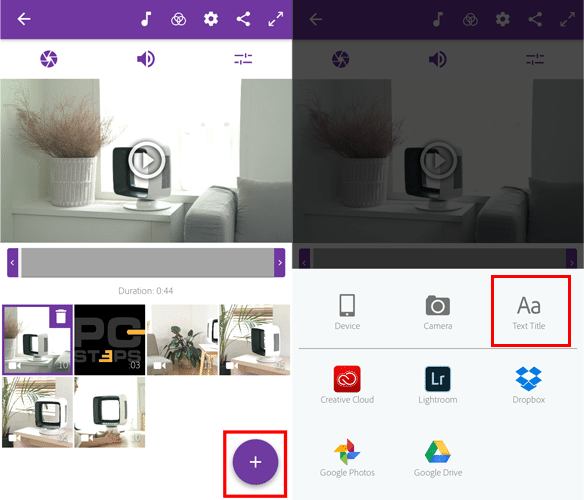
In the titles' editing screen, we can write the text we want, as well as select the color of the text and the background.
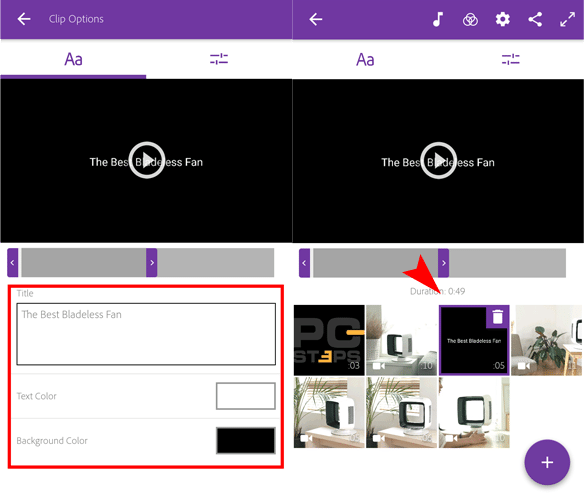
Once we return to the home screen, the title will be in front of the selected clip. If we want, we can move it to a different point, and we also can add as many other titles as we want.
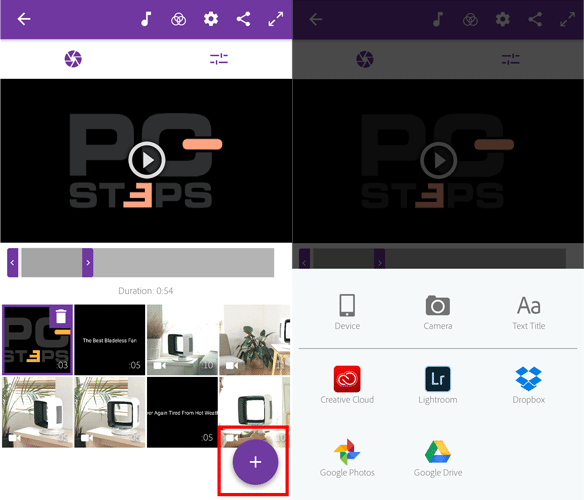
Similarly, from the "+" icon we can choose any source of multimedia, and add as many as we want to our project.
Save and publish the video
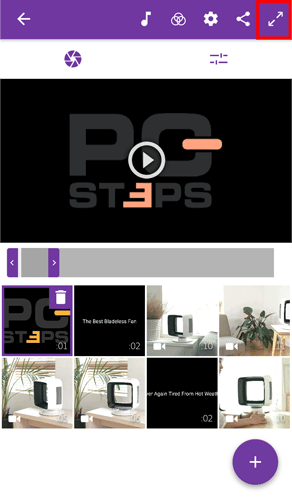
So this is how we can edit videos on iPhone and Android, with the help of Adobe's Premiere Clip. To see the final result, we press the full-screen button on the top right, and the video starts playing.
Adobe Premiere Clip automatically saves our work, so we don't have to worry about anything.
Also, we can share our creation with our friends. To do this, we press the share button on the top right.
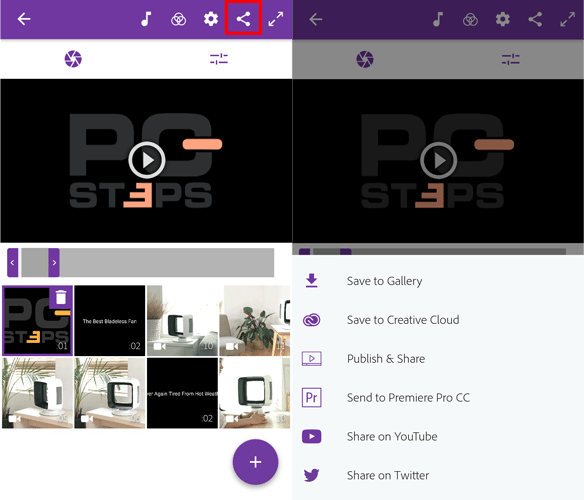
Here we have a few interesting choices. Let's look at them one by one.
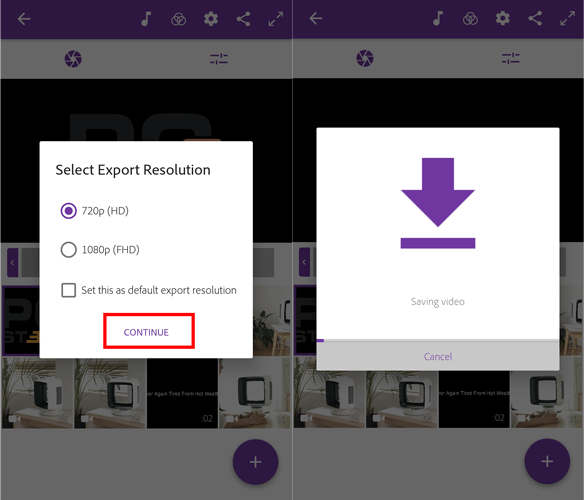
The first is the "Save to Gallery" feature, which allows us to export the video to our phone. Once we click on it, it asks us what resolution we want to save it as, and then we press "CONTINUE."
The export time varies based on the video's length, the size of the files, the effects we may have added, and, of course, how fast our smartphone is as a device.
We can view the exported video in any multimedia player app, or we can share it on our social media accounts.
The second option is the "Save to Creative Cloud," in which it creates the final video, and then uploads it to our Creative Cloud.
Next, we can use the "Publish & Share" option to share our video with the Adobe Premiere Clip community. However, we can also choose to hide this option.
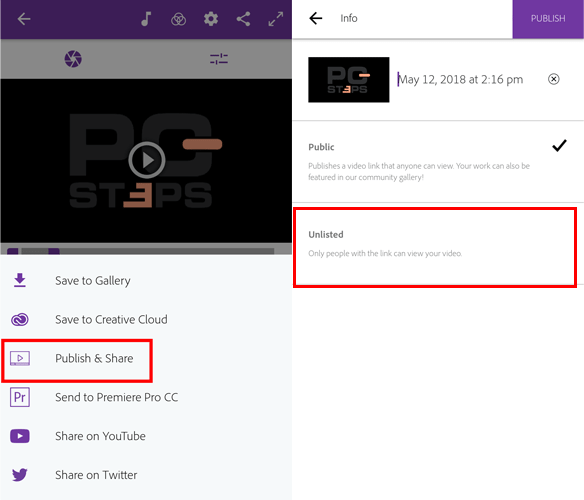
With "Share on YouTube" and "Share on Twitter," the app creates the video and posts it to our accounts.
The last option is the "Send to Premiere Pro CC" that uploads the project to Adobe Premiere Pro CC and allows us to edit it from our computer.
That is how we can do the necessary editing of any videos on iPhone, and then fine-tune it on the computer.
Have you tried creating videos on iPhone or Android with Adobe Premiere Clip?
Adobe Premiere Clip offers essential tools for editing videos on iPhone and Android. It is a powerful app with numerous features.
Of course, when we edit videos on iPhone or Android, we shouldn't expect them to have an Oscar-winning quality. We should use the app when we want to create something interesting but in a short time.
After all, we can always start editing the videos on our phone and continue working on the project on the computer.
What do you think about Adobe Premiere Clip? Do you edit videos on your phone? Would you give a chance to Adobe's app? Write us in the comments.
Support PCsteps
Do you want to support PCsteps, so we can post high quality articles throughout the week?
You can like our Facebook page, share this post with your friends, and select our affiliate links for your purchases on Amazon.com or Newegg.
If you prefer your purchases from China, we are affiliated with the largest international e-shops:

Leave a Reply